1. Introduction
This manual provides essential information for the safe and effective use of the RECI W2 CO2 Laser Tube. It covers product specifications, installation procedures, operational guidelines, troubleshooting steps, and maintenance recommendations.
The RECI W2 CO2 Laser Tube is designed for laser engraving and cutting applications, offering stable power output and a long operational lifespan.
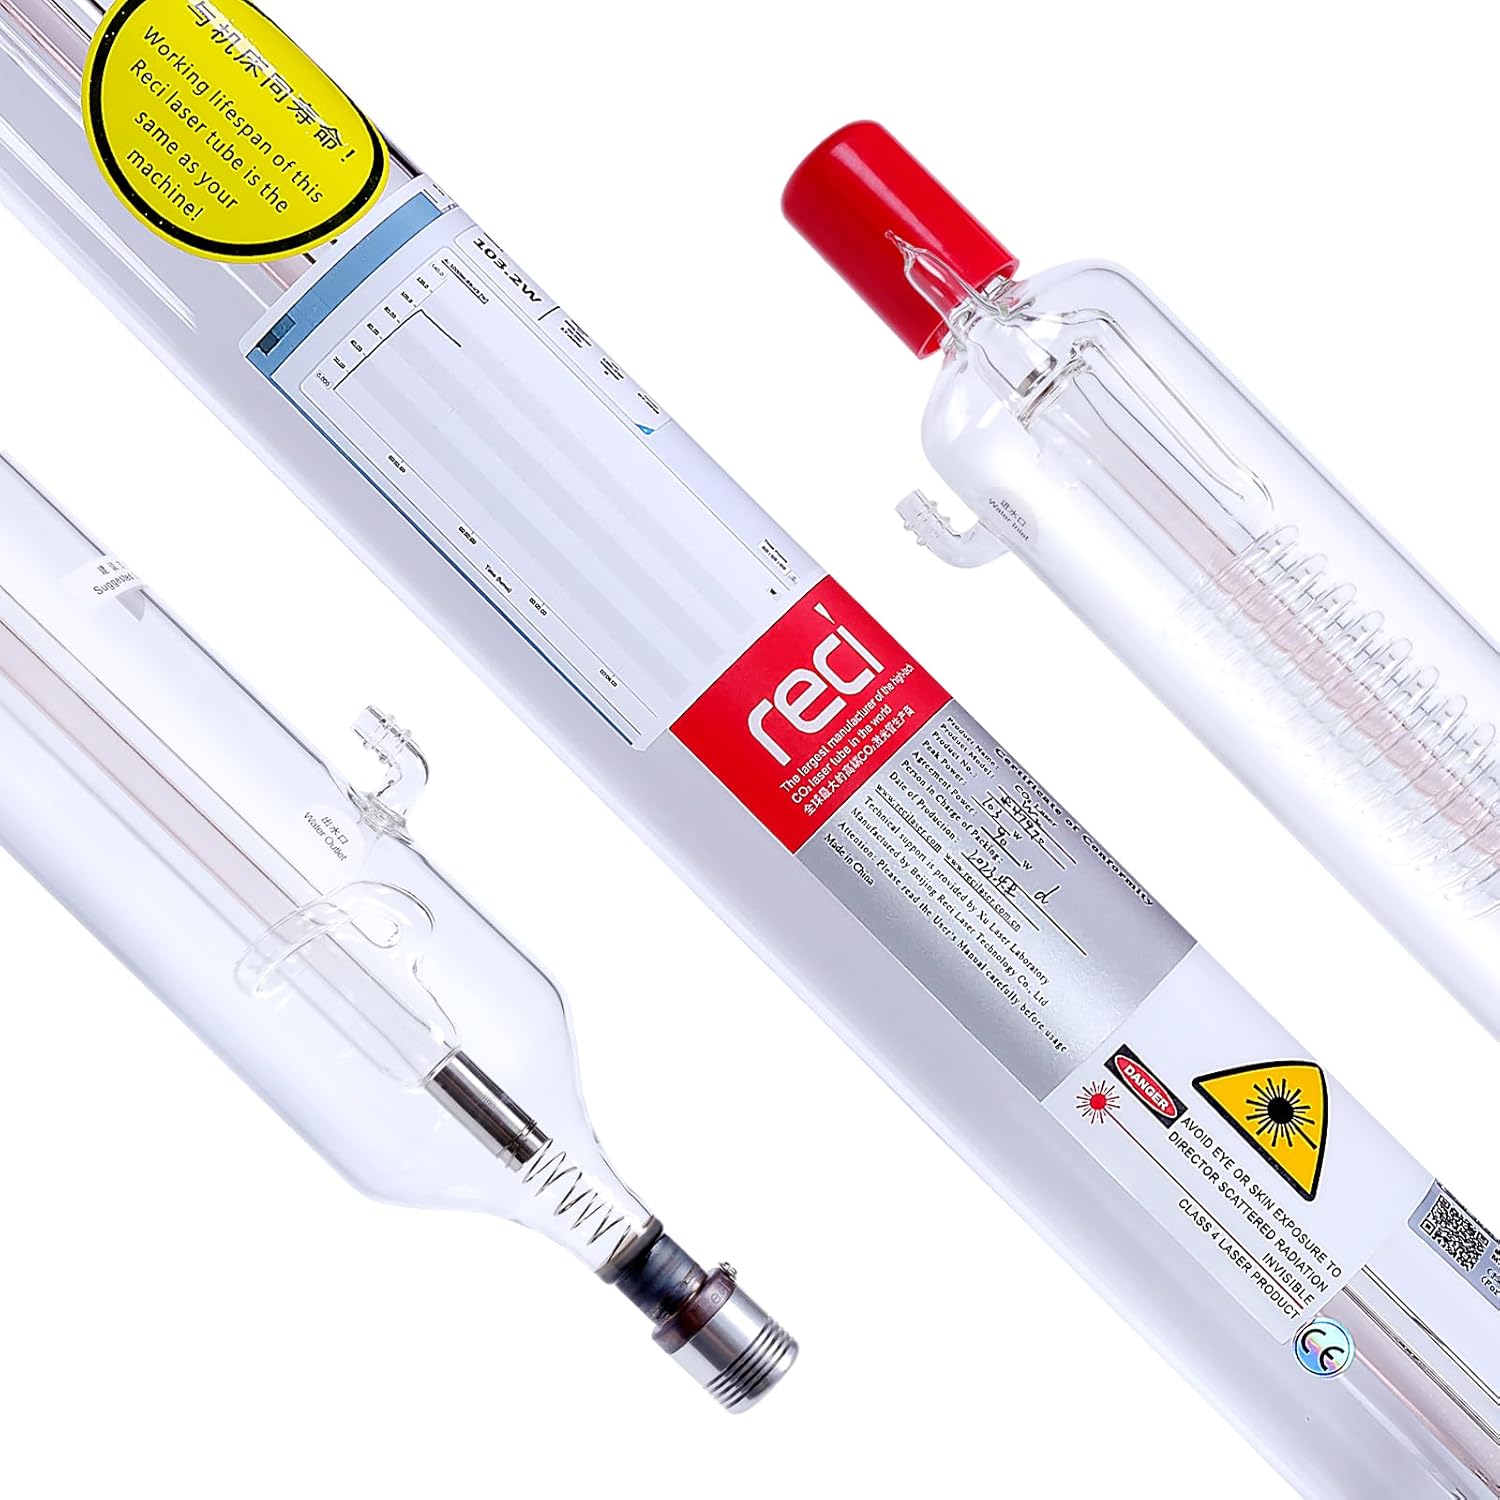
Figure 1: RECI W2 CO2 Laser Tube, showing its transparent glass construction and electrical connections.
2. Product Specifications
The following table details the technical specifications for the RECI W2 CO2 Laser Tube.

Figure 2: Visual representation of the RECI W2 Laser Tube's key parameters.
| Parameter | Value |
|---|---|
| Model | W2 |
| Rated Power | 90W |
| Maximum Power | 100W |
| Length | 1240mm |
| Diameter | 80mm |
| Triggering Voltage | 19kV |
| Operating Current (Recommended) | 25mA (Long-term: ≤26mA, Max: ≤28mA) |
| Catalytic | Yes |
| Lifespan | Up to 10,000 hours |
| Warranty | 18 Months |
Note: Ensure your laser machine has sufficient space to accommodate the 1240mm length and 80mm diameter of the W2 CO2 laser tube.
3. Installation
Proper installation is crucial for the performance and safety of the laser tube. Follow these steps carefully.

Figure 3: Diagram illustrating the components and connections for laser tube installation, including high voltage sheath, water inlet/outlet, and serial number location.
- Electrical Connections: Connect the positive and negative terminals of the laser tube to the power supply. Ensure all connections are properly insulated to prevent electrical hazards.
- Water Connections: Connect the inlet and outlet ports of the laser tube to your cooling system. The water inlet and outlet typically have a diameter of 9.5+1mm.
- Cooling System Activation: Turn on the water circulation system. Ensure that cooling water flows through the entire water line without air bubbles. Air bubbles can lead to localized overheating and potential tube damage.
- Initial Laser Firing: Initiate a brief laser pulse (inching mode). Observe the laser light emitted.
- Optical Path Adjustment: Adjust the position of the laser tube so that the laser spot precisely hits the center of the first reflective mirror. If the light path is incorrect, continue adjusting the laser lens positions until the optical path is aligned and perpendicular.
- Power Setting: For initial use, set the laser power to 50%-60% of the maximum rated power. Adjust as necessary based on specific application requirements.

Figure 4: Close-up view of the electrical connection point on the laser tube, demonstrating how to secure the wiring.
Important Cooling Tip: For optimal performance and to prevent air bubbles, ensure the water outlet side of the laser tube is positioned approximately 2mm higher than the inlet side. This facilitates bubble discharge.

Figure 5: Detailed view of the water inlet and outlet ports on the RECI W2 Laser Tube.
4. Operation Guidelines
Adhere to these guidelines for safe and efficient operation of your RECI W2 CO2 Laser Tube.
- Recommended Current: The recommended operating current for the RECI W2 laser tube is 25mA.
- Long-Term Operation: For extended periods of use, the operating current should not exceed 26mA.
- Maximum Current: The absolute maximum operating current must be controlled at 28mA or less. Exceeding this limit can significantly reduce the tube's lifespan.
- Coolant Requirements: Use pure water as the coolant. Maintain a flow rate of 2-5 liters per minute. The standard water temperature should be between 10°C and 50°C.
- Power Supply Compatibility: It is recommended to use a laser power supply that is specifically matched to the specifications of the RECI W2 laser tube.
5. Maintenance
Regular maintenance ensures optimal performance and extends the lifespan of your laser tube.
- Lens Cleaning: The W series laser tubes are equipped with a metal cap and a red plastic cap on each end for dust protection. These caps can be removed to clean the laser lens. Gently wipe the output lens of the laser head and other laser lenses (reflective mirrors and focus lens) with anhydrous alcohol.
- Cooling System Check: Regularly inspect the cooling system to ensure proper water circulation. Verify that water pipes are not folded or blocked, and that the water pump or chiller is functioning correctly. Adequate cooling prevents overheating and potential damage to the laser tube.
6. Troubleshooting: Laser Light Problems
If you experience issues with laser light output or processing effectiveness, perform the following self-checks:
- Check Laser Light Color: Open the back cover of the laser tube and observe the light. A normal laser light color is light pink.
- Processing Effect Not Ideal (Light Color Normal): If the light color is normal but the processing effect is poor, check the following:
- Output Lens Contamination: The output lens of the laser head may be contaminated. Gently wipe it with anhydrous alcohol.
- Laser Lens Contamination: Inspect the three reflective mirrors and one focus lens for contamination. Clean them with anhydrous alcohol or replace them if necessary.
- Optical Path Misalignment: The optical path may not be correctly adjusted, causing the light to not exit the laser head properly or to be misaligned. Re-adjust the optical path.
- Laser Power Supply Damage: If the laser tube emits light but it is weak, adjust the power to maximum intensity. If the ammeter value remains below 10mA, the power supply may be damaged and requires replacement.
- Cooling System Issues: Problems with the cooling system, such as slow water circulation or high laser temperature, can lead to poor cooling. Check for blocked water pipes (e.g., folded pipes) or a damaged water pump/chiller. Repair or replace components as needed.
7. Warranty and Support
The RECI W2 CO2 Laser Tube comes with an 18-month warranty.
In case of transportation damage or any defects, please contact customer service through the platform where the product was purchased (e.g., Amazon). It is recommended to provide documentation such as photos or videos of the damage to facilitate the replacement process.
For technical assistance or further inquiries, please refer to the contact information provided by your seller.


