1. Introduction
This manual provides essential information for the safe and effective installation, operation, and maintenance of the Heschen E3JK-R4M1 Photoelectric Switch. Please read this manual thoroughly before using the product and retain it for future reference.
The Heschen E3JK-R4M1 is a reflective photoelectric switch designed for industrial applications, capable of detecting opaque objects at a distance of up to 4 meters. It operates on an AC 90-250V power supply and features a relay output.
2. Safety Information
WARNING: Risk of Electric Shock
- Ensure power is disconnected before installation, wiring, or maintenance to prevent electric shock.
- Installation and wiring should only be performed by qualified personnel.
- Do not exceed the specified voltage and current ratings.
- Avoid exposing the device to excessive moisture or corrosive environments unless specifically rated for such conditions.
- Do not disassemble or modify the product. Unauthorized modifications may lead to malfunction or safety hazards.
3. Product Overview
3.1 Key Features
- Supply Voltage: 90 to 250V AC.
- Output: 3A, 250V AC.
- Sensing Range: 4 meters.
- Relay Output: AC, illuminated.
- Detection Method: Retro-reflective.
- Detection Target: Opaque objects.
3.2 Components
The Heschen E3JK-R4M1 Photoelectric Switch package typically includes the following components:
- Photoelectric Switch Unit
- Reflective Plate
- Mounting Bracket
- Mounting Screws and Nuts
- Small Screwdriver (for adjustment)

Figure 1: Heschen E3JK-R4M1 Photoelectric Switch and included accessories.
4. Specifications
| Parameter | Value |
|---|---|
| Model Number | E3JK-R4M1-AC |
| Supply Voltage | AC 90-250V |
| Output Current | 3A |
| Output Voltage | 250V AC |
| Sensing Distance | 4 meters |
| Detection Method | Retro-reflective |
| Light Source | Infrared light, 660 nm |
| Response Time | 30 ms |
| Insulation Resistance | 50 MΩ (between charger and housing) |
| Dielectric Strength | 1000V AC, 50/60 Hz, 1 min (between charging cable and housing) |
| Protection Rating | IP65 |
| Housing Material | Nickel-plated brass (ABS) |
| Optical Surface Material | Polymethyl methacrylate (PMMA) |
| Operating Mode | ON-OFF |
| Contact Type | Normally Open (NO) / Normally Closed (NC) |
| Terminal Type | Screw |
| Dimensions (approx.) | 9.8 x 8.6 x 5.6 cm |
| Weight (approx.) | 220 grams |

Figure 2: Product dimensions and mounting hole specifications.

Figure 3: Additional specifications including temperature effect on detection distance.
5. Setup
5.1 Mounting
Mount the photoelectric switch and the reflective plate securely on stable surfaces. Ensure they are aligned directly opposite each other. The maximum sensing distance is 4 meters. For optimal performance, avoid direct sunlight or strong artificial light sources that could interfere with the sensor's operation.
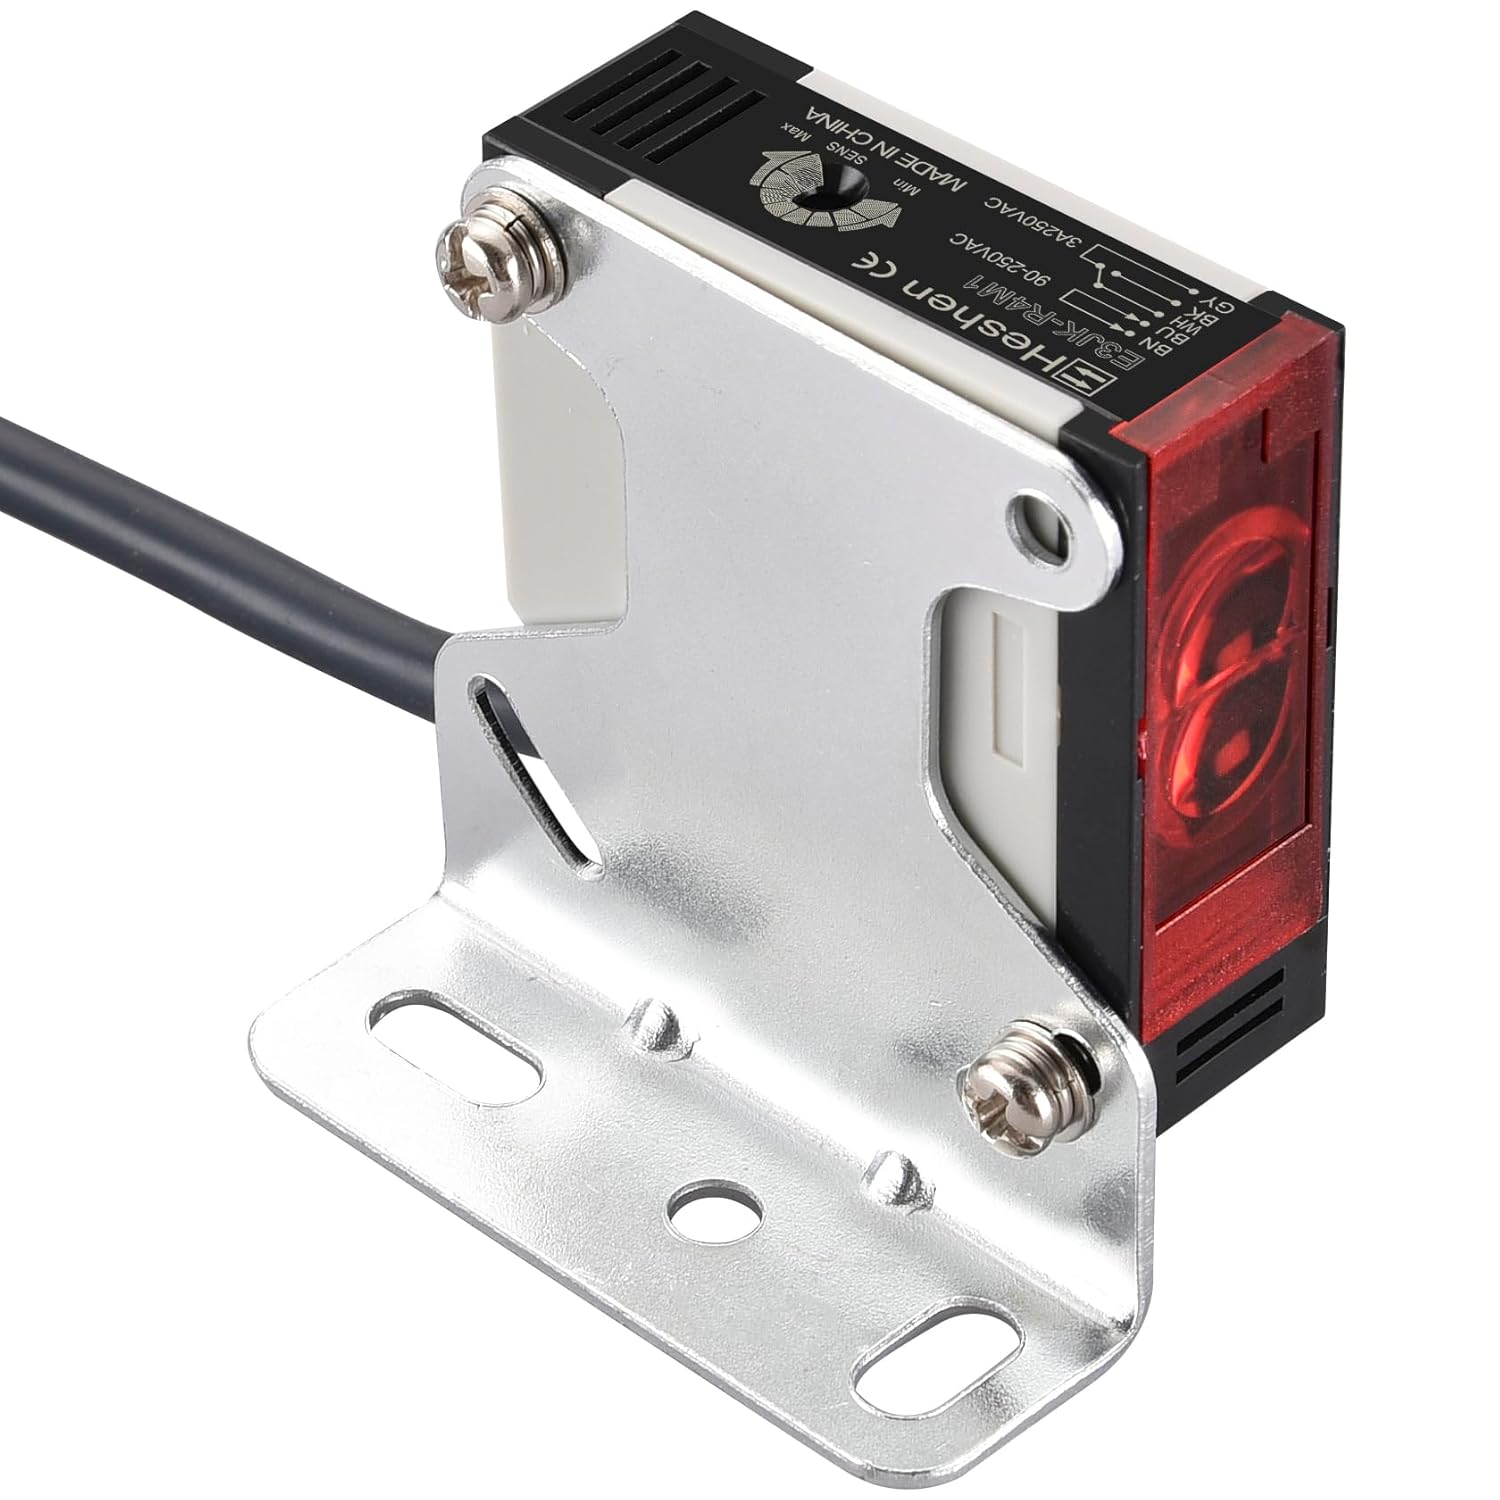
Figure 4: Example of sensor mounting with bracket.

Figure 5: Retro-reflective detection method with a 4-meter range.
5.2 Wiring
Connect the sensor according to the provided wiring diagrams. The sensor supports both Normally Open (NO) and Normally Closed (NC) configurations. Ensure all connections are secure and insulated.
- Brown Wire (L): Connect to Live (90-250VAC).
- Blue Wire (N): Connect to Neutral (90-250VAC).
- Black Wire (NO): Normally Open output. Connect to one side of the load.
- Grey Wire (NC): Normally Closed output. Connect to one side of the load.
- White Wire: Connect the other side of the load to the White wire.
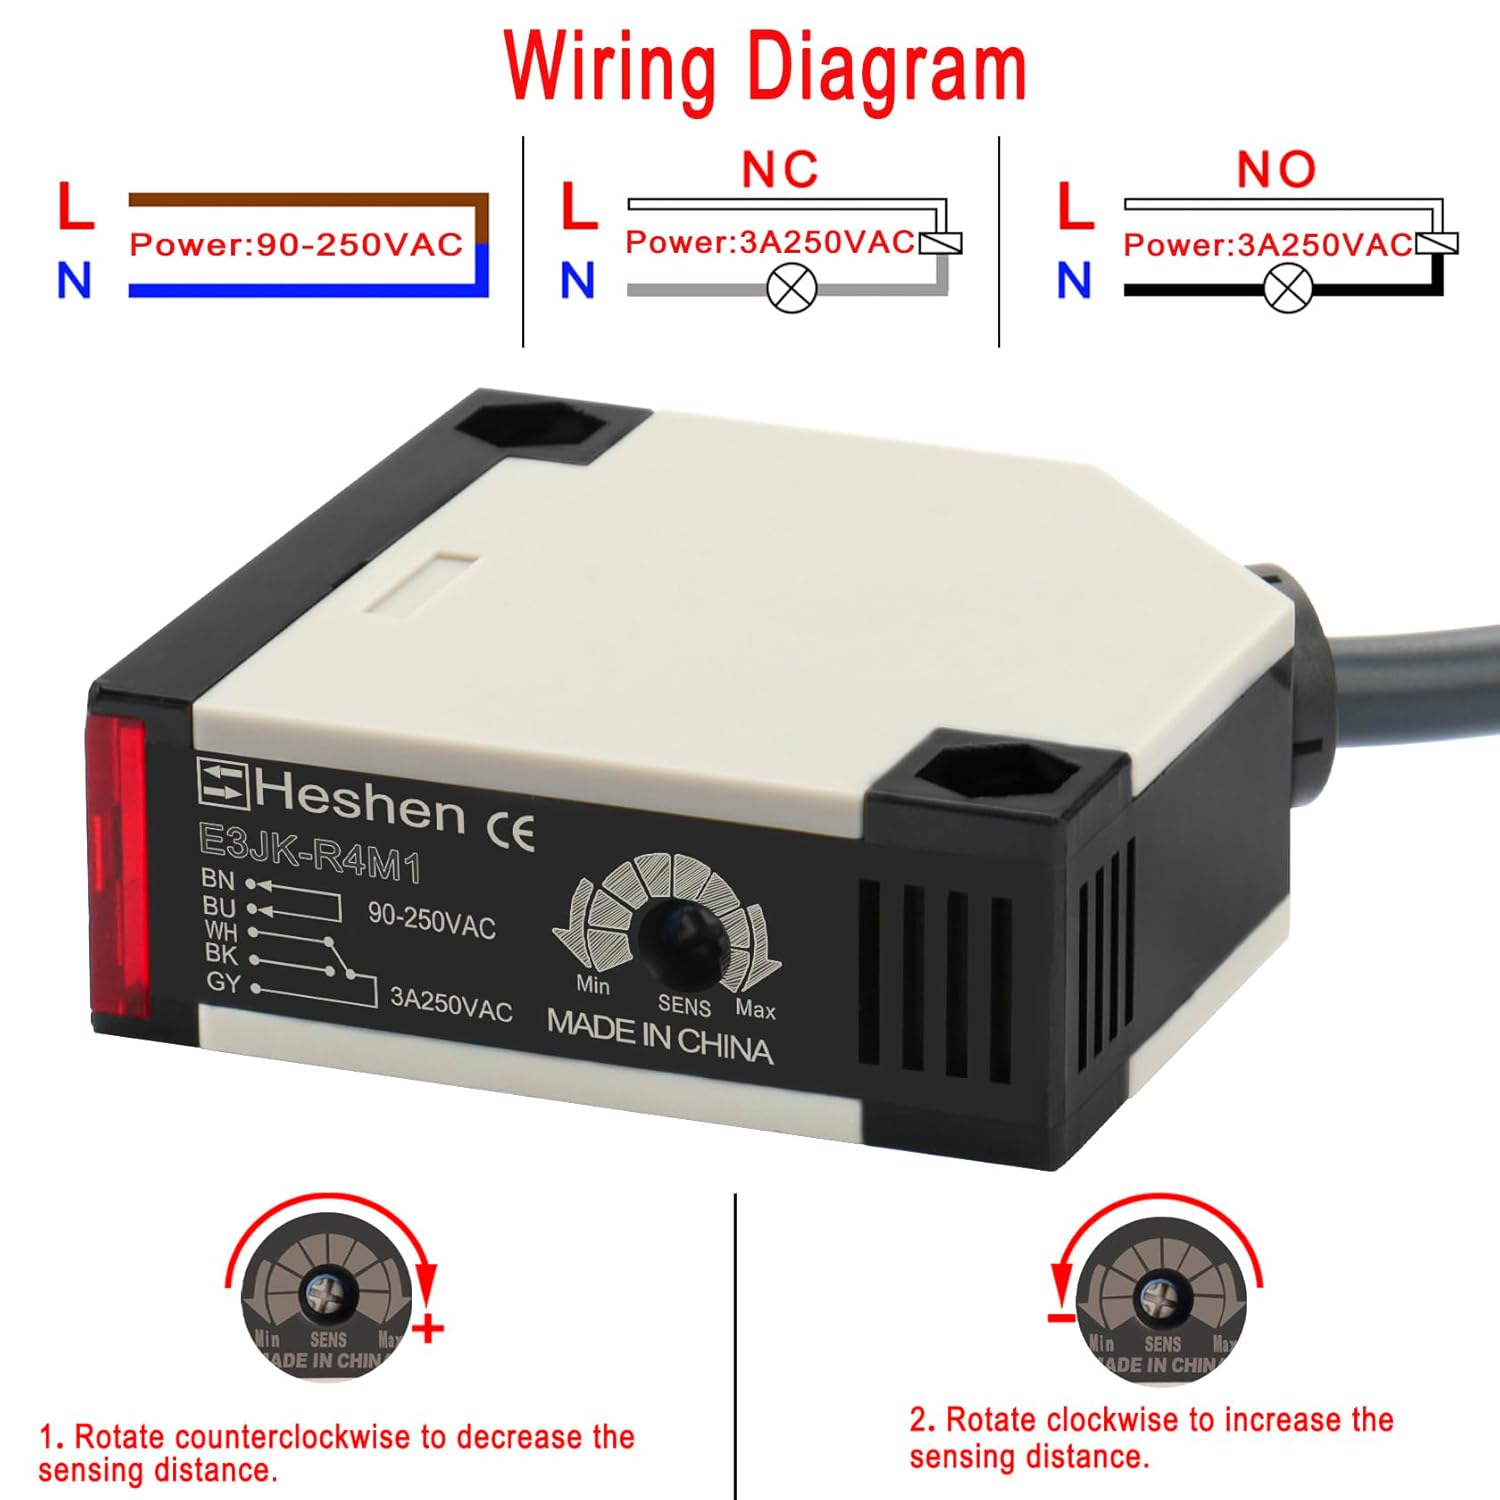
Figure 6: General wiring diagram and sensitivity adjustment dial.

Figure 7: Detailed NO and NC wiring configurations.
5.3 Sensitivity Adjustment
The sensor features an adjustment dial to fine-tune the sensing distance. Use the provided screwdriver to adjust the sensitivity.
- Rotate counter-clockwise to decrease the sensing distance.
- Rotate clockwise to increase the sensing distance.
Video 1: Demonstration of the Heschen E3JK-R4M1 Photoelectric Switch in operation, including sensitivity adjustment and detection of an object. The video shows the sensor connected to a power supply and output indicators, demonstrating how the output changes when an object is detected and how to adjust the sensing range.
6. Operating Instructions
Once properly installed and wired, the Heschen E3JK-R4M1 Photoelectric Switch operates by emitting an infrared light beam towards a reflective plate. When an opaque object interrupts this beam, the sensor detects the change and triggers its relay output.
- Ensure the sensor and reflector are clean and free from obstructions.
- Verify the power supply is within the specified range (AC 90-250V).
- Adjust the sensitivity as needed for your specific application and detection distance.
- The output will activate (or deactivate, depending on NO/NC configuration) when an object breaks the light beam between the sensor and the reflective plate.
7. Maintenance
Regular maintenance ensures optimal performance and longevity of your photoelectric switch.
- Cleaning: Periodically clean the sensor lens and the reflective plate with a soft, dry cloth. Dust, dirt, or moisture can impair detection capabilities.
- Inspection: Regularly inspect wiring for any signs of damage, fraying, or loose connections.
- Alignment: Verify that the sensor and reflective plate remain properly aligned. Misalignment can lead to intermittent or failed detection.
- Environmental Conditions: Ensure the operating environment remains within the specified temperature and humidity ranges.
8. Troubleshooting
| Problem | Possible Cause | Solution |
|---|---|---|
| Sensor not detecting objects. |
|
|
| Intermittent detection. |
|
|
| Output always ON/OFF (not changing). |
|
|
9. Warranty and Support
Heschen products are manufactured to high-quality standards. For warranty information, please refer to the terms and conditions provided at the point of purchase or contact your local distributor.
For technical support, troubleshooting assistance, or inquiries regarding replacement parts, please contact Heschen customer service or visit the official Heschen website. When contacting support, please have your product model number (E3JK-R4M1) and purchase details available.