Introduction
The AUTO-VOX D2 PRO Dash Cam is designed to capture high-quality video footage of your journeys, providing a reliable record for various situations. This manual provides comprehensive instructions for the installation, operation, and maintenance of your device, ensuring optimal performance and longevity.
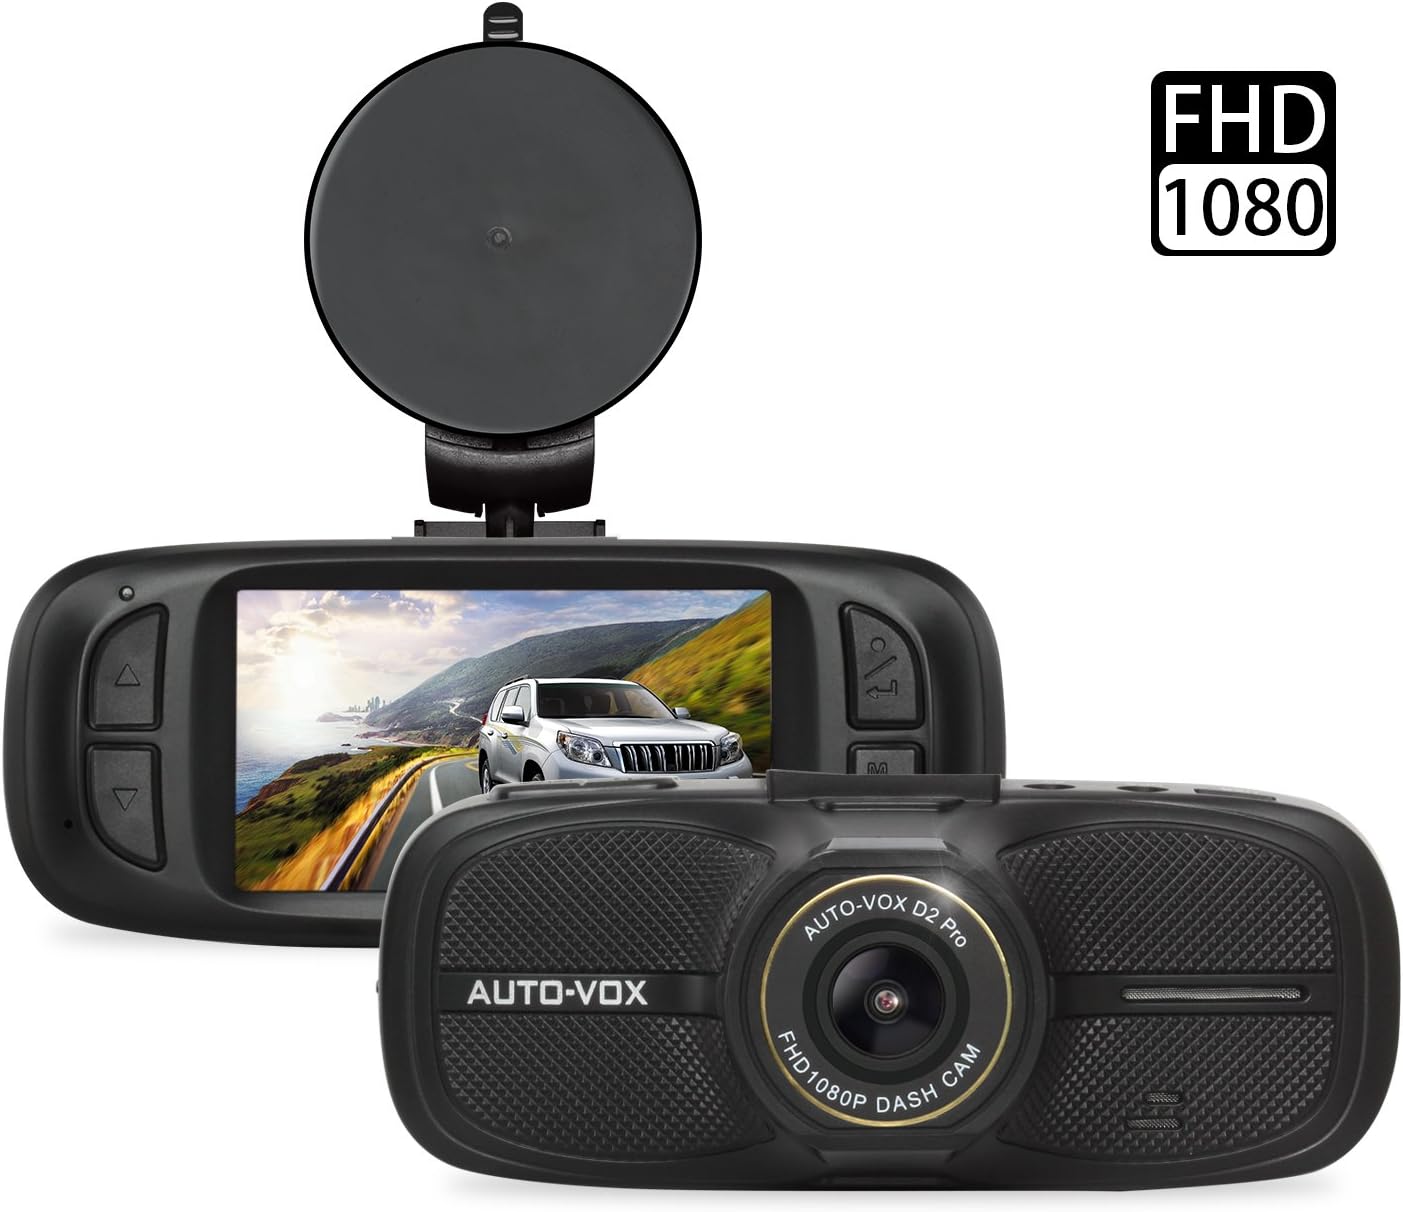
Figure 1: AUTO-VOX D2 PRO Dash Cam with mount, showing front and rear views.
Safety Information
To ensure safe and proper operation of your AUTO-VOX D2 PRO Dash Cam, please observe the following guidelines:
- SD Card Formatting: Always format the SD card before initial use and periodically thereafter to maintain optimal recording performance and prevent data corruption.
- Operating Temperature: Avoid exposing the device to extreme temperatures outside its specified operating range to prevent damage.
- Installation Location: Install the dash cam in a location that does not obstruct the driver's view or interfere with the deployment of airbags.
- Power Supply: Use only the provided power adapter to prevent damage to the device and ensure stable operation.
- Cleaning: Use a soft, dry cloth for cleaning. Do not use liquid cleaners or solvents.
Package Contents
Verify that all items listed below are present in your package:
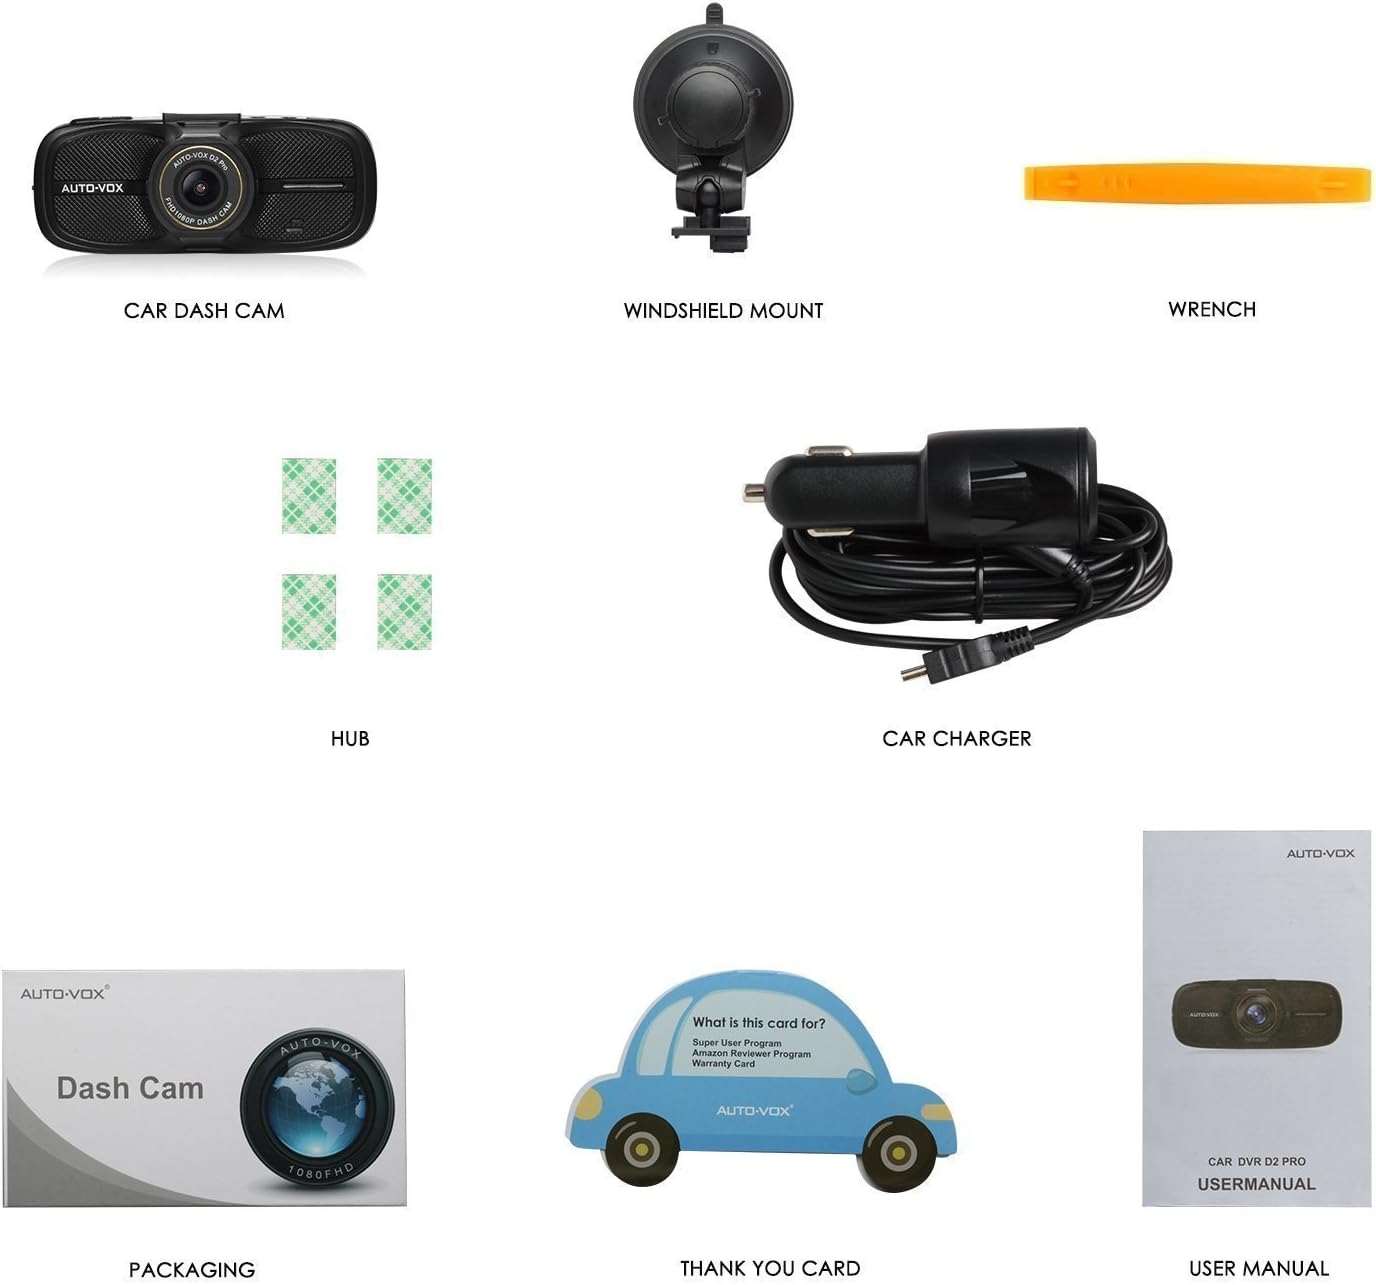
Figure 2: Included accessories with the AUTO-VOX D2 PRO Dash Cam.
- AUTO-VOX D2 PRO Car Dash Cam
- Windshield Mount (Suction Cup)
- Car Charger (Power Cable)
- Adhesive Cable Clips (Hubs)
- Wrench (Installation Tool)
- User Manual
Product Overview
Familiarize yourself with the various components and controls of your dash cam:

Figure 3: Front, top, and side views of the D2 PRO Dash Cam with labeled components.
- USB Interface
- GPS Interface
- AV-OUT
- Bracket Socket
- ON/OFF Button
- MENU Button
- UP Button
- Lens
- HDMI Port
- RESET Button
- DOWN Button
- OK Button
- MODE Button
- Indicator Light
Setup and Installation
1. Inserting the Micro SD Card
Insert a high-speed Micro SD card (Class 10 or higher, up to 32GB recommended) into the card slot until it clicks into place. Ensure the card is inserted correctly to avoid damage.
2. Formatting the SD Card
Before first use, and periodically thereafter, format the Micro SD card within the dash cam's settings menu. This ensures proper functionality and clears any existing data.
- Power on the dash cam.
- Press the MENU button to enter the settings.
- Navigate to the "Format" option using the UP/DOWN buttons.
- Press the OK button to confirm and format the card.
3. Mounting the Dash Cam
Attach the suction cup mount to the dash cam's bracket socket. Choose a location on your windshield that provides a clear view of the road ahead without obstructing your driving visibility or airbag deployment area. Typically, this is behind the rearview mirror.

Figure 4: Recommended cable routing for a neat installation.
4. Connecting Power
Connect the provided car charger to the dash cam's USB interface and plug the other end into your vehicle's 12V power outlet (cigarette lighter socket). Route the cable neatly along the windshield and dashboard using the provided adhesive cable clips to avoid interference with driving.
Operating Instructions
Power On/Off
- Automatic: The dash cam will automatically power on and begin recording when your vehicle's ignition is turned on (if connected to a switched power outlet).
- Manual: Press and hold the ON/OFF button to manually power on or off the device.
Recording Modes

Figure 5: Key recording features of the D2 PRO Dash Cam.
- Loop Recording: The camera continuously records video in segments (e.g., 1, 3, or 5 minutes). When the memory card is full, it automatically overwrites the oldest unlocked footage with new recordings. This ensures continuous recording without manual intervention.
- Emergency Recording (G-Sensor): The built-in G-sensor detects sudden impacts or collisions. When triggered, it automatically locks the current video segment, preventing it from being overwritten by loop recording. These locked files are stored in a separate folder.
- Parking Monitoring: When enabled, the dash cam will automatically start recording if it detects a vibration or impact while the vehicle is parked. This feature requires a continuous power supply (e.g., hardwire kit, not included) or the dash cam's internal battery.
Wide Dynamic Range (WDR) Technology
The D2 PRO Dash Cam features WDR technology, which enhances video quality in challenging lighting conditions. WDR balances exposure, ensuring clear footage in both brightly lit and dimly lit areas within the same frame. This is particularly useful when driving out of tunnels, under strong sunlight, or at night.

Figure 6: Visual demonstration of WDR technology's effect on image clarity.
Playback Options
You can review recorded footage using several methods:
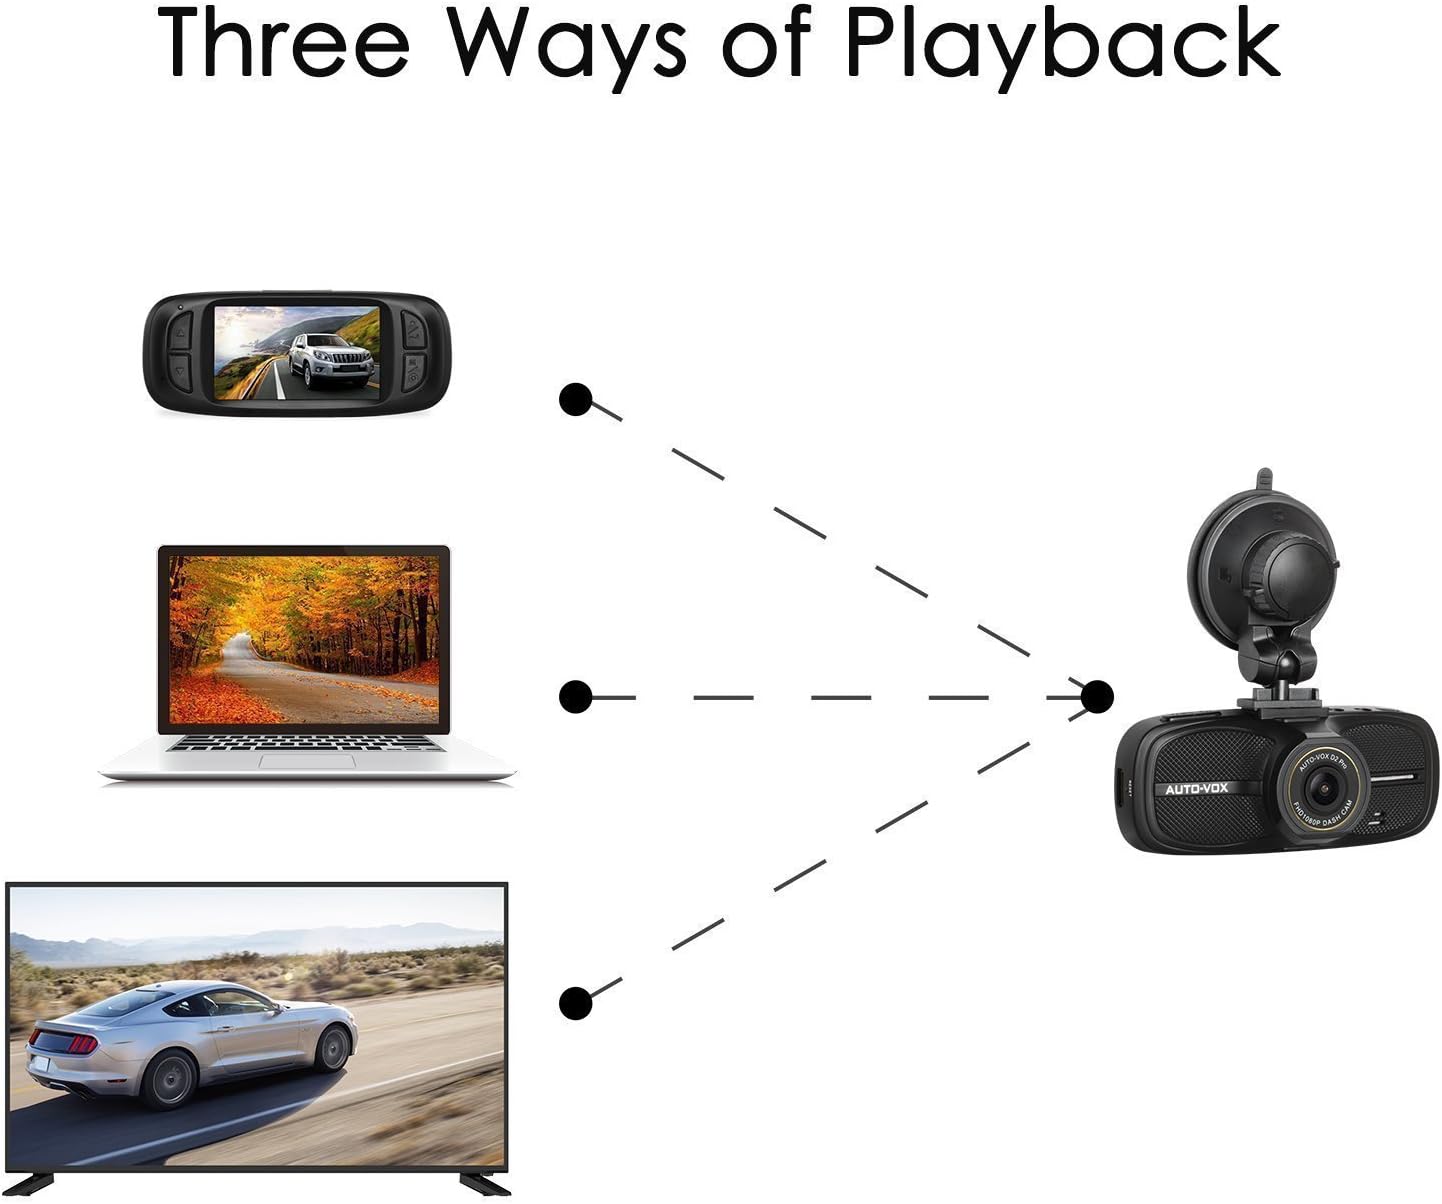
Figure 7: Various methods for viewing recorded video.
- On the Dash Cam: Use the MODE button to switch to playback mode. Use UP/DOWN buttons to navigate through files and OK to play.
- On a Computer: Remove the Micro SD card from the dash cam and insert it into a computer's card reader. The video files can then be accessed and played using standard media players.
- On a TV/Monitor: Connect the dash cam to a TV or monitor using an AV-OUT cable (not included) or HDMI cable (not included) for larger screen viewing.
Maintenance
- SD Card Care: Regularly format your SD card (at least once a month) to prevent data corruption and ensure smooth recording. Replace the SD card if you experience frequent errors or recording issues.
- Lens Cleaning: Gently wipe the camera lens with a soft, lint-free cloth to remove dust or smudges that may affect video clarity.
- Firmware Updates: Check the AUTO-VOX official website periodically for any available firmware updates. Updating firmware can improve performance and add new features.
- Storage: When not in use for extended periods, store the dash cam in a cool, dry place away from direct sunlight.
Troubleshooting
| Problem | Possible Cause / Solution |
|---|---|
| Dash cam does not power on. |
|
| Recording stops or freezes. |
|
| Video footage is blurry or unclear. |
|
| G-sensor is too sensitive or not sensitive enough. | Adjust the G-sensor sensitivity setting in the dash cam's menu. |
| Dash cam restarts unexpectedly. |
|
Specifications

Figure 8: Physical dimensions of the D2 PRO Dash Cam.
| Feature | Detail |
|---|---|
| Model | D2 PRO |
| Screen Size | 2.7 Inches LCD |
| Video Resolution | Full HD 1080P |
| Viewing Angle | 135° Wide Angle |
| Lens Aperture | F1.8 |
| Special Features | WDR, G-Sensor, Loop Recording, Parking Mode, Night Vision |
| Storage | Micro SD Card (Class 10, up to 32GB) |
| Dimensions (L x W x H) | 11.18 x 4.57 x 3.56 cm (approx. 112.70 x 46.50 x 38.00 mm) |
| Weight | 150.25 Grams (approx. 5.3 Ounces) |
| Power Input | 12V Car Charger |
The dash cam is designed to withstand both high and low temperatures, ensuring reliable operation in various climates.

Figure 9: Dash cam performance across temperature ranges.
Warranty and Support
AUTO-VOX provides a 1-year warranty for the D2 PRO Dash Cam. For any technical assistance, troubleshooting, or warranty claims, please contact our professional after-sales service team. Your inquiries will typically be replied to within 24 hours.
For further support, visit the official AUTO-VOX website or refer to the contact information provided with your purchase.