1. Introduction
Thank you for choosing the Wenko Classic Plus Wall Shelf. This manual provides essential information for the safe and efficient installation, operation, and maintenance of your new wall shelf. Please read these instructions carefully before use and retain them for future reference.
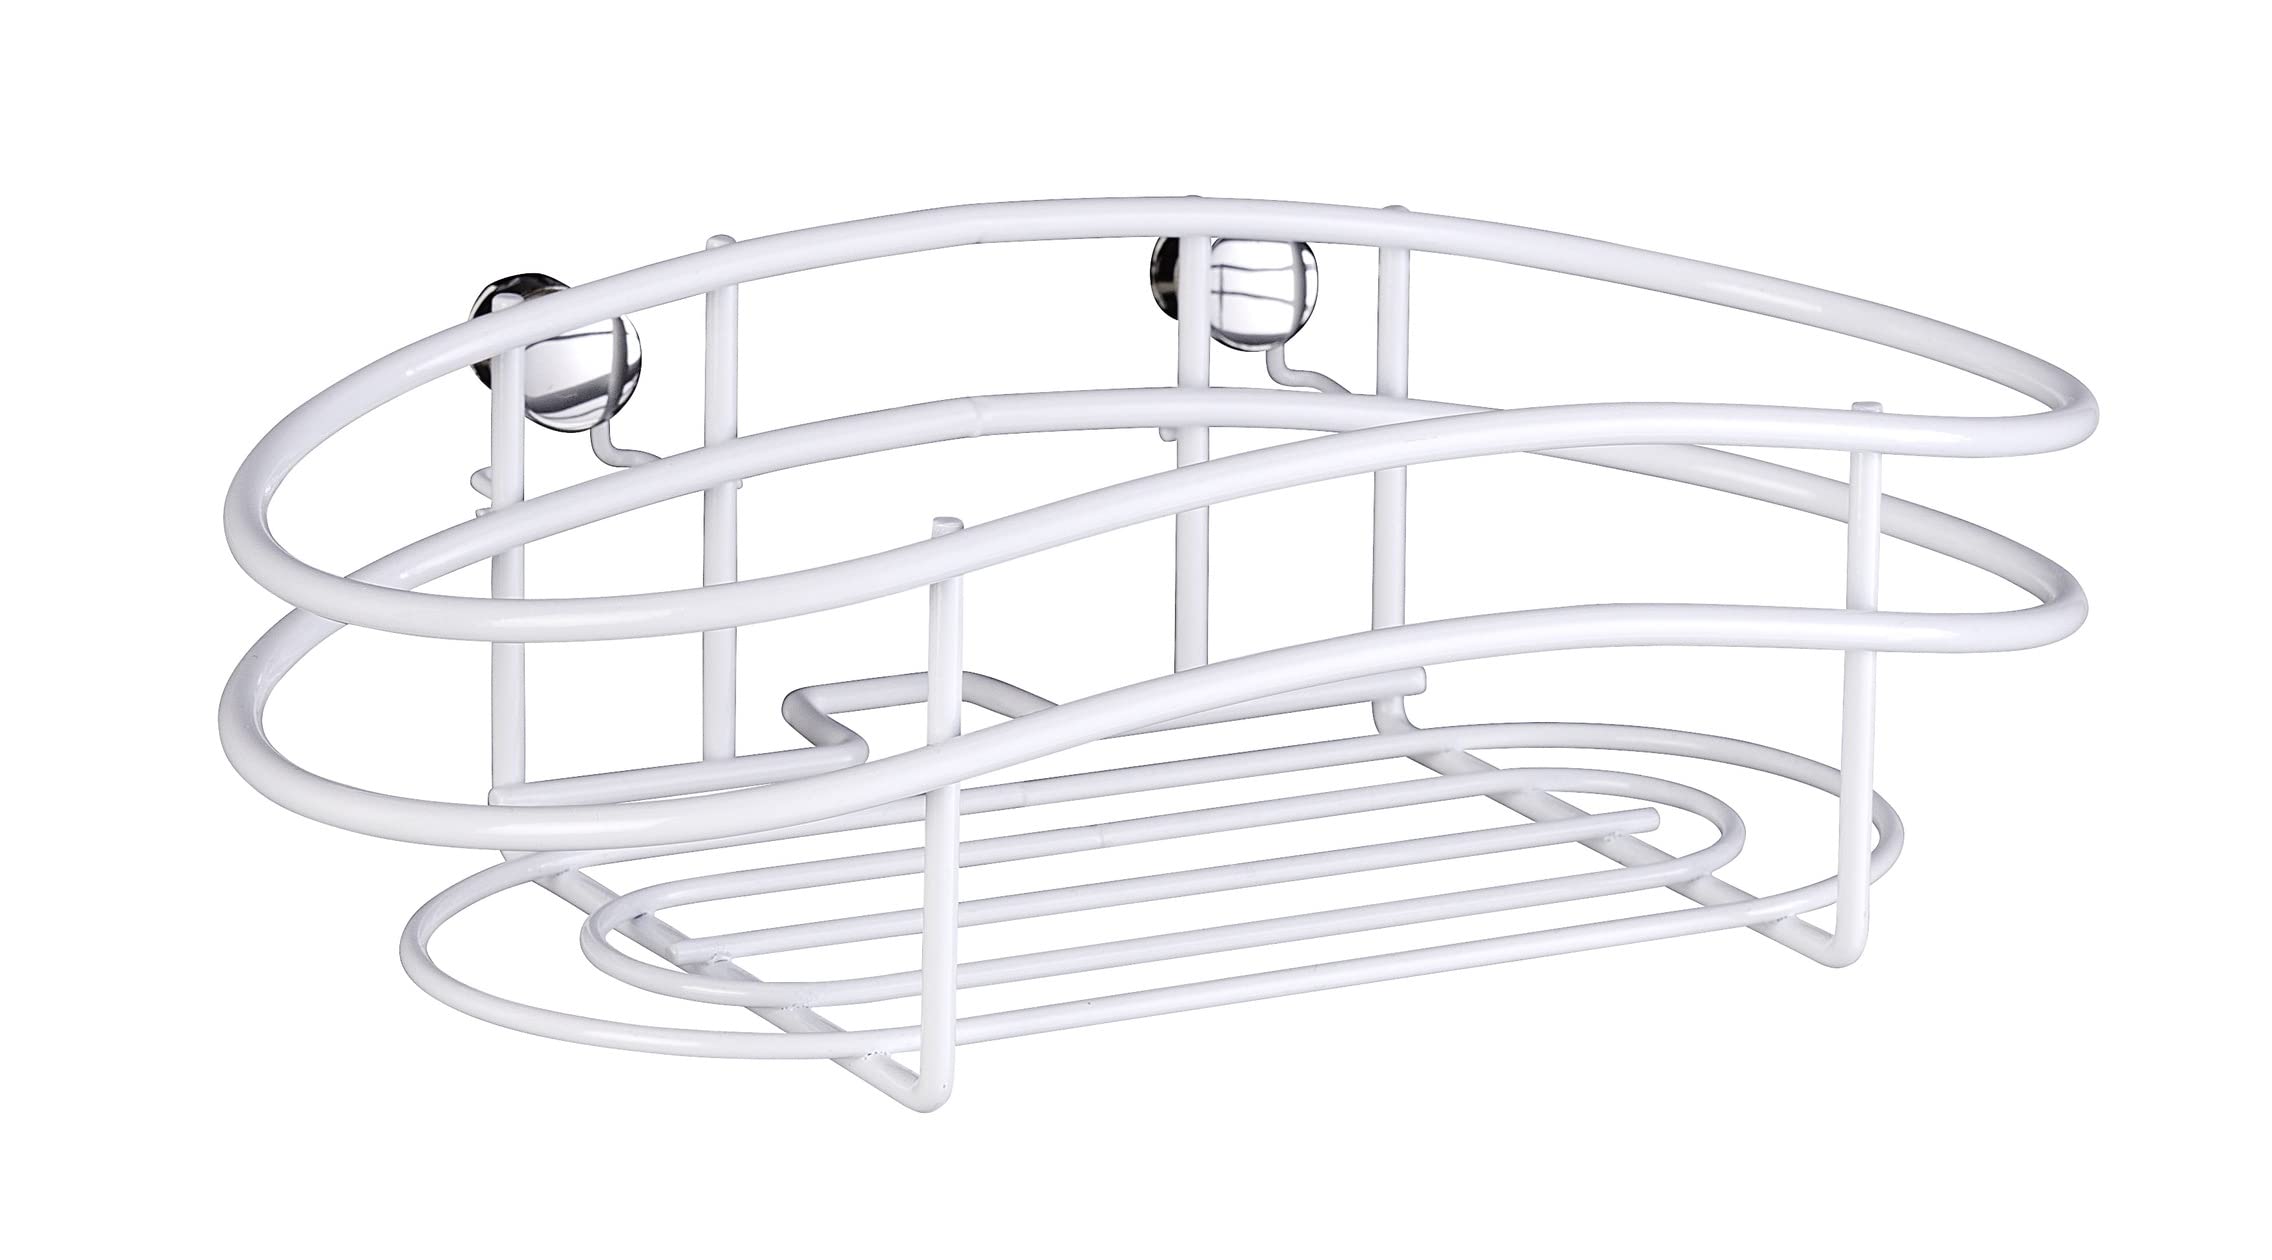
Image 1.1: The Wenko Classic Plus Wall Shelf, featuring its white steel construction.
2. Package Contents
Please check that all items are present and undamaged. If any parts are missing or damaged, contact customer support immediately.
- 1 x Wenko Classic Plus Wall Shelf (White, Steel)
- Mounting hardware (screws and dowels)
3. Safety Instructions
- Ensure the mounting surface is suitable and strong enough to support the shelf and its contents.
- Do not overload the shelf. Refer to the specifications for maximum weight capacity.
- Keep small parts (screws, dowels) out of reach of children.
- Always use appropriate tools and wear safety gear (e.g., eye protection) during installation.
- If drilling, be aware of hidden electrical wires or water pipes behind the wall.
4. Setup and Installation
The Wenko Classic Plus Wall Shelf can be installed using the included screws and dowels for a permanent fixture. Alternatively, it is compatible with Wenko's Vacuum-Loc, Turbo-Loc, or Power-Loc adhesive systems (sold separately) for drilling-free installation.
4.1. Installation with Screws and Dowels (Recommended for maximum stability)
- Choose Location: Select a suitable, clean, and dry wall surface in your bathroom or desired area. Ensure there are no hidden pipes or electrical lines.
- Mark Drilling Points: Hold the shelf against the wall at the desired height and use a pencil to mark the positions for the mounting holes.
- Drill Holes: Using an appropriate drill bit for your wall type and the size of the included dowels, carefully drill holes at the marked points.
- Insert Dowels: Push the plastic dowels into the drilled holes until they are flush with the wall surface. If necessary, gently tap them with a hammer.
- Mount Shelf: Align the shelf's mounting holes with the inserted dowels. Insert the screws through the shelf and into the dowels. Tighten the screws firmly but do not overtighten to avoid damaging the wall or shelf.

Image 4.1: Included screws and dowels for secure wall mounting.
4.2. Alternative Installation (Drilling-Free Adapters)
This shelf is designed to be compatible with Wenko's Vacuum-Loc, Turbo-Loc, or Power-Loc adhesive systems. These systems allow for installation without drilling, ideal for tiled surfaces. If you choose to use one of these alternative methods, please refer to the specific instruction manual provided with the respective adapter system for detailed installation steps. These adapter systems are sold separately.

Image 4.2: Vacuum-Loc system (sold separately).

Image 4.3: Turbo-Loc system (sold separately).

Image 4.4: Power-Loc system (sold separately).
5. Operating and Usage
Once securely installed, the Wenko Classic Plus Wall Shelf provides convenient storage for various bathroom items such as shampoo bottles, shower gels, soaps, and sponges. Distribute weight evenly on the shelf to maintain stability.

Image 5.1: The shelf in use, holding common bathroom products.
6. Maintenance
To ensure the longevity and appearance of your Wenko Classic Plus Wall Shelf, follow these simple maintenance guidelines:
- Cleaning: Wipe the shelf regularly with a dry, soft cloth. For more stubborn marks, a damp cloth with mild soap can be used, followed by drying thoroughly.
- Avoid Harsh Chemicals: Do not use abrasive cleaners, scouring pads, or harsh chemical detergents, as these can damage the white special coating and rust protection.
- Rust Protection: The shelf features a high-grade rust protection coating. To maintain this, avoid prolonged exposure to standing water and ensure good ventilation in the bathroom.
7. Troubleshooting
- Shelf feels loose after installation: Ensure screws are tightened properly. If using adhesive systems, re-check installation instructions for that specific system. The wall material might not be suitable for the chosen mounting method.
- Signs of rust: While the shelf has high-grade rust protection, prolonged exposure to moisture or damage to the coating can lead to rust. Ensure proper ventilation and dry the shelf after use. If rust appears, clean immediately with a non-abrasive rust remover suitable for coated steel.
- Items sliding off: Ensure items are placed securely and the shelf is level. Avoid placing items that are too tall or unstable.
8. Specifications
| Feature | Detail |
|---|---|
| Model Number | 22819100 |
| Material | Alloy Steel |
| Color | White |
| Product Dimensions (D x W x H) | 5.91" x 9.45" x 3.15" (15 cm x 24 cm x 8 cm) |
| Item Weight | 0.1 Kilograms |
| Mounting Type | Wall Mount (Screws & Dowels included; compatible with Vacuum-Loc, Turbo-Loc, Power-Loc adapters - sold separately) |
| Special Feature | Rust Proof (special coating) |
| Number of Shelves | 1 |
| Recommended Use | Indoor (Bathroom) |
| Care Instructions | Wipe with Dry Cloth |
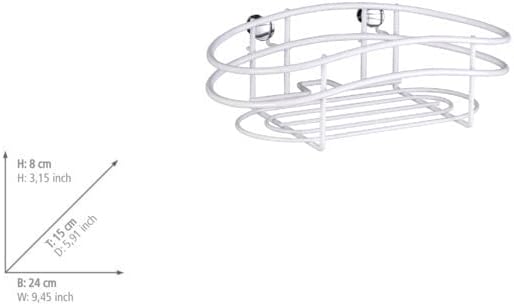
Image 8.1: Detailed dimensions of the Wenko Classic Plus Wall Shelf.
9. Warranty
This Wenko product comes with a 3-year guarantee from the date of purchase. The guarantee covers all material and manufacturing defects that impair the product's function. Damage caused by improper handling, normal wear and tear, or external factors is excluded. In case of a warranty claim, please send the article free of charge and properly packaged to the following address together with the original receipt:
Wenko-Wenselaar GmbH & Co. KG
Abteilung „Retouren“
Im Hülsenfeld 10
40721 Hilden
Germany
For further inquiries regarding warranty, you may also contact service@wenko.de.

Image 9.1: Wenko 3-Year Guarantee Certificate.
10. Support
For additional support, questions, or to purchase compatible accessories (like Vacuum-Loc, Turbo-Loc, or Power-Loc adapters), please visit the official WENKO website or contact their customer service directly.
WENKO Official Website: www.wenko.com
Email Support: service@wenko.de