1. Introduction
This manual provides essential instructions for the safe and effective installation, operation, and maintenance of your Technical Precision replacement light bulb for the Heine MINI MICROFLEX 2. This product is designed as a direct replacement component. Please read this manual thoroughly before installation and retain it for future reference.
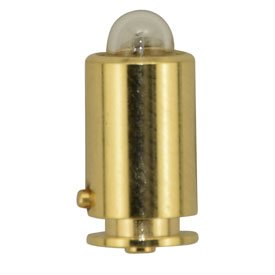
Image 1: Technical Precision Replacement Light Bulb. This image displays the compact design of the replacement bulb, suitable for the Heine MINI MICROFLEX 2 device.
2. Important Safety Information
Always observe the following safety precautions to prevent injury or damage to the product and the device it is installed in:
- Ensure the device is powered off and unplugged from its power source before attempting any installation or replacement.
- Allow the old bulb to cool completely before removal to avoid burns.
- Handle the new bulb by its base or with a clean cloth to avoid touching the glass, as oils from your skin can reduce bulb life.
- Do not overtighten the bulb during installation.
- Dispose of old bulbs according to local regulations.
- If the bulb appears damaged, do not install it. Contact support for a replacement.
3. Setup and Installation
Follow these steps to correctly install the replacement light bulb into your Heine MINI MICROFLEX 2 device:
- Power Off: Ensure the Heine MINI MICROFLEX 2 device is completely turned off and disconnected from any power source.
- Access Bulb Compartment: Refer to your Heine MINI MICROFLEX 2 device's original manual to locate and open the bulb compartment. This typically involves unscrewing a cap or opening a latch.
- Remove Old Bulb: Carefully unscrew or unclip the old bulb from its socket. If the bulb is hot, wait for it to cool.
- Insert New Bulb: Holding the new Technical Precision bulb by its base, align it with the socket. Gently screw or push the bulb into place until it is secure. Do not force it.
- Close Compartment: Securely close the bulb compartment, ensuring all covers and latches are properly fastened.
- Test: Reconnect the device to its power source and turn it on to verify the new bulb is functioning correctly.
4. Operation
Once installed, the Technical Precision replacement light bulb operates in conjunction with your Heine MINI MICROFLEX 2 device. Simply power on your device as you normally would, and the bulb will illuminate. No special operational procedures are required for the bulb itself beyond the device's standard use.
5. Maintenance
Proper maintenance can extend the life of your replacement bulb:
- Cleaning: If the bulb's glass surface becomes dirty, gently wipe it with a soft, dry, lint-free cloth. Avoid using abrasive cleaners or solvents.
- Handling: Avoid touching the glass portion of the bulb with bare hands. If touched, clean with an alcohol wipe to remove skin oils.
- Storage: If storing a spare bulb, keep it in its original packaging in a cool, dry place away from direct sunlight and extreme temperatures.
6. Troubleshooting
If you encounter issues with your replacement bulb, refer to the following table:
| Problem | Possible Cause | Solution |
|---|---|---|
| Bulb does not light up. |
|
|
| Bulb flickers. |
|
|
7. Specifications
Key specifications for the Technical Precision Replacement Light Bulb for Heine MINI MICROFLEX 2:
- Brand: Technical Precision
- Model: MINI MICROFLEX 2 (Replacement)
- Voltage: 2 Volts
- Wattage: 2 Watts
- Material: Glass
- Included Components: Replacement Part (1 unit per sale)
- Power Source: Battery Powered (as per device)
8. Warranty and Support
This Technical Precision product is designed for reliability. For any questions, technical assistance, or warranty inquiries, please contact the manufacturer, Technical Precision, directly through their official support channels. Please have your purchase information and the product model number (MINI MICROFLEX 2) available when contacting support.
Note: This bulb is not manufactured by HEINE.