Diamond Audio HX1600.1D
Diamond Audio HX1600.1D Monoblock Amplifier User Manual
Model: HX1600.1D | Brand: Diamond Audio
1. Introduction
The Diamond Audio HX1600.1D Monoblock Amplifier is engineered for audiophiles demanding superior sound quality and power. This manual provides essential information for the proper installation, operation, and maintenance of your amplifier, ensuring optimal performance and longevity.
The Hex Series Amplifiers are designed with meticulous precision and feature high-tolerance components, ensuring an unparalleled listening experience. With top-of-the-line features and user-friendly controls, these amplifiers seamlessly blend advanced technology with convenience.
2. Safety Information
Warning: This product can expose you to chemicals known to the State of California to cause cancer. For more information, please visit P65Warnings.ca.gov.
Always ensure proper ventilation around the amplifier. Do not expose the unit to moisture or extreme temperatures. Disconnect power before making any connections or performing maintenance. Professional installation is recommended for optimal safety and performance.
3. Package Contents
Upon opening the package, verify that all items listed below are present and in good condition:
- 1 x Diamond Audio HX1600.1D - HEX Mono Class D Subwoofer Amplifier
- Remote Control
- Owner's Manual (this document)
4. Product Overview
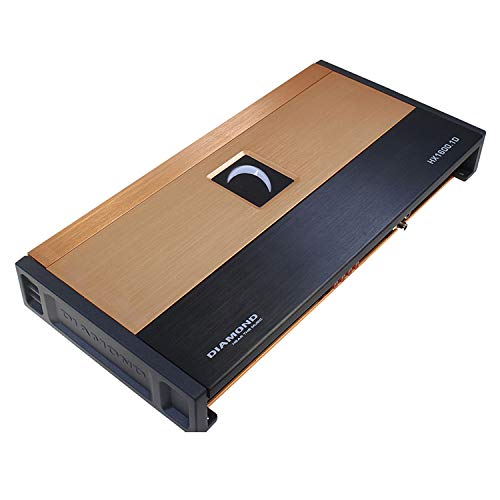
Figure 4.1: Top view of the Diamond Audio HX1600.1D Monoblock Amplifier, showcasing its sleek design with a gold and black finish and illuminated logo.
Key features of the HX1600.1D Monoblock Amplifier include:
- HEX Series Mono Amplifier engineered for audiophiles demanding superior sound quality and power.
- Delivers up to 1600 W x 1 @ 1Ω, ensuring robust power output and exceptional bass performance.
- High-end anodized extruded aluminum heat sink for superior thermal performance and long-lasting reliability.
- Advanced 4-layer PCB board with balanced differential inputs for clear, distortion-free sound.
- Full-range Class D IR chipset and audiophile-grade components for unmatched efficiency and sound clarity.
- Illuminated logo and fully concealed mounting for a sleek and stylish amplifier setup.
5. Setup and Installation
Proper installation is crucial for the performance and longevity of your amplifier. It is highly recommended to have the amplifier installed by a qualified professional.
5.1 Mounting
The HX1600.1D features fully concealed mounting for a clean installation. Choose a mounting location that provides adequate ventilation and is protected from moisture and excessive heat. Ensure the surface is stable and secure.
5.2 Wiring Connections
Refer to the wiring diagram (not provided in this manual, consult a professional or detailed product sheet) for correct power, ground, remote turn-on, and speaker connections. Use appropriate gauge wiring for all connections to prevent power loss and ensure safety.
- Power Input: Connect to the vehicle's positive battery terminal via a fuse or circuit breaker.
- Ground: Connect to a clean, unpainted metal surface of the vehicle chassis.
- Remote Turn-On: Connect to the head unit's remote output.
- Speaker Output: Connect to your subwoofer(s). Ensure correct polarity and impedance matching (1Ω stable).
6. Operating Instructions
Once installed, the amplifier requires proper configuration for optimal audio performance.
6.1 Initial Power-Up
After all connections are made, turn on your head unit. The amplifier's illuminated logo should light up, indicating it is powered on. If not, recheck all connections, especially the remote turn-on wire.
6.2 Adjusting Controls
The HX1600.1D features top-mounted controls for convenient adjustment. These include:
- Gain Control: Adjust this to match the output voltage of your head unit. Start low and gradually increase until the output clip indicator illuminates, then back off slightly.
- Low-Pass Filter (LPF): A fully variable crossover allows you to set the upper frequency limit for the subwoofer. Typically set between 50Hz and 120Hz.
- Subsonic Filter: Filters out extremely low frequencies that are below the audible range and can damage subwoofers.
- Phase Control: Adjusts the phase of the subwoofer output relative to the main speakers (0-180 degrees) to ensure proper bass integration.
- Output Clip Indicators: These indicators provide precise feedback for setting the gain, helping to prevent distortion and protect your speakers.
Adjust these settings incrementally and listen carefully to the sound output to achieve the desired audio balance and clarity.
7. Maintenance
To ensure the longevity and optimal performance of your Diamond Audio HX1600.1D amplifier, follow these simple maintenance guidelines:
- Cleaning: Periodically wipe the amplifier's exterior with a soft, dry cloth. Avoid using harsh chemicals or abrasive cleaners.
- Ventilation: Ensure that the amplifier's heat sink and ventilation areas are free from obstructions. Proper airflow is essential for thermal performance.
- Connections: Occasionally check all wiring connections to ensure they are secure and free from corrosion. Loose connections can lead to poor performance or damage.
- Environment: Protect the amplifier from direct sunlight, excessive heat, and moisture.
8. Troubleshooting
If you encounter issues with your amplifier, refer to the following common problems and solutions:
| Problem | Possible Cause | Solution |
|---|---|---|
| No Power / Amplifier Not Turning On | Blown fuse; loose power/ground/remote wire; faulty remote turn-on signal. | Check and replace fuse; verify all power, ground, and remote connections are secure and correctly wired. |
| No Sound Output | Loose RCA cables; incorrect gain setting; speaker wires disconnected; amplifier in protect mode. | Ensure RCA cables are firmly connected; adjust gain; check speaker wire connections; if in protect mode, check for short circuits or overheating. |
| Distorted Sound | Gain set too high; incorrect crossover settings; poor ground connection; damaged speaker. | Lower gain setting; adjust LPF/subsonic filters; verify ground connection; inspect speakers for damage. |
| Amplifier Overheating | Insufficient ventilation; impedance too low; prolonged high-volume operation. | Ensure proper airflow around the amplifier; verify speaker impedance matches amplifier's capabilities; reduce volume or allow cooling time. |
If the problem persists after attempting these solutions, contact Diamond Audio customer support or a qualified car audio technician.
9. Specifications
The following are the technical specifications for the Diamond Audio HX1600.1D Monoblock Amplifier:
- Power Output (RMS):
- 700 W x 1 @ 4Ω
- 1150 W x 1 @ 2Ω
- 1600 W x 1 @ 1Ω
- Signal-to-Noise Ratio (S/N): ≥ 95 dBA
- Total Harmonic Distortion (THD): 0.06%
- Dimensions (L x W x H): 15.8" x 7.67" x 2" (402 x 195 x 51.5 mm) (Remote Included)
- Heat Sink: Anodized Extruded Aluminum
- PCB Board: 4-Layer with Balanced Differential Inputs
- Chipset: Full Range Class D IR
- Components: "SNAP" Capacitors, Audiophile Grade High Tolerance
- FET Clips: Spring Steel
- Controls: Fine Tuned Fully Variable Crossovers and Phase Control, Top Mounted
- Indicators: Output Clip Indicators
- Mounting Type: Surface Mount
- Number of Channels: 1
- Item Weight: 12 Pounds
10. Warranty and Support
Diamond Audio products are manufactured to the highest quality standards. For warranty information, please refer to the warranty card included with your product or visit the official Diamond Audio website. Keep your proof of purchase for any warranty claims.
For technical support, troubleshooting assistance, or to inquire about service, please contact Diamond Audio customer service. You can find contact information on the official Diamond Audio website or through your authorized dealer.
Official Website: While a direct link isn't provided, you can typically find support information by searching for "Diamond Audio official website".
Ask a question about this manual
Ask about setup, troubleshooting, compatibility, parts, safety, or missing instructions. Manuals+ will review the question and use this page’s manual context to help answer it.