
CCH YPLA-08C
CCH YPLA-08C Portable Air Conditioner User Manual
Model: YPLA-08C
1. Introduction
Thank you for choosing the CCH YPLA-08C Portable Air Conditioner. This unit is designed to provide efficient cooling and dehumidification for your indoor spaces. With its compact design and versatile features, it offers a comfortable environment in rooms up to 250 sq. ft., with partial cooling for areas up to 350 sq. ft.
Please read this manual thoroughly before operating your new air conditioner to ensure proper use, maintenance, and safety.
2. Safety Information
To prevent injury to the user or other people and property damage, the following instructions must be followed. Incorrect operation due to ignoring instructions may cause harm or damage.
- Power Supply: Ensure the unit is connected to a properly grounded electrical outlet with the correct voltage (120 Volts). Do not use extension cords or adapter plugs.
- Placement: Place the unit on a flat, stable surface. Maintain at least 12 inches of clearance from walls or other objects to ensure proper airflow.
- Ventilation: The exhaust hose must be properly installed and vented to the outside to expel hot air. Do not block the air intake or exhaust vents.
- Water Drainage: When operating in dehumidifier mode or in high humidity, the unit will collect water. Ensure the drainage port is accessible for emptying or continuous drainage.
- Cleaning: Always unplug the unit before cleaning or performing any maintenance. Use a soft, damp cloth for cleaning the exterior.
- Children and Pets: Keep children and pets away from the unit during operation.
- Moving the Unit: Before moving the unit, ensure all water is drained and the power cord is disconnected. The unit weighs approximately 47 lbs and is equipped with casters for easy movement.
3. Package Contents
Carefully unpack your portable air conditioner and check that all items are present and in good condition:
- CCH YPLA-08C Portable Air Conditioner Unit
- Exhaust Hose
- Window Venting Kit
- Remote Control
- User Manual (this document)
4. Product Overview
Familiarize yourself with the main components of your CCH YPLA-08C Portable Air Conditioner.
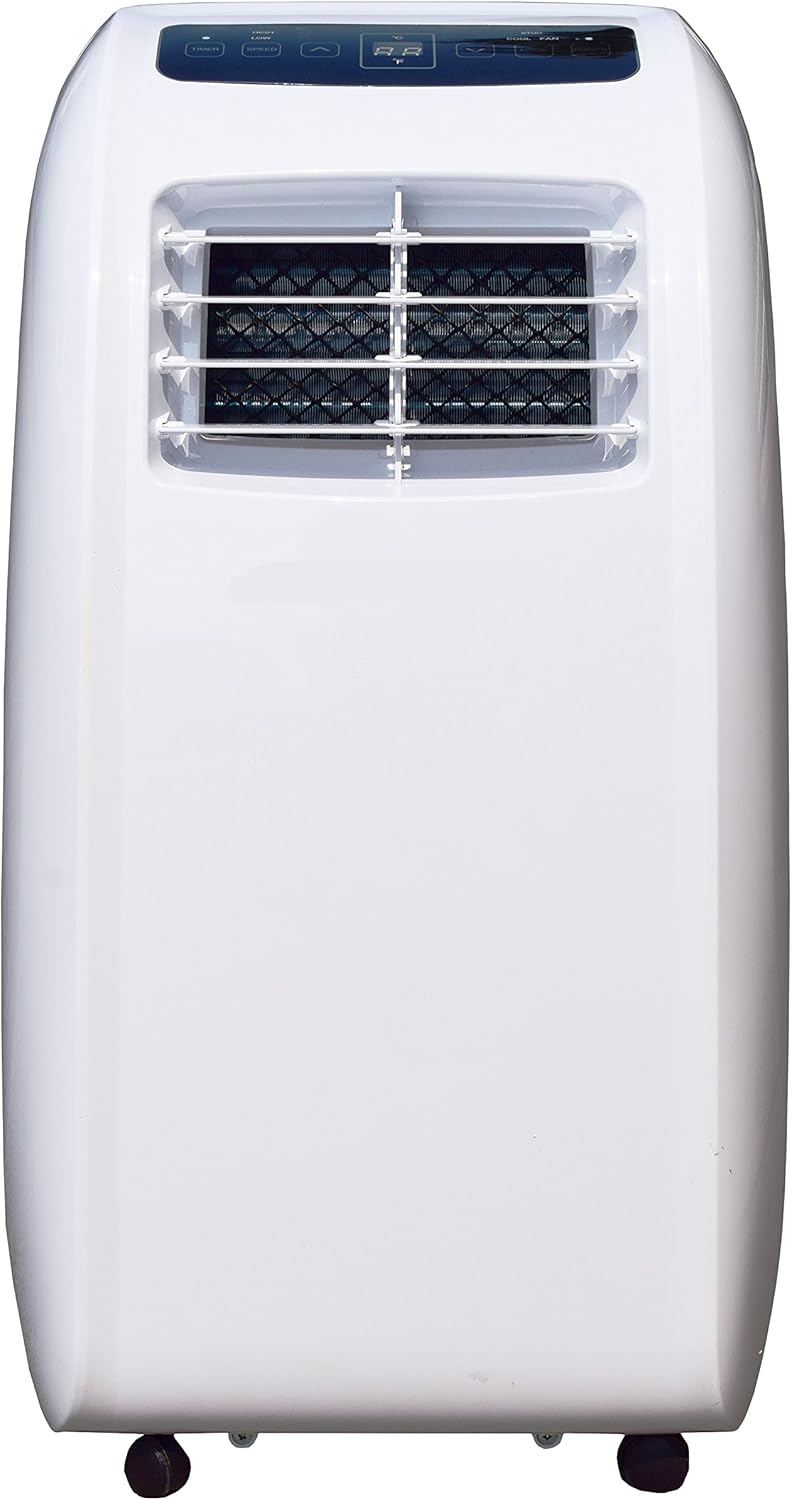
Figure 4.1: Front View of the Portable Air Conditioner. This image displays the main body of the unit, highlighting the front air outlet grille and the integrated control panel located on the top surface.
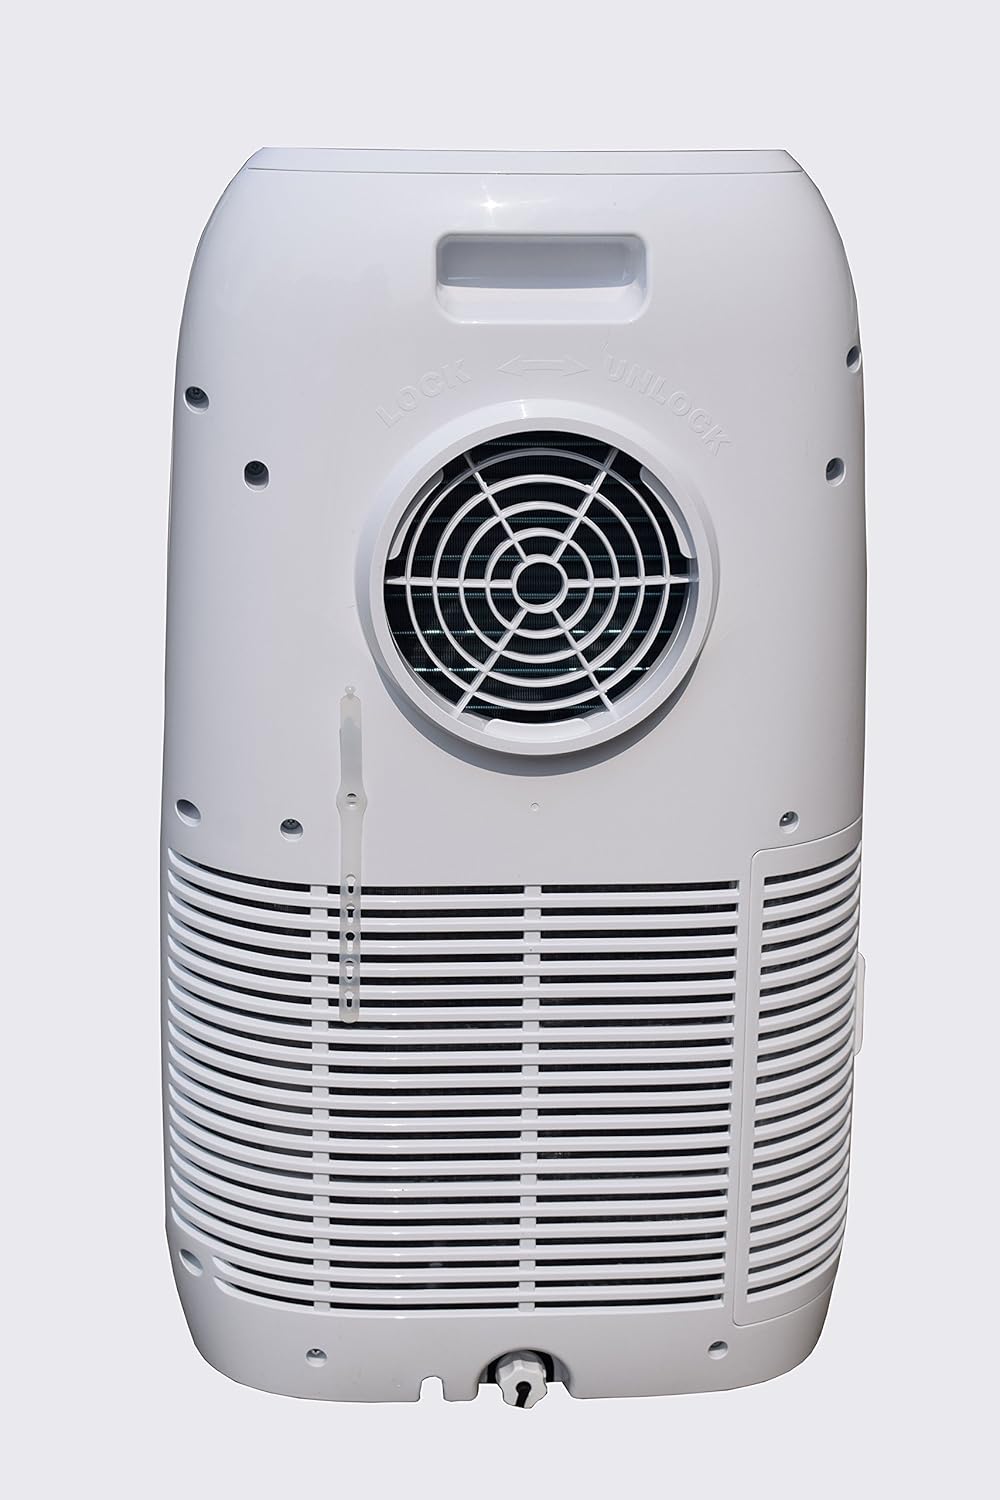
Figure 4.2: Rear View of the Portable Air Conditioner. This image shows the back of the unit, featuring the circular exhaust port for the hose connection and the lower air intake grille.

Figure 4.3: Side View of the Portable Air Conditioner. This image provides a profile view of the unit, illustrating its compact dimensions and the side vents.

Figure 4.4: Angled View of the Portable Air Conditioner. This perspective shows the unit from a slight angle, giving a better sense of its overall shape and the placement of the control panel and front grille.

Figure 4.5: Control Panel. A detailed view of the top-mounted control panel, displaying the digital temperature display and various function buttons including Timer, Speed, Mode, Power, and temperature adjustment arrows.
Control Panel Features:
- Digital Display: Shows current temperature or timer settings.
- Power Button: Turns the unit On or Off.
- Mode Button: Cycles through operating modes: Cool, Fan, Dry (Dehumidifier).
- Speed Button: Adjusts fan speed (Low, High).
- Timer Button: Sets the auto-on or auto-off timer (up to 24 hours).
- Temperature Adjustment Buttons (Up/Down Arrows): Adjusts the desired temperature in Cool mode.
5. Setup and Installation
Proper installation is crucial for the efficient operation of your portable air conditioner.
5.1 Choosing a Location:
- Place the unit on a flat, level surface near a window.
- Ensure there is at least 12 inches of space around the unit for proper air circulation.
- The unit should be within reach of a grounded electrical outlet.
5.2 Exhaust Hose Installation:
- Attach one end of the exhaust hose to the exhaust port on the back of the air conditioner unit. Twist or snap into place as per the design.
- Assemble the window venting kit according to its specific instructions to fit your window opening.
- Connect the other end of the exhaust hose to the adapter on the window venting kit.
- Secure the window kit in the open window, ensuring a tight seal to prevent hot air from entering the room.
Note: For optimal performance, keep the exhaust hose as short and straight as possible. Avoid sharp bends or kinks, as this can reduce efficiency and potentially cause the unit to overheat.
6. Operating Instructions
Your CCH YPLA-08C Portable Air Conditioner can be operated using the control panel on the unit or the included remote control.
6.1 Basic Operation:
- Plug the unit into a grounded 120V electrical outlet.
- Press the POWER button to turn the unit on. The display will light up.
- Press the MODE button to select your desired operating mode:
- Cool Mode: For cooling the room. Use the Up/Down arrows to set the desired temperature.
- Fan Mode: Circulates air without cooling.
- Dry Mode (Dehumidifier): Removes moisture from the air. The fan speed will be fixed in this mode.
- In Cool or Fan mode, press the SPEED button to select fan speed: Low or High.
- To turn the unit off, press the POWER button again.
6.2 Timer Function:
The timer function allows you to set the unit to automatically turn on or off after a set period (1-24 hours).
- Auto-Off: While the unit is running, press the TIMER button. Use the Up/Down arrows to set the desired number of hours until the unit turns off.
- Auto-On: While the unit is off, press the TIMER button. Use the Up/Down arrows to set the desired number of hours until the unit turns on.
- To cancel the timer, press the TIMER button again until the timer setting disappears or set it to "00".
6.3 Sleep Mode:
The Sleep mode is designed for comfortable overnight operation. When activated, the unit will gradually increase the set temperature by 1°F after 30 minutes, and then by another 1°F after another 30 minutes. This helps save energy while maintaining comfort. The fan speed will automatically adjust to low.
To activate Sleep Mode, press the SLEEP button (if available on your remote/panel, otherwise it might be integrated with other modes or automatic). To exit, press any button or the SLEEP button again.
7. Maintenance
Regular maintenance ensures optimal performance and extends the lifespan of your air conditioner.
7.1 Air Filter Cleaning:
The air filter should be cleaned every two weeks or more frequently depending on usage and air quality.
- Unplug the air conditioner from the power outlet.
- Locate the air filter panel (usually at the back or side of the unit).
- Remove the filter. It is washable and reusable.
- Wash the filter under running water (warm, soapy water if very dirty).
- Allow the filter to air dry completely before reinstalling. Do not expose to direct sunlight or high heat.
- Reinsert the dry filter into the unit and close the panel.
7.2 Water Drainage:
The unit has an internal water collection tank for dehumidification. When the tank is full, the unit will stop operating and an indicator light (e.g., "Full" or "Water") may illuminate.
- Unplug the unit.
- Place a shallow pan or tray under the drainage port at the bottom rear of the unit.
- Remove the drain plug/cap. Allow all collected water to drain out.
- Once drained, replace the drain plug/cap securely.
- Plug the unit back in and resume operation.
For continuous drainage in high humidity environments, you can connect a standard garden hose (not included) to the continuous drainage port and route it to a floor drain or bucket.
7.3 Storage:
When storing the unit for an extended period:
- Drain all accumulated water from the unit.
- Clean the air filter.
- Run the unit in Fan mode for a few hours to dry the internal components.
- Unplug the power cord and coil it neatly.
- Store the unit in a cool, dry place, preferably in its original packaging, to protect it from dust and damage.
8. Troubleshooting
Before contacting customer support, please refer to the following table for common issues and their solutions.
| Problem | Possible Cause | Solution |
|---|---|---|
| Unit does not turn on. | No power; Power cord not plugged in; Circuit breaker tripped; Water tank full. | Check power outlet; Plug in power cord securely; Reset circuit breaker; Drain water tank. |
| Unit does not cool. | Air filter dirty; Exhaust hose not properly installed/blocked; Room too large; Doors/windows open; Temperature setting too high. | Clean air filter; Ensure exhaust hose is properly vented and not kinked; Close doors/windows; Lower set temperature. |
| Unit is noisy. | Unit not on a level surface; Air filter dirty; Internal components vibrating. | Place unit on a flat, stable surface; Clean air filter. Some operational noise is normal. |
| Water leaks from unit. | Drain plug not securely closed; Unit tilted; Continuous drain hose blocked. | Ensure drain plug is tight; Place unit on level surface; Check continuous drain hose for blockages. |
9. Specifications
| Feature | Detail |
|---|---|
| Model Name | YPLA-08C |
| Brand | CCH |
| Cooling Power | 8,000 BTU |
| Recommended Room Size | Up to 250 sq. ft. (partially cools up to 350 sq. ft.) |
| Dehumidification Capacity | Up to 2.0 pints per hour |
| Product Dimensions (W x D x H) | 13.3 x 27.8 x 12 inches |
| Item Weight | 47 pounds |
| Voltage | 120 Volts |
| Refrigerant | R 410A |
| Fan Speeds | 2 (Low, High) |
| Timer | 24-hour programmable |
| Included Components | 6' cord, Remote Control |
10. Warranty and Support
For warranty information or technical support, please refer to the warranty card included with your product or contact CCH customer service directly. Keep your purchase receipt as proof of purchase for any warranty claims.
For further assistance, please visit the official CCH website or contact their customer support line. Contact details are typically found in the product packaging or on the manufacturer's website.
Related documentsYPLA-08C


Ask a question about this manual
Ask about setup, troubleshooting, compatibility, parts, safety, or missing instructions. Manuals+ will review the question and use this page’s manual context to help answer it.