1. Introduction
This manual provides essential information for the safe and efficient operation of your ACOVA Taiga ACATAKE200121CF electric fluid-filled radiator. Please read these instructions carefully before installation and use, and retain them for future reference. This radiator features a curved design, aluminum construction, digital regulation, and advanced functions for optimized heating.

Figure 1: Front view of the ACOVA Taiga electric fluid-filled radiator.
2. Safety Information
- Ensure the power supply voltage matches the rating label on the appliance.
- Do not cover the radiator, as this can cause overheating and fire hazards.
- Keep flammable materials away from the radiator.
- This appliance is not intended for use by persons (including children) with reduced physical, sensory, or mental capabilities, or lack of experience and knowledge, unless they have been given supervision or instruction concerning use of the appliance by a person responsible for their safety.
- Children should be supervised to ensure that they do not play with the appliance.
- If the supply cord is damaged, it must be replaced by the manufacturer, its service agent, or similarly qualified persons to avoid a hazard.
- Do not operate the radiator with a damaged cord or plug, or after the appliance malfunctions or has been dropped or damaged in any manner.
- Always disconnect the radiator from the power supply before cleaning or maintenance.
3. Package Contents
Upon unpacking, please verify that the following components are present:
- ACOVA Taiga Electric Fluid-Filled Radiator (Model: ACATAKE200121CF)
- Wall mounting bracket (H-fixation system)
- Installation hardware (screws, wall plugs)
- User Manual (this document)
If any components are missing or damaged, please contact ACOVA customer service.
4. Setup and Installation
The ACOVA Taiga radiator is designed for easy installation using its integrated H-fixation system. Professional installation is recommended for optimal safety and performance.
4.1 Wall Mounting
- Choose Location: Select a suitable wall location, ensuring adequate clearance from furniture, curtains, and other obstructions. Avoid placing directly under electrical outlets.
- Mark Drilling Points: Use the H-fixation bracket as a template to mark the drilling points on the wall. The integrated level on the bracket assists in ensuring a straight installation.
- Drill Holes: Drill holes at the marked points using an appropriate drill bit for your wall type. Insert wall plugs.
- Attach Bracket: Securely fasten the H-fixation bracket to the wall using the provided screws.
- Mount Radiator: Carefully lift the radiator and hook it onto the H-fixation bracket. Ensure it is securely seated and stable.
4.2 Electrical Connection
- Ensure the main power supply is switched off before making any electrical connections.
- Connect the radiator's power cable to a suitable electrical outlet or a dedicated circuit, following local electrical codes.
- Once connected, switch on the main power supply.
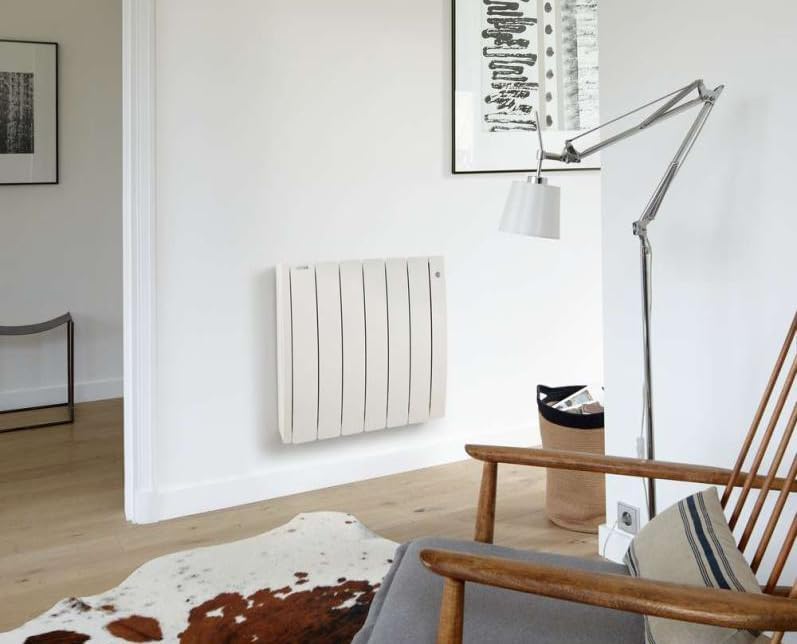
Figure 2: Example of the ACOVA Taiga radiator installed in a room.
5. Operating Instructions
Your ACOVA Taiga radiator features digital controls and smart functions for precise temperature management and energy efficiency.
5.1 Control Panel Overview

Figure 3: Digital control panel.
The digital control panel, located on the side of the radiator, allows you to adjust settings. It typically includes a display for temperature, mode indicators, and buttons for navigation and adjustment.
5.2 Basic Operation
- Power On/Off: Press the power button (usually marked with a circle and a vertical line) to turn the radiator on or off.
- Set Temperature: Use the '+' and '-' buttons to adjust the desired room temperature. The display will show the set temperature.
- Mode Selection: Press the 'Mode' button to cycle through available operating modes (e.g., Comfort, Eco, Frost Protection, Program). Refer to the on-screen icons for specific mode indications.
5.3 Advanced Features
- Smartphone App Configuration: The radiator supports configuration via a smartphone application for more efficient use and personalized programming. Download the official ACOVA app from your device's app store and follow the in-app instructions for pairing and control.
- User Programs: Create and customize your own heating programs to match your schedule and preferences. This feature is accessible via the control panel or the smartphone app.
- Window Open Detection: The radiator can detect open windows and automatically reduce heating to save energy.
- Presence Detection: This feature helps optimize heating by adjusting output based on room occupancy, further enhancing energy savings.
6. Maintenance
Regular maintenance ensures the longevity and efficient operation of your radiator.
- Cleaning: Before cleaning, ensure the radiator is switched off and disconnected from the power supply. Allow it to cool completely. Wipe the exterior surfaces with a soft, damp cloth. Do not use abrasive cleaners, solvents, or harsh chemicals, as these can damage the finish.
- Dust Removal: Periodically remove dust from the radiator fins and vents using a soft brush or vacuum cleaner with a brush attachment. This helps maintain heating efficiency.
- Inspection: Regularly inspect the power cord and plug for any signs of damage. If damage is found, contact qualified service personnel for repair.
7. Troubleshooting
If you encounter issues with your radiator, refer to the following common problems and solutions:
| Problem | Possible Cause | Solution |
|---|---|---|
| Radiator does not turn on. | No power supply; power button not pressed; circuit breaker tripped. | Check if the radiator is plugged in and the outlet has power. Press the power button. Check your home's circuit breaker. |
| Radiator is on but not heating. | Temperature setting too low; mode set to Frost Protection or Eco; window open detection activated. | Increase the set temperature. Change the operating mode to Comfort. Close any open windows. |
| Unusual noises from the radiator. | Expansion/contraction of materials; air in the fluid (unlikely for sealed electric units). | Minor clicking or creaking sounds are normal during heating and cooling. If noises are loud or persistent, contact customer service. |
| Digital display not working. | Power issue; internal fault. | Ensure power supply. Try resetting the radiator by unplugging it for a few minutes and plugging it back in. If the problem persists, contact customer service. |
For issues not listed here or if solutions do not resolve the problem, please contact ACOVA customer support.
8. Specifications
| Feature | Detail |
|---|---|
| Model Number | ACATAKE200121CF |
| Type | Electric Fluid-Filled Radiator |
| Power Source | Electrical |
| Power Output | 2000 Watts |
| Material | Cast Aluminum |
| Color | White (Ral 9010) |
| Dimensions (L x W x H) | 1 x 1 x 1 cm |
| Weight | 28.7 kg |
| Control | Digital Regulation, Smartphone App Compatible |
| Origin | Made in France |
9. Warranty and Support
ACOVA products are known for their quality and durability. Your ACOVA Taiga radiator comes with a manufacturer's warranty, reflecting the brand's commitment to lasting performance.
- Warranty Information: For detailed information regarding the warranty period and terms, please refer to the warranty card included with your product or visit the official ACOVA website.
- Customer Service: ACOVA customer service is available to assist you with any questions, technical support, or service requests. Please have your model number (ACATAKE200121CF) and purchase date ready when contacting support.
Contact details for customer service can typically be found on the ACOVA website or in the product packaging.