Introduction
This manual provides detailed instructions for the safe and proper installation, operation, and maintenance of your Omega 4-Tier Adjustable Wall Mount Shelving Kit. Please read all instructions carefully before assembly and use. Retain this manual for future reference.

Image: Fully assembled Omega 4-Tier Adjustable Wall Mount Shelving Unit, showcasing its four shelves and wall-mounting design.
Safety Information
Always prioritize safety during installation and use. Failure to follow these instructions may result in injury or damage to the product or property.
- Ensure the wall structure is capable of supporting the shelving unit and its intended load. The load capacity is between 100-600 lbs, depending on wall construction and anchors used.
- Use appropriate wall anchors for your specific wall type (e.g., wood studs, concrete, drywall). Consult a professional if unsure.
- Do not overload shelves. Distribute weight evenly.
- Wear appropriate safety gear, such as gloves and eye protection, during installation.
- Keep children and pets away from the work area during assembly.
- Periodically check all connections and fasteners to ensure they remain tight and secure.
Package Contents
Verify that all components are present before beginning assembly. If any parts are missing or damaged, contact customer support.
- Vertical Wall Posts (Quantity: Varies by configuration)
- Wire Shelves (Quantity: 4)
- Shelf Brackets (Quantity: 8, two per shelf)
- Mounting Hardware (Screws, wall anchors - specific type may vary)
- Instruction Manual (This document)
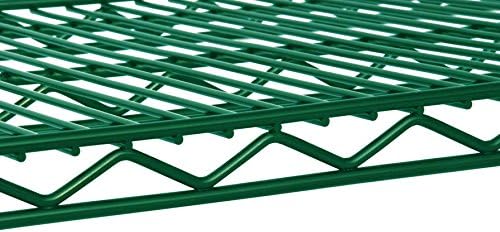
Image: Close-up view of the green wire shelf, showing its sturdy construction and grid pattern.

Image: A green shelf bracket securely attached to a vertical wall post, illustrating the mounting mechanism.
Specifications
| Feature | Detail |
|---|---|
| Product Dimensions | 21"D x 54"W x 54"H |
| Number of Shelves | 4 |
| Material | Metal |
| Installation Type | Wall Mount |
| Load Capacity | 100-600 lbs (varies by wall construction and anchors) |
| Shelf Adjustment | Every 1 inch |
| Certifications | NSF Certified |
| Item Weight | 81 Pounds |
Setup and Installation
Follow these steps carefully to install your shelving unit.
- Plan Placement: Choose a suitable location on a sturdy wall. Consider the weight of items you plan to store and ensure the wall can support it. Mark the desired height for the top of your vertical posts.
- Mount Vertical Posts:
- Align the vertical posts against the wall at your marked locations. Ensure they are level and plumb.
- Mark the drilling points through the mounting holes on the posts.
- Drill pilot holes using an appropriate drill bit for your wall type.
- Insert wall anchors if required for your wall type (e.g., drywall).
- Securely fasten the vertical posts to the wall using the provided screws or suitable heavy-duty fasteners.

Image: A close-up of the vertical post, showing the incremental markings for precise shelf height adjustment.
- Attach Shelf Brackets:
- Determine the desired height for your first shelf. The posts have markings every 1 inch for precise adjustment.
- Hook the shelf brackets onto the vertical posts at the chosen height. Ensure both brackets for a single shelf are at the same height and securely seated.
- Repeat for all four shelves.

Image: Side view of a shelf bracket, highlighting its design for hooking onto the vertical posts.
- Place Shelves:
- Carefully place each wire shelf onto its corresponding brackets. Ensure the shelf is fully seated and stable on both brackets.
- Final Check: Before loading, gently test the stability of the entire unit. Ensure all posts are firmly attached to the wall and all shelves are securely resting on their brackets.
Operation (Shelf Adjustment)
The Omega shelving unit allows for easy adjustment of shelf heights in 1-inch increments.
- Empty the Shelf: Remove all items from the shelf you wish to adjust.
- Remove Shelf: Carefully lift the wire shelf off its brackets.
- Adjust Brackets: Unhook the shelf brackets from the vertical posts. Re-hook them at the desired new height, ensuring they are level and at the same increment on both posts.
- Replace Shelf: Place the empty wire shelf back onto the adjusted brackets, ensuring it is stable.
- Reload Shelf: You may now place items back onto the shelf, distributing weight evenly.

Image: The shelving unit with text highlighting that shelf height can be adjusted every 1 inch, demonstrating its flexibility.
Maintenance
Proper maintenance will ensure the longevity and continued performance of your shelving unit.
- Cleaning: Wipe the shelves and posts with a dry cloth to remove dust and debris. For stubborn dirt, a damp cloth with mild soap can be used, followed by thorough drying. Avoid abrasive cleaners or harsh chemicals.
- Inspection: Periodically inspect all mounting points and shelf connections for any signs of loosening or wear. Tighten screws as necessary.
- Load Management: Always adhere to the recommended load capacity. Overloading can compromise the structural integrity of the unit.
Troubleshooting
Refer to this section for common issues and their solutions.
| Problem | Possible Cause | Solution |
|---|---|---|
| Shelving unit feels unstable. | Loose wall mounts; unevenly distributed load; incorrect wall anchors. | Ensure all wall mounting screws are tight. Redistribute items evenly on shelves. Verify appropriate wall anchors were used for your wall type. |
| Shelf sags or bows. | Overloaded shelf; incorrect bracket placement. | Reduce the weight on the shelf. Ensure brackets are correctly seated and supporting the shelf evenly. |
| Difficulty adjusting shelf height. | Shelf is loaded; brackets are stuck. | Always empty the shelf before attempting to adjust its height. Gently wiggle brackets to unhook if they are tight. |
Warranty and Support
For warranty information or technical support, please refer to the manufacturer's official website or contact Omega Products Corporation directly. Keep your purchase receipt as proof of purchase.
Manufacturer: Omega Products Corporation
Model: B06WLJ43FZ


