1. Introduction
This manual provides comprehensive instructions for the installation, operation, and maintenance of your MB Quart ZA2-1000.2 2-Channel Class SQ (Class A/B) Car Audio Amplifier. Please read this manual thoroughly before attempting installation or operation to ensure proper use and to prevent damage.
The ZA2-1000.2 is a full-range, bridgeable amplifier designed for high-quality car audio systems, featuring Q-Stasis Pre Amplifier Stage circuitry and adjustable high and low pass filters.
2. Safety Information
Always observe the following safety precautions during installation and operation:
- Disconnect the vehicle's negative battery terminal before starting any electrical work.
- Ensure all wiring is properly routed and secured to prevent pinching or damage.
- Use appropriate gauge wiring for power, ground, and speaker connections as specified.
- Mount the amplifier securely in a location that allows for adequate ventilation and is protected from moisture and excessive heat.
- Do not operate the amplifier if it is damaged or malfunctioning. Refer to the troubleshooting section or contact support.
- Avoid placing the amplifier in direct sunlight or near heat sources.
3. Setup and Installation
3.1 Mounting the Amplifier
The MB Quart ZA2-1000.2 amplifier is designed for surface mounting. Choose a secure location in your vehicle that provides sufficient airflow around the amplifier to prevent overheating. Avoid mounting it in enclosed spaces without ventilation.
3.2 Wiring Connections
Refer to the diagram below for proper wiring connections. Ensure all connections are tight and secure to prevent electrical shorts or poor performance.
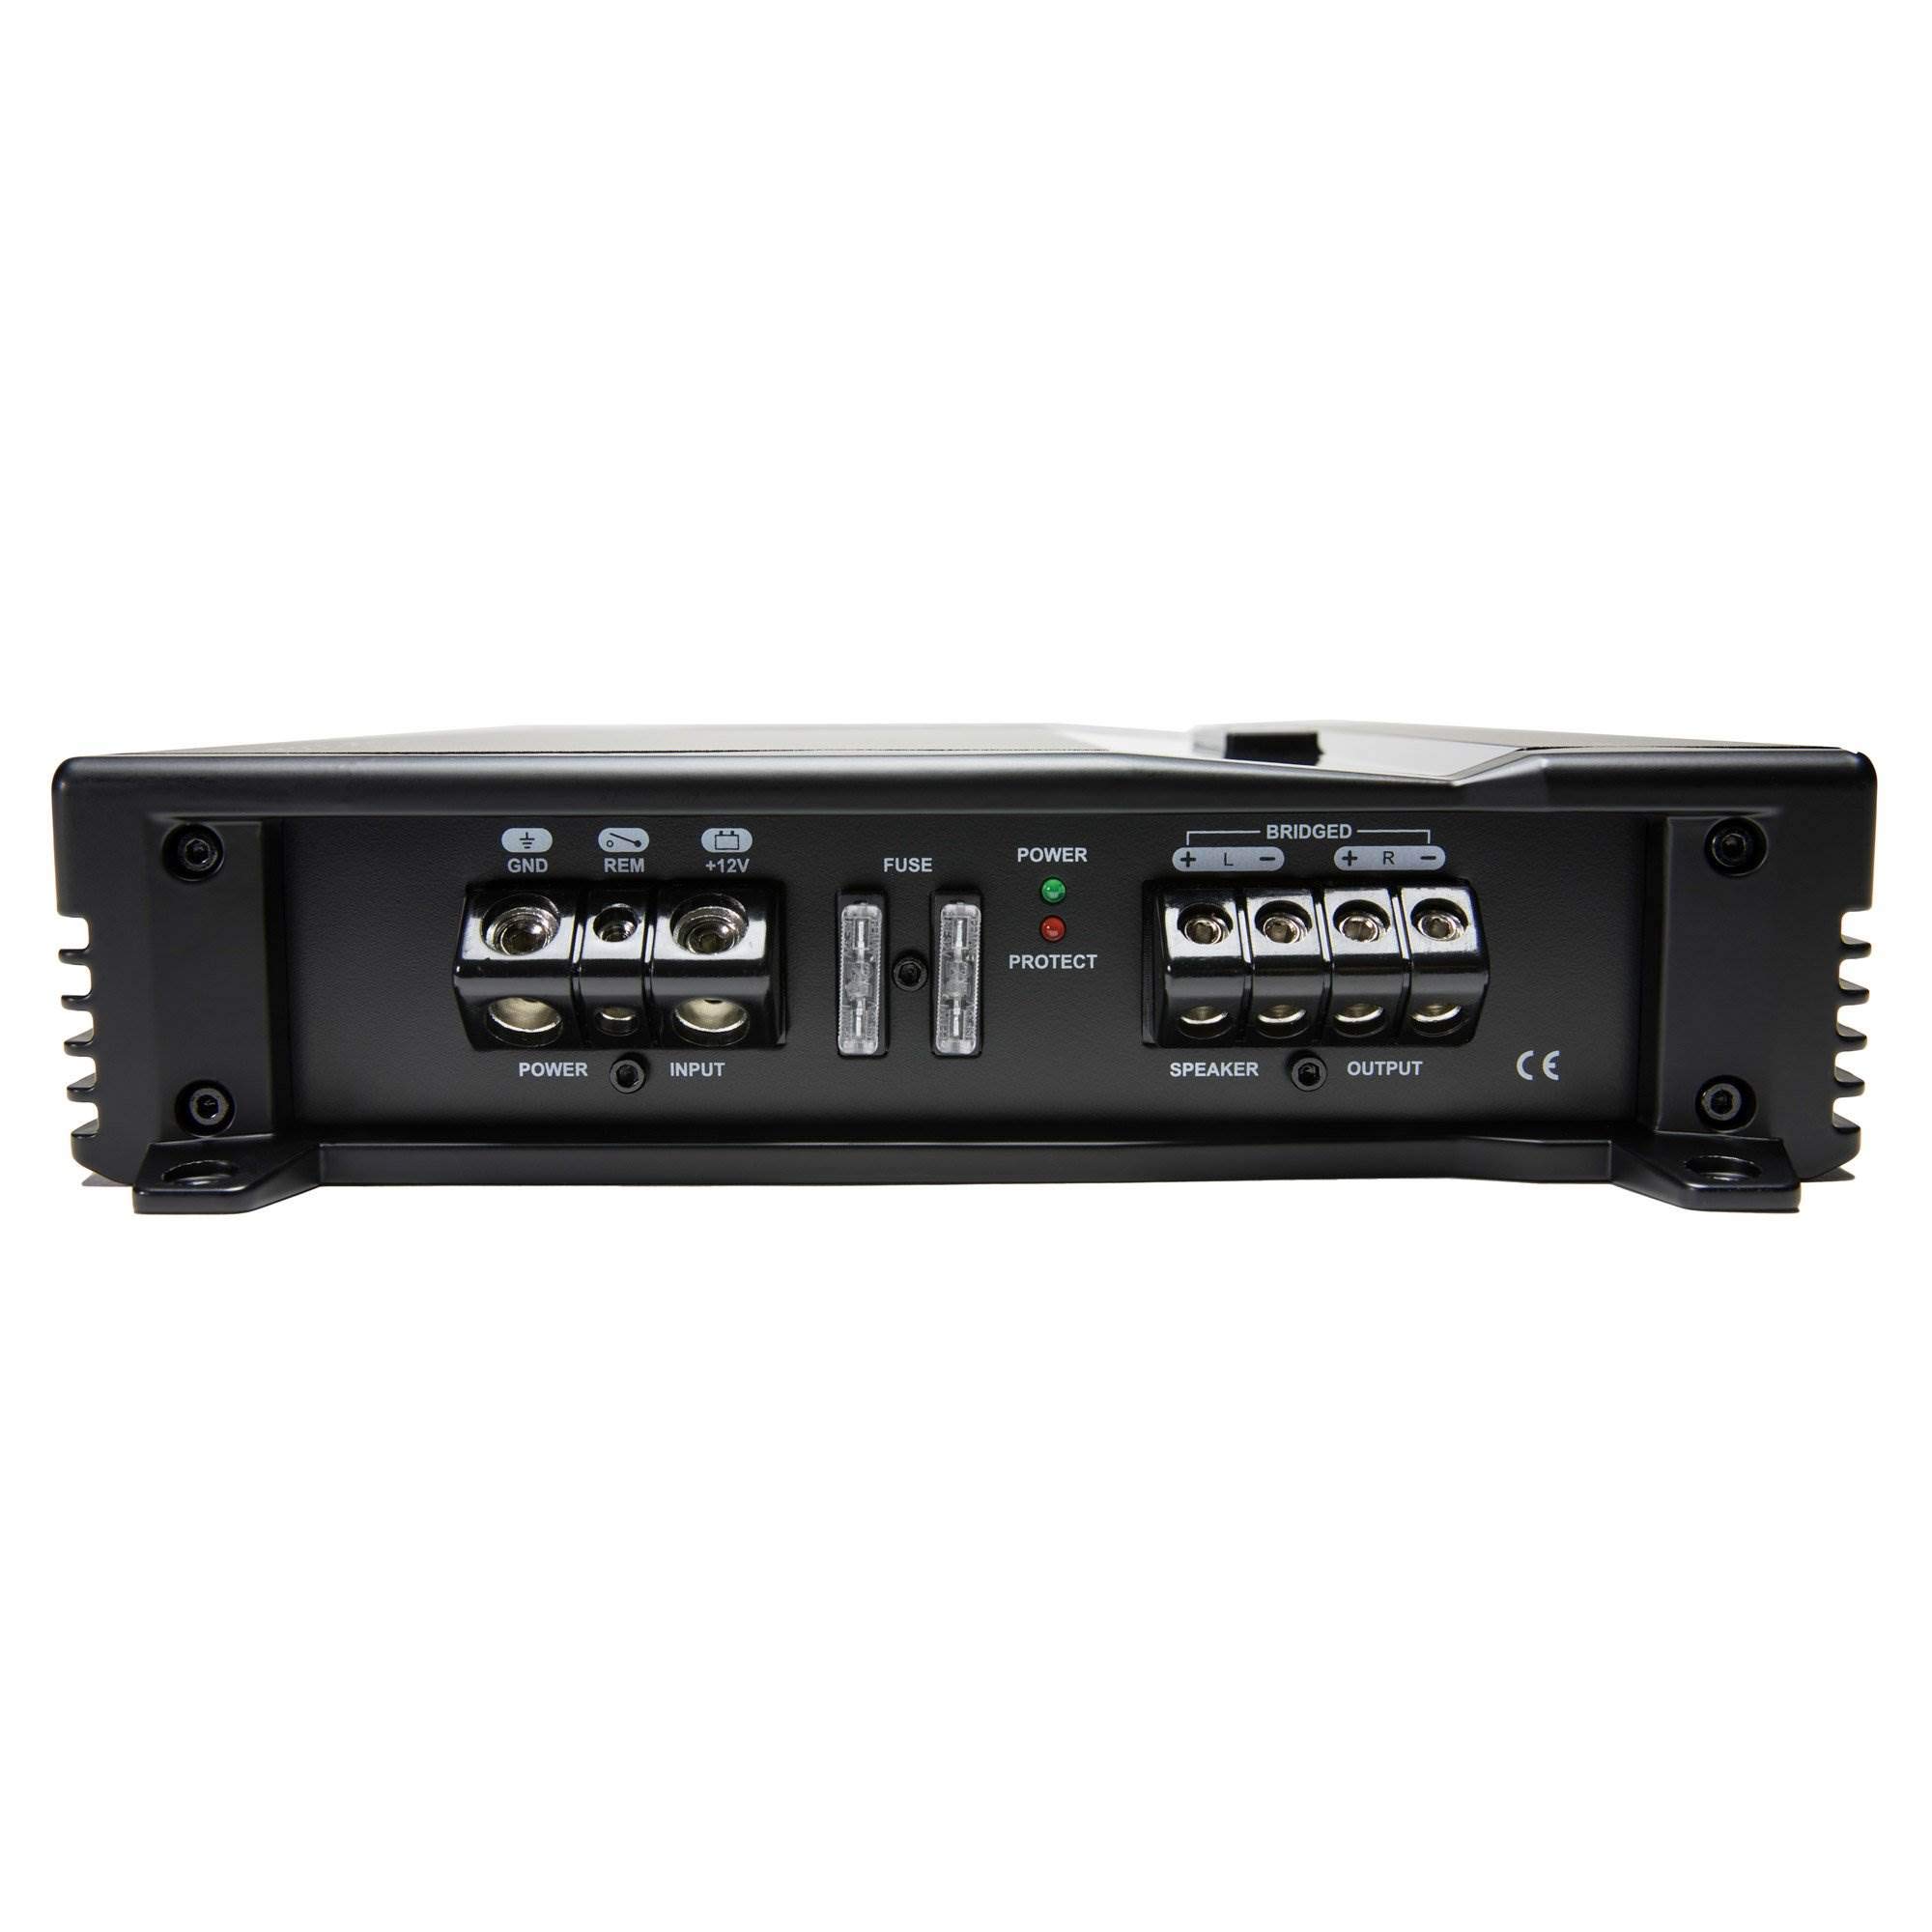
Figure 1: Power and Speaker Terminal Connections. This image displays the rear panel of the amplifier, highlighting the power input (GND, REM, +12V), fuse holders, and speaker output terminals (BRIDGED, +L, -L, +R, -R).
- Power (BATT +12V): Connect to the positive terminal of the vehicle's battery using 4 gauge wire. Install an appropriate fuse (20A x 1) within 18 inches of the battery.
- Ground (GND): Connect to a clean, unpainted metal surface of the vehicle chassis using 4 gauge wire. Ensure a solid electrical connection.
- Remote (REM): Connect to the remote turn-on lead from your head unit. This wire turns the amplifier on and off with your stereo.
- Speaker Outputs: Connect your speakers to the designated speaker terminals using 12 gauge wire. Observe correct polarity (+ to + and - to -). For bridged mono operation, refer to the "Operating Instructions" section.
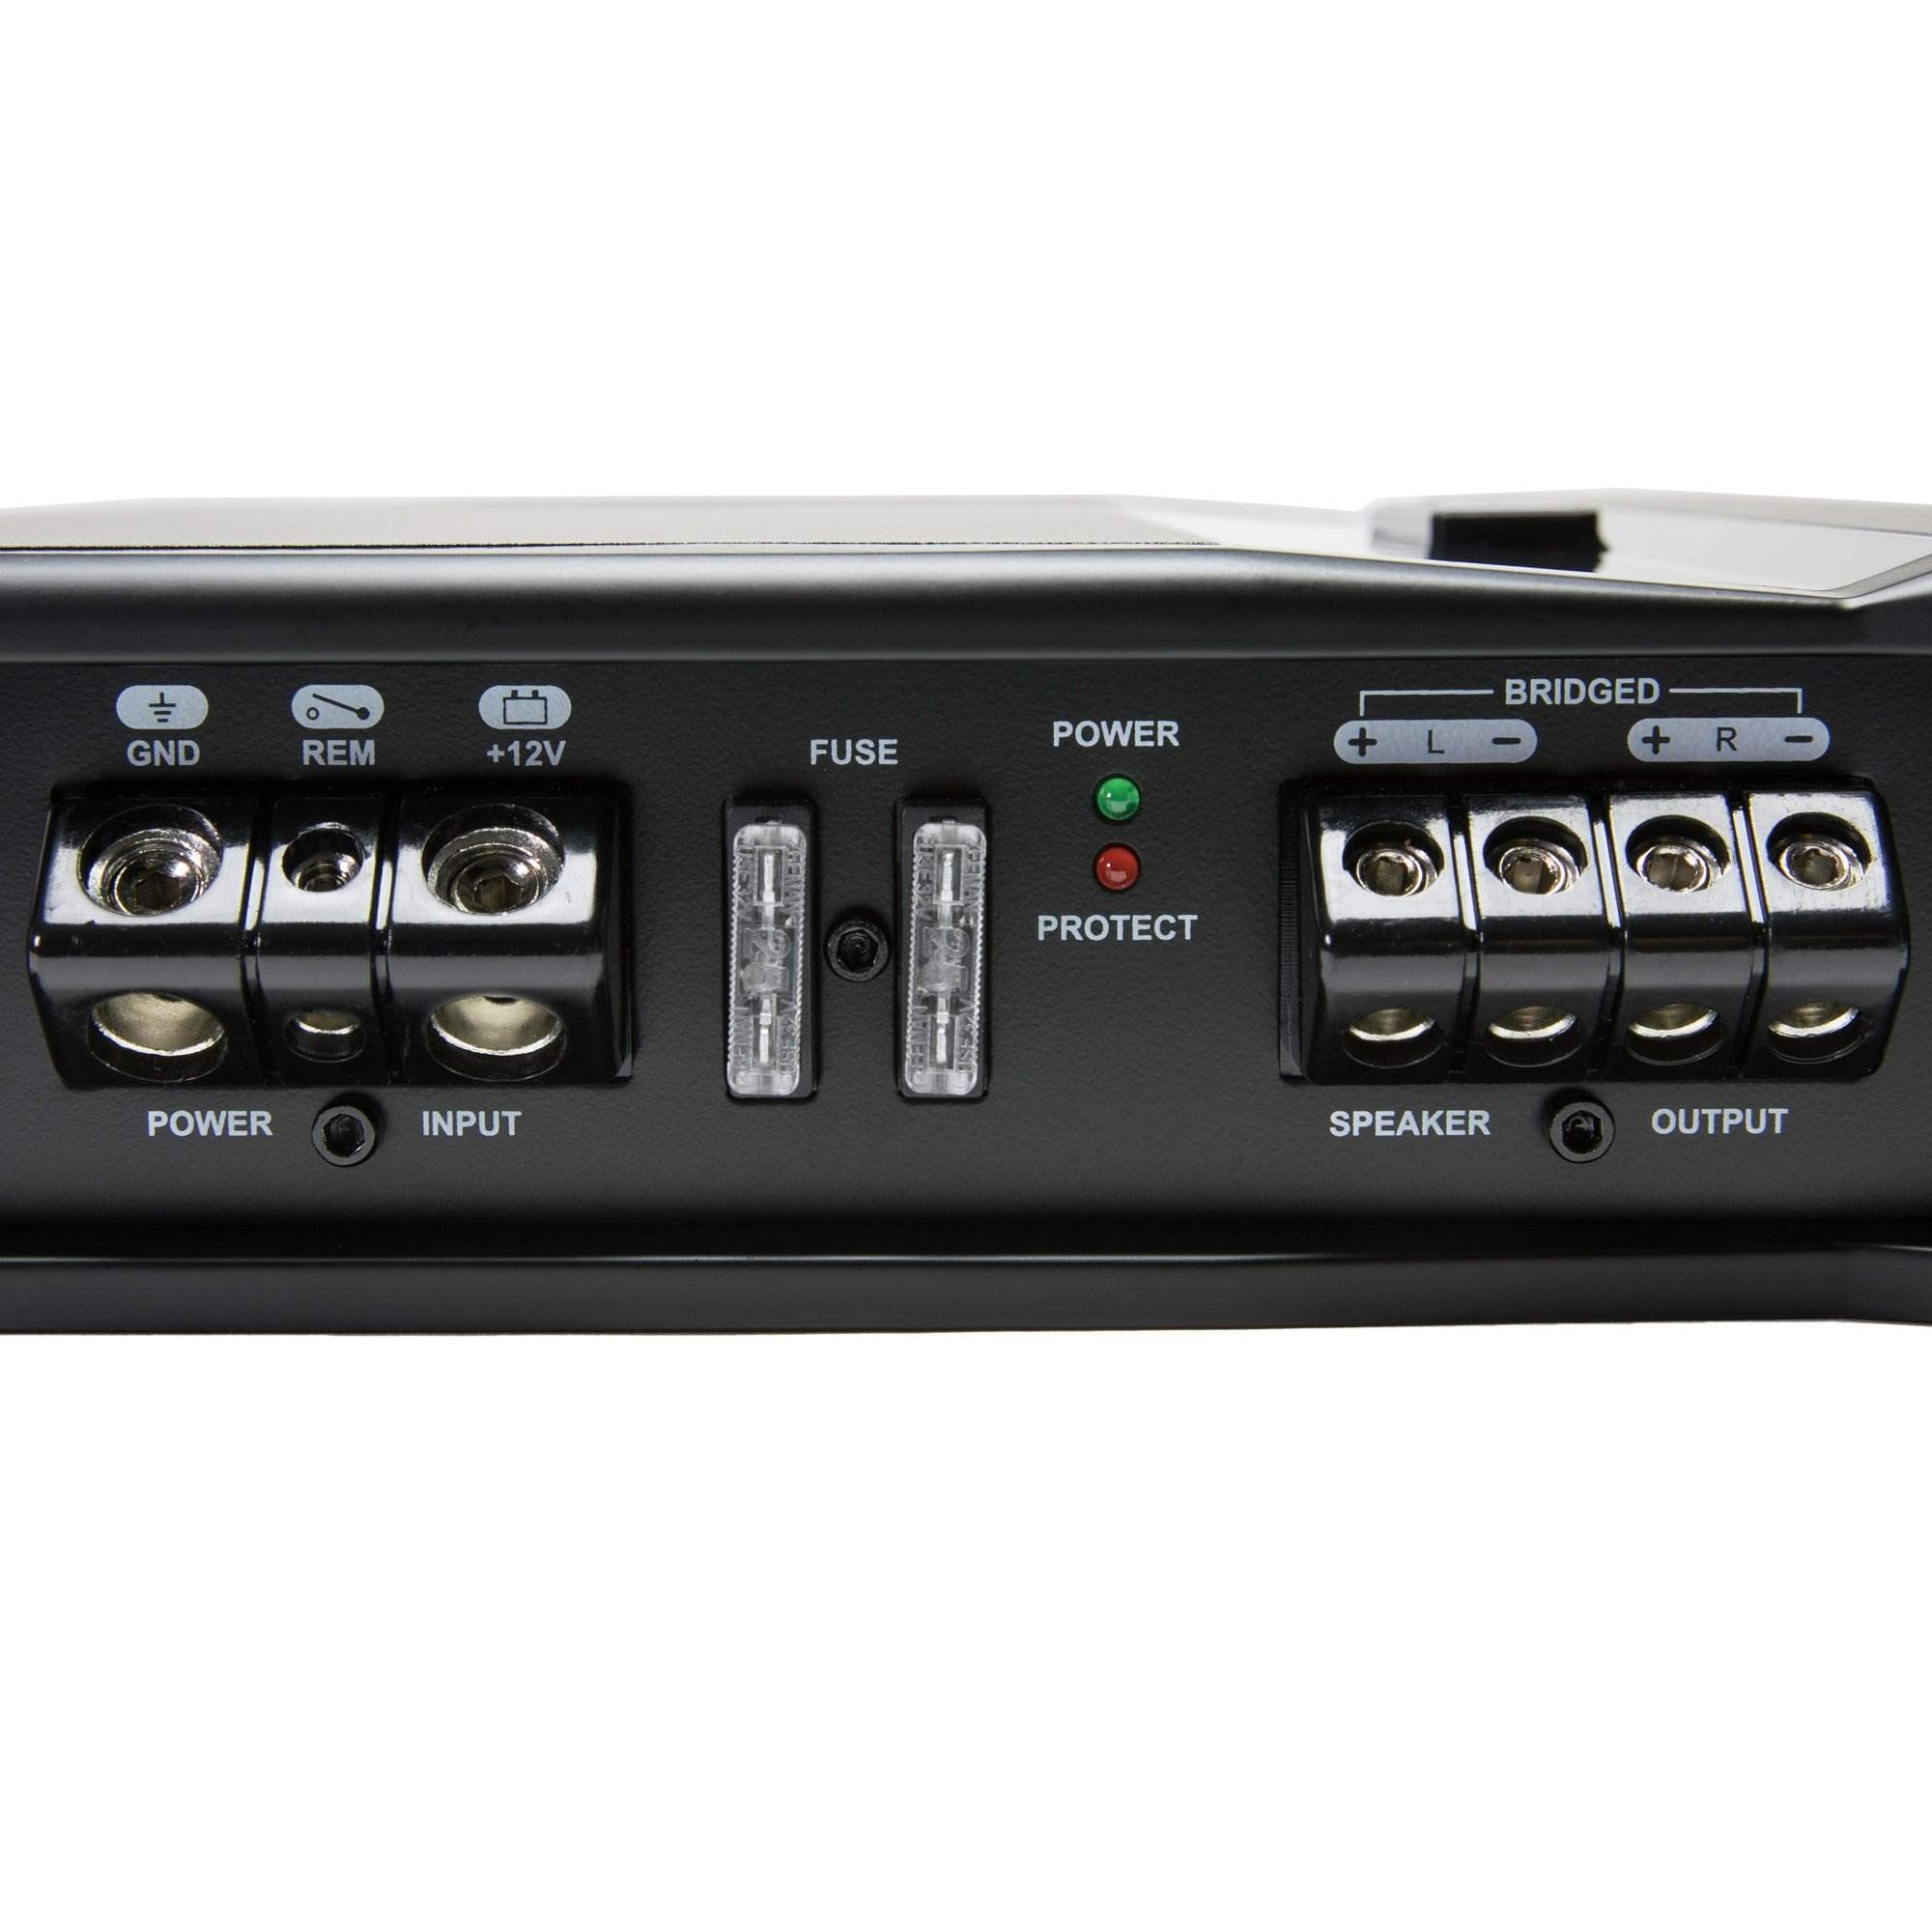
Figure 2: Detailed view of Power and Speaker Terminals. This close-up shows the robust screw terminals for power, ground, remote, and speaker connections, along with the fuse slots.
3.3 Audio Input Connections
Connect your head unit's RCA outputs to the amplifier's RCA input jacks. The amplifier also features a high-level input for head units without RCA outputs.
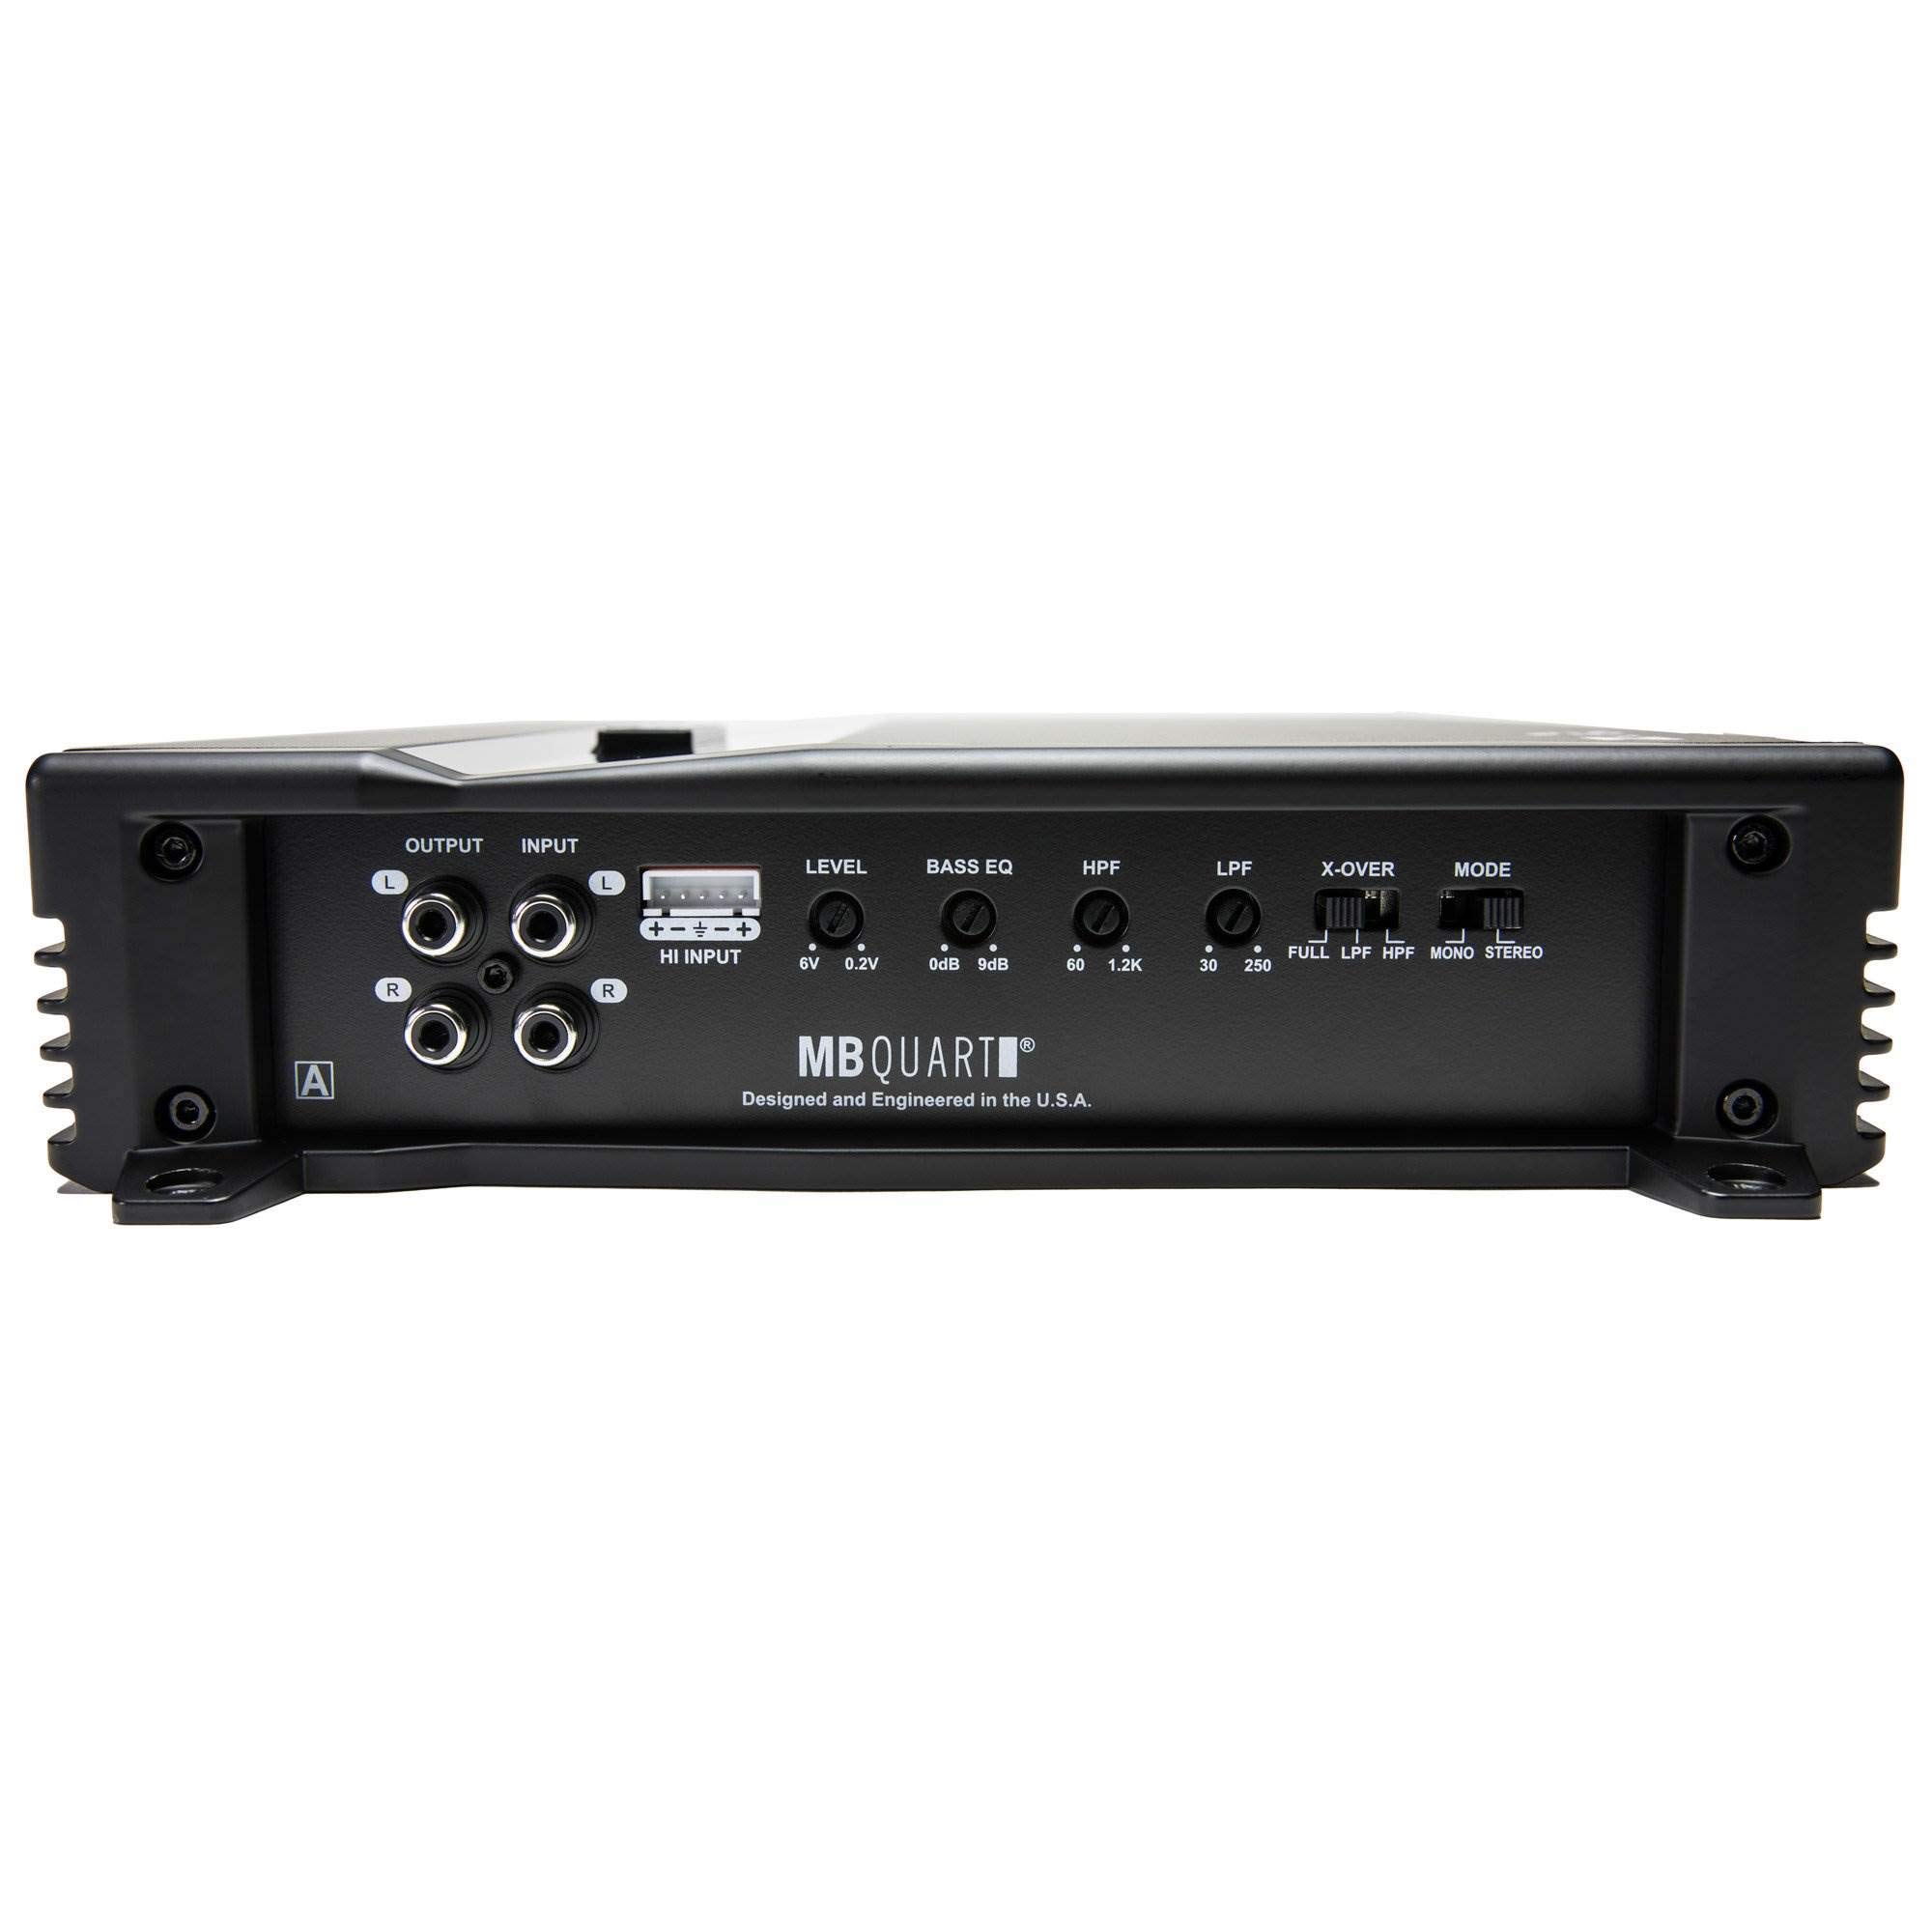
Figure 3: Audio Input and Control Panel. This image displays the rear panel, including the RCA input/output jacks, high-level input connector, and various control knobs for level, bass EQ, HPF, LPF, and X-OVER.
- RCA Inputs: Connect the RCA cables from your head unit's pre-amp outputs to the amplifier's "INPUT" RCA jacks (1 Pair).
- High-Level Input: If your head unit does not have RCA outputs, use the provided high-level input connector. Connect your speaker wires from the head unit to this connector.
- RCA Outputs: The amplifier provides 1 Pair of RCA output jacks for connecting additional amplifiers in a daisy-chain configuration.

Figure 4: Detailed view of Control Knobs and Inputs. A close-up of the amplifier's control section, showing the precise markings for LEVEL, BASS EQ, HPF, LPF, X-OVER, and MODE switches, along with the high-level input.
4. Operating Instructions
Once the amplifier is correctly installed and wired, you can adjust its settings for optimal audio performance.
4.1 Control Panel Overview
The amplifier features several adjustable controls on its rear panel:
- LEVEL (Input Gain): Adjusts the input sensitivity of the amplifier to match the output of your head unit. Range: 6.0V - 0.2V. Start with the gain low and slowly increase until distortion is heard, then back off slightly.
- BASS EQ: Provides a bass boost. Range: 0dB - 9dB. Use sparingly to avoid distortion.
- HPF (High Pass Filter): Filters out low frequencies, allowing only frequencies above the set point to pass. Range: 60Hz - 1.2KHz (12dB per octave). Useful for protecting full-range speakers from damaging bass.
- LPF (Low Pass Filter): Filters out high frequencies, allowing only frequencies below the set point to pass. Range: 30Hz - 250Hz (12dB per octave). Typically used for subwoofers.
- X-OVER (Crossover Mode Switch): Selects the crossover operation.
- FULL: Full range audio, no filtering applied.
- LPF: Low Pass Filter active.
- HPF: High Pass Filter active.
- MODE (Operation Mode Switch): Selects the amplifier's output configuration.
- MONO (Bridged): Combines the two channels into a single, more powerful mono output. Use for a single subwoofer. Refer to speaker terminal markings for bridged connection.
- STEREO: Standard two-channel operation for left and right speakers.
4.2 Initial Power-Up
After all connections are made, reconnect the vehicle's negative battery terminal. Turn on your head unit. The amplifier's power indicator light (green) should illuminate. If the protect light (red) illuminates, refer to the troubleshooting section.
5. Maintenance
The MB Quart ZA2-1000.2 amplifier requires minimal maintenance. Follow these guidelines to ensure longevity:
- Cleaning: Periodically wipe the amplifier's exterior with a soft, dry cloth. Do not use harsh chemicals or abrasive cleaners.
- Ventilation: Ensure that the amplifier's cooling fins are free from dust and obstructions. Good airflow is crucial for preventing overheating.
- Connections: Occasionally check all wiring connections (power, ground, remote, speaker, RCA) to ensure they remain tight and free from corrosion.
6. Troubleshooting
If you experience problems with your amplifier, consult the following table before contacting technical support.
| Problem | Possible Cause | Solution |
|---|---|---|
| No Power (Power LED off) |
|
|
| Protect LED on (Red) |
|
|
| No Sound |
|
|
| Distorted Sound |
|
|
7. Specifications
| Feature | Specification |
|---|---|
| Model | ZA2-1000.2 |
| Brand | MB Quart |
| Amplifier Class | Class SQ (Class A/B) |
| Channels | 2 (Two channel and bridged mono operation) |
| Variable Voltage | 6.0V - 0.2V |
| Frequency Response | 10Hz - 45KHz |
| Crossover Type | Variable Electronic |
| High Pass Crossover | 12dB per Octave: 60Hz - 1.2KHz |
| Low Pass Crossover | 12dB per Octave: 30Hz - 250Hz |
| Bass Boost | 0 - 9dB |
| Power Output @ 2 Ohms | 2 x 500W |
| Power Output @ 4 Ohms | 2 x 250W |
| Mono Bridged @ 4 Ohms | 1 x 1000W |
| Audio Inputs | 1 Pair RCA Jacks, High-Level Input |
| Audio Outputs | 1 Pair RCA Jacks |
| Power Terminal Wire Gauge | 4 gauge (12V/GND) |
| Speaker Terminal Wire Gauge | 12 gauge |
| Fusing | 20A x 1 |
| Dimensions (L x W x H) | 12.63 x 10.5 x 3.25 inches (32 x 26.6 x 8.2 cm) |
| Weight | 5.5 lbs (2.4 kg) |
| Mounting Type | Surface Mount |
| UPC | 806576227069 |
| ASIN | B06W52P84L |
8. Warranty Information
For detailed warranty information regarding your MB Quart ZA2-1000.2 amplifier, please refer to the official MB Quart website or the warranty card included with your product. Warranty terms and conditions may vary by region and retailer.
9. Customer Support
If you require further assistance or have questions not covered in this manual, please visit the official MB Quart website for support resources, FAQs, and contact information. You may also contact your authorized MB Quart dealer.
10. Official Product Videos
No official product videos from the seller are available for this model at this time.