
Introduction
This manual provides essential information for the installation, operation, and maintenance of your Aqua Flo Gecko in.yj-3 Control System. Please read this manual thoroughly before attempting any installation or operation to ensure proper function and safety.
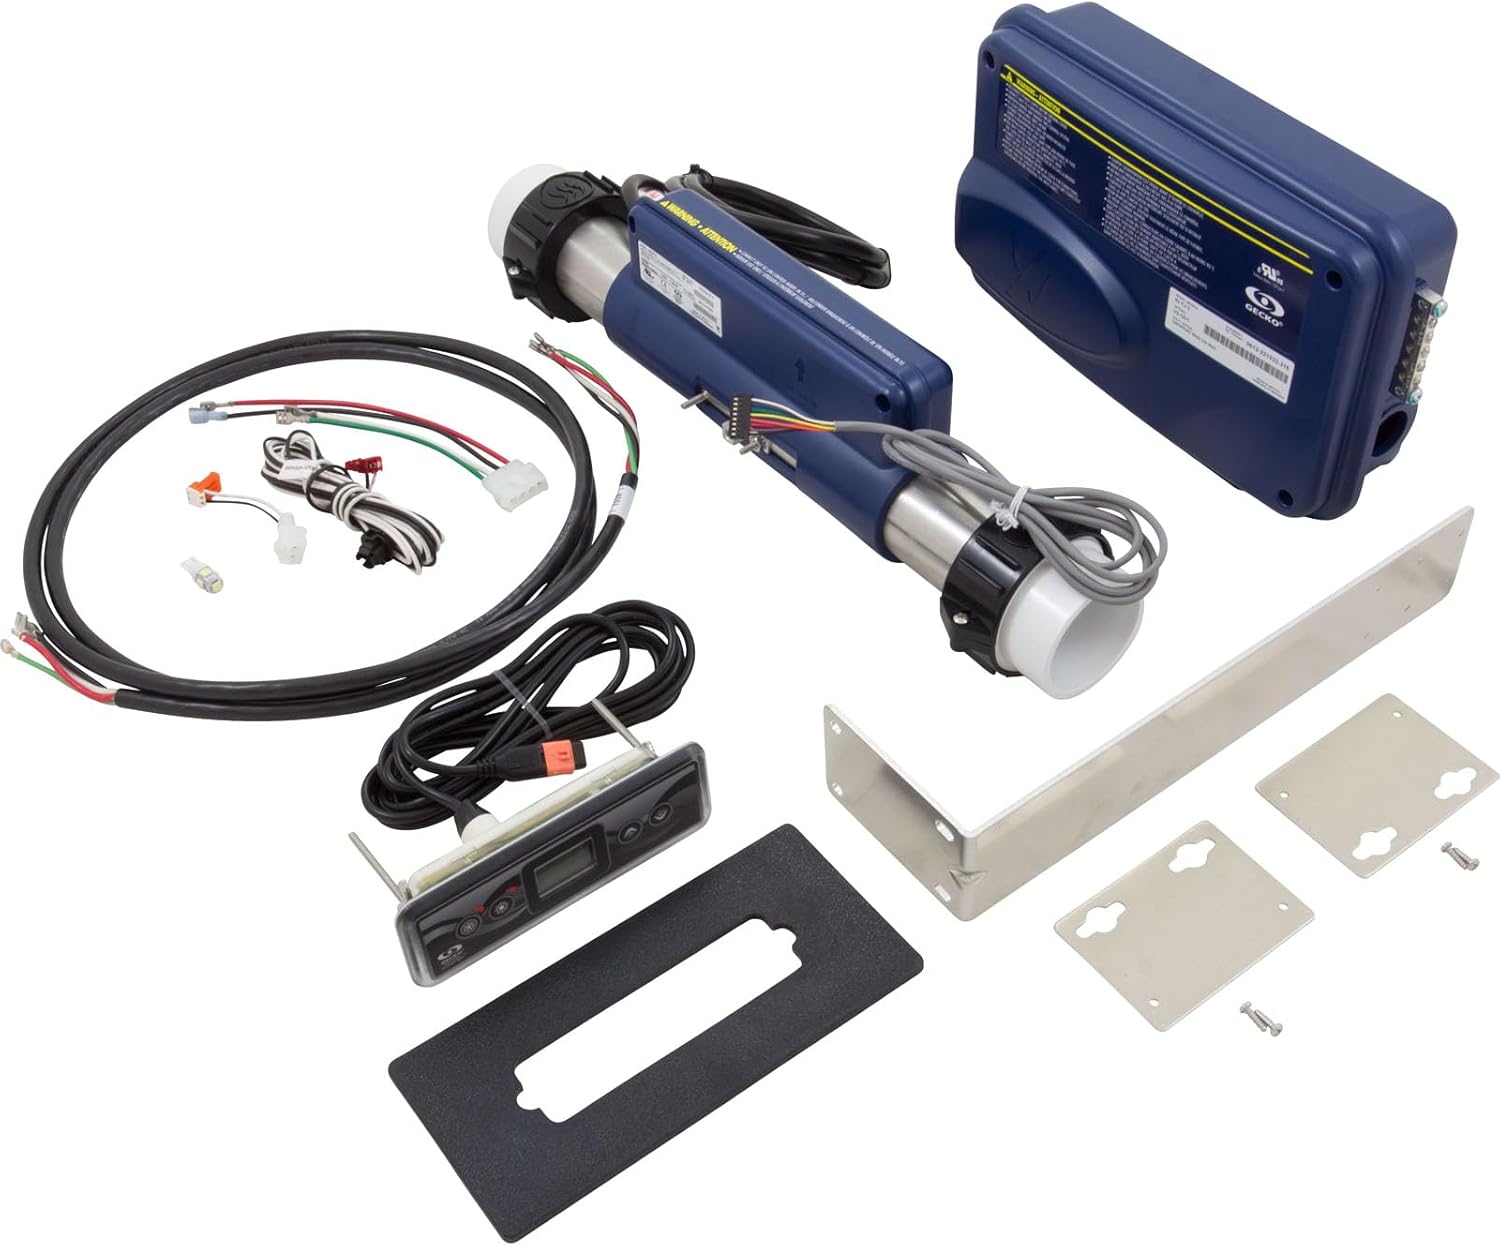
Figure 1: Complete Aqua Flo Gecko in.yj-3 Control System kit, including the control box, heater, keypad, wiring, and mounting hardware.
Safety Information
Always observe the following safety precautions:
- Disconnect Power: Always disconnect power supply before opening the control system cover or performing any service.
- Grounding: Connect only to a grounded circuit. Improper wiring may damage the control system.
- Qualified Personnel: Installation and service should only be performed by qualified personnel.
- Location: Do not install or store the unit outdoors or when installed under a weatherproof spa skirt.
- Fuses: Use only replacement fuses of the same type and rating.
- Wiring: Use only copper conductors rated at least 90°C. Connect only to a circuit protected by a Class A Ground Fault Circuit Interrupter (GFCI).
- Wiring Diagram: Refer to the wiring diagram on the rear of the cover for connections.
- Secure Connections: Ensure that the screws of the terminal block are completely unscrewed before inserting the input wires.

Figure 2: Rear view of the control box, showing important safety warnings and electrical specifications. Note the 120V/240V 60Hz 40A MAX input rating.
Setup and Installation
The Aqua Flo Gecko in.yj-3 control system is designed for easy integration into your spa or hot tub. Follow these steps for proper setup:
- Unpacking: Carefully unpack all components and verify that all parts are present: control box, heater, keypad, wiring harness, and mounting hardware.
- Mounting the Control Box: Select a suitable location for the control box, ensuring it is protected from direct weather exposure and allows for proper ventilation. Use the provided mounting bracket and screws to secure the control box.
- Heater Installation: Install the heater component in line with your spa's plumbing system. Ensure proper water flow through the heater. The heater is designed for 115V/230V operation.
- Wiring Connections:
- Power Input: Connect the main power supply (115V or 230V AC) to the designated terminal block inside the control box. Refer to the wiring diagram on the inside of the control box cover for correct connections. This system supports 230 volts AC.
- Pump and Accessory Connections: Connect pumps, blowers, and other accessories to their respective outputs on the control board.
- Keypad Connection: Connect the keypad cable to the dedicated port on the control board.
- Initial Power-Up: After all connections are secure and verified, restore power to the system. The control system will perform a self-diagnostic check.

Figure 3: Mounting bracket and associated screws for securing the control box.

Figure 4: The heater component of the system, which integrates into the spa's water circulation.

Figure 5: Internal view of the control box, displaying the main circuit board and various connection points for power, pumps, and accessories.

Figure 6: The main wiring harness, showing various connectors for different components of the spa system.
Operating Instructions
The in.k300 keypad provides intuitive control over your spa's functions.

Figure 7: The in.k300 control panel keypad, used for operating the spa functions.
Keypad Functions:
- Pump 1 (P1): Activates and cycles the primary pump. Press once for low speed, twice for high speed, third time to turn off.
- Pump 2 (P2): Activates and cycles the secondary pump (if applicable).
- Light: Turns the spa light on/off.
- Up/Down Arrows: Adjusts the set temperature.
- Mode/Program: Accesses different operating modes or programming options (e.g., filter cycles, economy mode). Refer to the in.k300 specific manual for detailed programming.
Upon initial startup, the system will typically display the current water temperature. Use the up/down arrows to set your desired temperature. The heater will activate automatically to reach and maintain the set temperature.
Maintenance
Regular maintenance ensures the longevity and optimal performance of your control system.
- Power Disconnection: Always disconnect power to the spa before performing any maintenance.
- Visual Inspection: Periodically inspect all wiring and connections for signs of wear, corrosion, or loose terminals.
- Heater Element: Ensure the heater element is free from scale buildup. Descale as necessary following manufacturer guidelines for your spa.
- Control Box: Keep the control box clean and free of debris. Ensure ventilation openings are not obstructed.
- Water Quality: Maintain proper spa water chemistry to prevent damage to the heater and other components.
Troubleshooting
This section provides solutions to common issues. For problems not listed, contact qualified service personnel.
| Problem | Possible Cause | Solution |
|---|---|---|
| System not powering on | No power supply; tripped GFCI; loose wiring connection. | Check circuit breaker/GFCI. Verify main power connections. Ensure terminal block screws are tightened. |
| Heater not heating | Low water flow; air lock; faulty heater element; incorrect temperature setting. | Ensure pumps are running and water flow is adequate. Bleed air from plumbing. Check temperature setting. Inspect heater element for damage. |
| Keypad unresponsive | Loose keypad cable; damaged keypad. | Check keypad cable connection to the control board. Replace keypad if damaged. |
| Error code displayed | Specific system fault (e.g., sensor error, overheat). | Consult the Gecko in.k300 keypad manual for specific error code definitions and troubleshooting steps. |
Specifications
- Model: in.yj-3
- Part Number: BDLYJ2K300
- Brand: Aqua Flo (Control System by Gecko)
- Power Input: 115V/230V AC, 60Hz, 40A Max
- Heater Power: 4.0kW
- Material: Stainless Steel (Heater), Durable Plastic (Control Box)
- Color: Blue (Control Box)
- Item Weight: Approximately 9 Pounds
- Product Dimensions: 12 x 3.75 x 7.37 inches (Control Box)
- Keypad: in.k300
- UPC: 753610461746
Warranty and Support
For warranty information and technical support, please refer to the documentation provided with your purchase or contact Aqua Flo customer service. Keep your proof of purchase for warranty claims.
For additional resources and detailed troubleshooting, you may also visit the official Gecko Alliance website or consult a certified spa technician.