Nintendo Joy-Con
Nintendo Joy-Con Controller Pair User Manual
Model: Joy-Con (Neon Red/Neon Blue)
Introduction
This manual provides essential information for the setup, operation, and maintenance of your Nintendo Joy-Con Controller Pair (Neon Red/Neon Blue). These versatile controllers are designed to enhance your Nintendo Switch gaming experience, offering multiple play styles and immersive features.

Image: The Nintendo Joy-Con Controller Pair, featuring one Neon Red controller and one Neon Blue controller, each with a black wrist strap attached. They are shown side-by-side against a white background.
Setup and Connection
1. Attaching to the Nintendo Switch Console
To use the Joy-Con controllers in handheld mode, slide each controller down the side rails of the Nintendo Switch console until you hear a click. The left Joy-Con (Neon Red) attaches to the left side, and the right Joy-Con (Neon Blue) attaches to the right side.
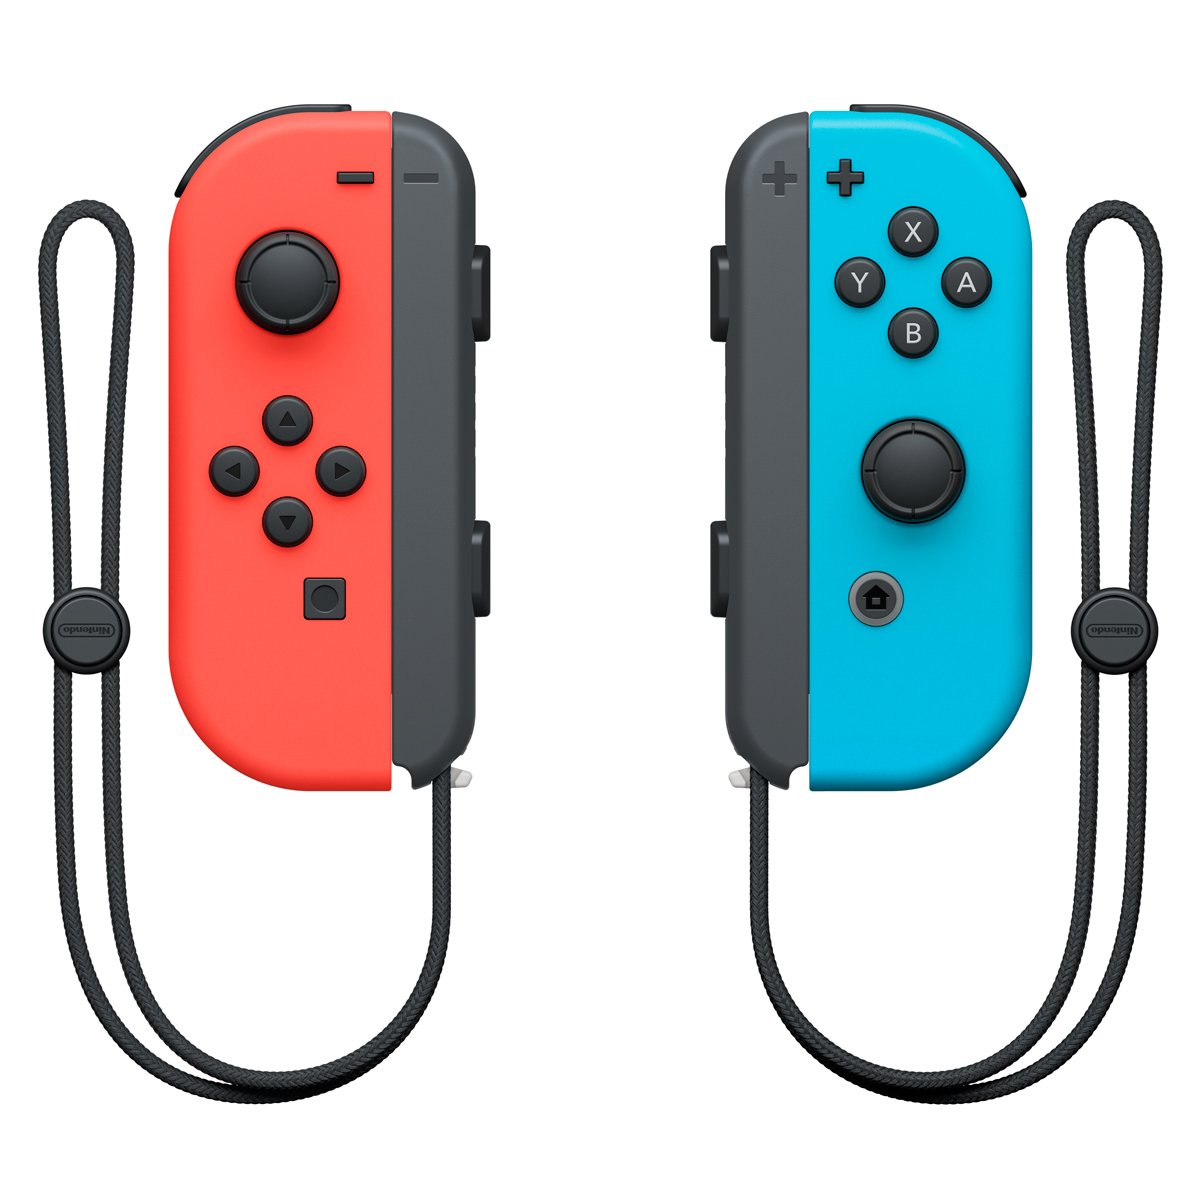
Image: A close-up of the Nintendo Switch console with the Neon Red and Neon Blue Joy-Con controllers securely attached to its sides, ready for handheld play.
2. Wireless Pairing
For wireless play, detach the Joy-Cons from the console. They will automatically pair. If manual pairing is needed, navigate to the HOME Menu, select "Controllers," then "Change Grip/Order." Press and hold the SYNC Button on the Joy-Con you wish to pair until the player indicator lights begin to flash.
3. Attaching Joy-Con Wrist Straps
The included wrist straps can be attached to each Joy-Con for added security during active gameplay. Ensure the strap is oriented correctly (matching the + and - symbols on the Joy-Con and strap) before sliding it onto the controller until it clicks into place. Use the lock switch on the strap to secure it.
Operating the Joy-Con Controllers
1. Button Layout and Functions
- Left Joy-Con: Features a Left Stick, Directional Buttons (Up, Down, Left, Right), - Button, Capture Button, SL/SR Buttons (on rail), and L/ZL Buttons.
- Right Joy-Con: Features a Right Stick, A/B/X/Y Buttons, + Button, HOME Button, SL/SR Buttons (on rail), and R/ZR Buttons.
2. Advanced Features
- Motion Controls: Both Joy-Cons are equipped with an accelerometer and gyroscope, enabling intuitive motion-controlled gameplay in compatible titles.
- HD Rumble: Experience realistic and nuanced tactile feedback through the advanced HD Rumble feature, enhancing immersion in various games.
- IR Motion Camera (Right Joy-Con only): The Right Joy-Con includes an IR Motion Camera that can detect the shape, movement, and distance of objects in front of it, offering unique gameplay possibilities in supported games.
3. Play Modes
The Joy-Cons support multiple play modes:
- Handheld Mode: Attached to the Nintendo Switch console.
- Tabletop Mode: Detached from the console, used individually or with a Joy-Con Grip.
- TV Mode: Detached from the console, used individually or with a Joy-Con Grip while the console is docked.
Maintenance and Care
- Cleaning: Use a soft, dry cloth to clean the controllers. Avoid using harsh chemicals or abrasive materials.
- Battery Care: The Joy-Cons feature built-in rechargeable batteries. Charge them by attaching them to the Nintendo Switch console (while docked or connected to power) or by using a Joy-Con Charging Grip (sold separately). Avoid exposing batteries to extreme temperatures.
- Storage: Store controllers in a cool, dry place away from direct sunlight and extreme temperatures when not in use.
- Handling: Handle controllers with care to prevent damage from drops or impacts.
Troubleshooting
- Controllers Not Connecting/Pairing:
- Ensure the Joy-Cons are sufficiently charged.
- Verify that the console's system software is up to date.
- Attempt manual pairing via the HOME Menu: "Controllers" > "Change Grip/Order."
- Ensure no strong interference sources (e.g., other wireless devices, metal objects) are near the console or controllers.
- Buttons Unresponsive or Lagging:
- Check for any physical obstructions or debris around the buttons.
- Recalibrate the control sticks and motion controls in System Settings.
- Ensure the Joy-Cons are fully charged.
- Charging Issues:
- Confirm the Nintendo Switch console is connected to its AC adapter.
- Ensure Joy-Cons are correctly attached to the console or charging grip.
- Try a different charging method if available (e.g., another Joy-Con Charging Grip).
Specifications
| Brand | Nintendo |
| Model | Joy-Con (Neon Red/Neon Blue) |
| Item Weight | 0.24 Pounds |
| Connectivity | Bluetooth Wireless Technology |
| Motion Sensors | Accelerometer, Gyroscope (in both Joy-Cons) |
| Haptic Feedback | HD Rumble |
| Additional Sensor | IR Motion Camera (Right Joy-Con only) |
Warranty and Support
Specific warranty details and direct support contact information are not available in the provided product data. For warranty claims or technical assistance, please refer to the official Nintendo support website or contact Nintendo customer service directly.
Additional Information (Videos)
No official product videos from the seller were available in the provided data to embed in this manual.
Related Documents - Joy-Con
 |
Nintendo Switch Right Joy-Con Joystick Replacement Guide A step-by-step guide to replacing the joystick on a Nintendo Switch Right Joy-Con, including necessary tools, parts, and detailed instructions for a successful repair. |
 |
Nintendo Switch Repair and Exchange Price List (Out of Warranty) Official price list from Nintendo France for out-of-warranty repairs and exchanges of Nintendo Switch consoles and accessories, applicable from September 17, 2025. Includes pricing for various models and common issues. |
 |
Nintendo Switch, OLED Model, and Lite: Important Information, Safety, and Warranty Guide Comprehensive guide for Nintendo Switch, Nintendo Switch - OLED Model, and Nintendo Switch Lite consoles, covering essential safety information, parental controls, usage instructions, technical specifications, and warranty details. |
 |
Nintendo Switch Family: Important Information, Safety, and Specifications Comprehensive guide to Nintendo Switch, Nintendo Switch – OLED Model, and Nintendo Switch Lite, covering important information, health and safety guidelines, parental controls, technical specifications, warranty, and disposal. |
 |
Nintendo Switch Joy-Con Controller User Manual User manual for the Nintendo Switch Joy-Con controller, detailing setup, functions, and troubleshooting. Includes information on connecting, charging, and using the controller for gaming. |
 |
Nintendo Switch, Switch OLED Model, and Switch Lite: Important Information and Specifications Comprehensive guide to Nintendo Switch, Nintendo Switch OLED Model, and Nintendo Switch Lite consoles, covering setup, safety, parental controls, warranty, and technical specifications. |