Karcher K1800
Karcher K1800 Electric Pressure Washer User Manual
Model: K1800 (1.106-110.0)
1. Introduction
This manual provides essential information for the safe assembly, operation, maintenance, and troubleshooting of your Karcher K1800 Electric Pressure Washer. Please read these instructions carefully before using the appliance for the first time and observe the safety instructions. Keep this manual for future reference.

Figure 1: Karcher K1800 Electric Pressure Washer. This image displays the complete Karcher K1800 unit, highlighting its yellow and black design, integrated handle, wheels, and hose storage.
2. Safety Information
Always observe the following safety precautions to prevent injury or damage to the unit:
- Eye Protection: Always wear appropriate eye protection (safety glasses or goggles) when operating the pressure washer.
- Electrical Safety: Connect the unit only to a grounded outlet. Do not use extension cords unless they are rated for outdoor use and are properly grounded. Never operate the unit with wet hands or while standing in water.
- High Pressure Hazard: The high-pressure jet can be dangerous if misused. Do not direct the jet at people, animals, electrical devices, or the unit itself.
- Secure Connections: Ensure all hoses, nozzles, and accessories are securely connected before starting the unit.
- Children and Pets: Keep children and pets away from the operating area.
- Water Supply: Ensure the water supply hose is free of kinks and provides adequate flow.
3. Package Contents
Verify that all items are present in the package:
- Karcher K1800 Pressure Washer Unit
- High-Pressure Spray Wand
- 25-foot Kink-Resistant High-Pressure Hose
- Quick-Connect Nozzles:
- 15-degree All-Purpose Nozzle (Yellow)
- Turbo Nozzle (Black)
- Soap Nozzle (Black, 65-degree)
- 0.5 Gallon Removable Detergent Tank
- Removable Storage Bin
4. Assembly and Setup
The Karcher K1800 is designed for quick assembly, typically in five minutes or less, without the need for tools.
- Unpack Components: Carefully remove all parts from the packaging.
- Attach Wheels: Secure the oversized no-flat wheels to the unit's base.
- Install Handle: Extend and lock the integrated aluminum handle into the upright position. The handle can be folded down for compact storage after use.
- Connect High-Pressure Hose: Attach the 25-foot high-pressure hose to the unit's outlet and to the spray wand. Ensure connections are tight.
- Connect Water Supply: Connect a standard garden hose (not included) to the water inlet on the pressure washer. Ensure the water supply is turned on fully.
- Bleed Air: Before connecting to power, squeeze the trigger on the spray wand to allow water to flow through the system for approximately 30 seconds. This purges air from the pump and hoses.
- Connect Power: Plug the power cord into a grounded electrical outlet. The unit features unique power cord storage for convenience.
- Install Storage Bin and Detergent Tank: Place the removable storage bin and the 0.5-gallon detergent tank into their designated slots on the unit.

Figure 2: Folding Handle. This image illustrates the adjustable handle of the Karcher K1800, showing its ability to fold down for convenient, compact storage.

Figure 3: Large Wheels and Metal Frame. A close-up view of the Karcher K1800's durable, oversized wheels and robust metal frame, designed for stability and easy transport.

Figure 4: Power Cord Storage. This image shows the integrated storage solution for the power cord on the Karcher K1800, keeping it tidy and secure when not in use.

Figure 5: Removable Storage Bin. A view of the spacious, removable storage bin on the Karcher K1800, ideal for holding accessories or personal items.
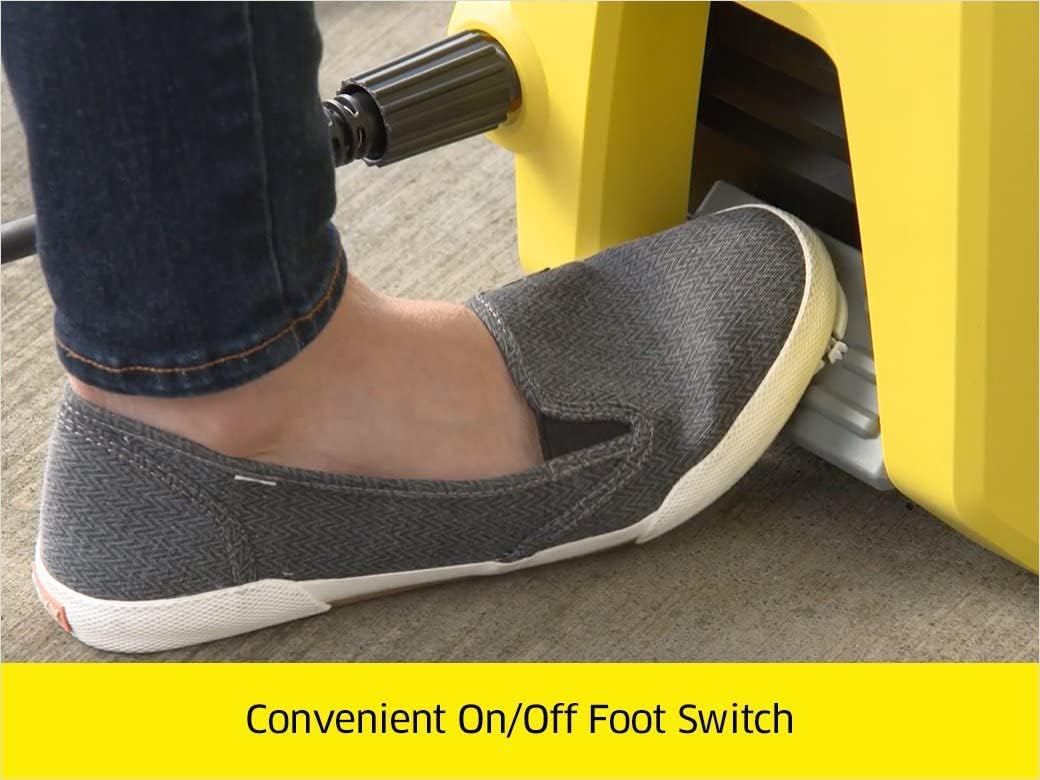
Figure 6: Removable Detergent Tank. This image highlights the 0.5-gallon removable detergent tank of the Karcher K1800, designed for easy filling and application of cleaning solutions.
5. Operation
- Start the Unit: Press the convenient On/Off foot switch located at the base of the unit to power it on.
- Select Nozzle: Choose the appropriate quick-connect nozzle for your cleaning task.
- 15-degree Nozzle (Yellow): Ideal for general cleaning tasks on various surfaces.
- Turbo Nozzle (Black): Provides a concentrated, oscillating jet for intense cleaning of stubborn dirt and grime on hard surfaces like concrete.
- Soap Nozzle (Black, 65-degree): Designed for applying detergent at low pressure.
- Apply Detergent (Optional): Fill the 0.5-gallon removable detergent tank with a pressure washer-safe cleaning solution. Attach the soap nozzle to the spray wand. The unit will automatically draw detergent when operating at low pressure.
- Begin Cleaning: Hold the spray wand firmly and squeeze the trigger. Maintain a safe distance from the surface being cleaned, adjusting as needed.
- Shut Down: Release the trigger, press the On/Off foot switch to turn off the unit, and turn off the water supply. Squeeze the trigger again to release any remaining pressure in the system.

Figure 7: On/Off Foot Switch. A close-up of the foot-operated power switch on the Karcher K1800, providing hands-free control for starting and stopping the unit.

Figure 8: Pressure Washer Nozzles. This image displays the three quick-connect nozzles included with the Karcher K1800: the turbo nozzle, the 15-degree nozzle, and the soap nozzle.

Figure 9: Cleaning an Outdoor Table. A person is shown using the Karcher K1800 pressure washer to clean an outdoor metal table, demonstrating its use for patio furniture.

Figure 10: Cleaning a Car. This image depicts a person using the Karcher K1800 pressure washer to clean a car, illustrating its application for vehicle washing.
6. Maintenance
Regular maintenance ensures optimal performance and extends the life of your pressure washer.
- Hose Storage: After each use, coil the high-pressure hose neatly and store it in the onboard hose bucket.
- Draining Water: Before storing, especially in freezing temperatures, ensure all water is drained from the pump, hoses, and spray wand to prevent damage. Run the unit for a few seconds with the water supply off and the trigger open until no more water comes out.
- Nozzle Cleaning: Periodically clean the nozzles to remove any blockages that may affect spray pattern or pressure.
- Filter Cleaning: Check and clean the water inlet filter regularly to prevent debris from entering the pump.
7. Troubleshooting
If you encounter issues, refer to the following common problems and solutions:
- No Pressure or Low Pressure:
- Ensure the water supply is fully open and the garden hose is not kinked.
- Check if the water inlet filter is clogged.
- Verify that all hose connections are tight.
- Bleed air from the system by running water through the wand before starting the motor.
- Unit Does Not Start:
- Check the power connection and ensure the outlet is functional.
- Verify the On/Off foot switch is pressed.
- Ensure the GFCI plug (if applicable) has not tripped.
- Water Leaking:
- Inspect hose connections for tightness.
- Check O-rings for wear or damage and replace if necessary.
- Pulsating Spray:
- This can indicate air in the system; re-bleed the unit.
- Check for a restricted water supply or clogged nozzle.
8. Specifications
| Specification | Value |
|---|---|
| Brand | Karcher |
| Model Number | 1.106-110.0 |
| Pressure | 1800 PSI (TruPressure) |
| Flow Rate | 1.3 GPM |
| Power Source | Corded Electric |
| Hose Length | 25 Feet |
| Detergent Tank Volume | 0.5 Gallons |
| Item Weight | 21.4 Pounds |
| Product Dimensions (L x W x H) | 17.5" x 17.25" x 33" |

Figure 11: Product Dimensions. This image provides a visual representation of the Karcher K1800 pressure washer with its key dimensions labeled: 17.5 inches length, 17.25 inches width, and 33 inches height.
9. Warranty and Support
The Karcher K1800 Electric Pressure Washer is backed by a three-year limited warranty. For warranty claims, technical support, or service inquiries, please refer to the official Karcher website or contact Karcher customer service directly. Keep your proof of purchase for warranty validation.
Ask a question about this manual
Ask about setup, troubleshooting, compatibility, parts, safety, or missing instructions. Manuals+ will review the question and use this page’s manual context to help answer it.