Shellab 5 CU FT, 115V
Shel Lab Forced Air Oven User Manual
Model: 5 CU FT, 115V
Brand: Shellab
1. Introduction
This manual provides essential information for the safe and efficient operation of your Shel Lab Forced Air Oven. Please read this manual thoroughly before operating the oven to ensure proper usage, maximize performance, and prolong the life of the equipment. Retain this manual for future reference.
2. Safety Information
Always observe the following safety precautions to prevent injury or damage to the equipment.
- Electrical Safety: Ensure the oven is connected to a properly grounded electrical outlet with the correct voltage (115V). Do not use extension cords. Disconnect power before performing any maintenance or cleaning.
- Temperature Safety: Surfaces inside and outside the oven can become extremely hot during operation. Use appropriate personal protective equipment (PPE), such as heat-resistant gloves, when handling items inside the oven or touching hot surfaces. Allow the oven to cool completely before cleaning or servicing.
- Ventilation: Ensure adequate clearance around the oven for proper ventilation. Do not block air vents.
- Flammable Materials: Do not place flammable, explosive, or volatile materials inside the oven.
- Spills: Clean up spills immediately to prevent damage to the oven or potential hazards.
3. Product Overview
The Shel Lab Forced Air Oven is designed for various laboratory applications requiring precise temperature control and uniform heating. Its forced air circulation system ensures consistent temperature distribution throughout the chamber.
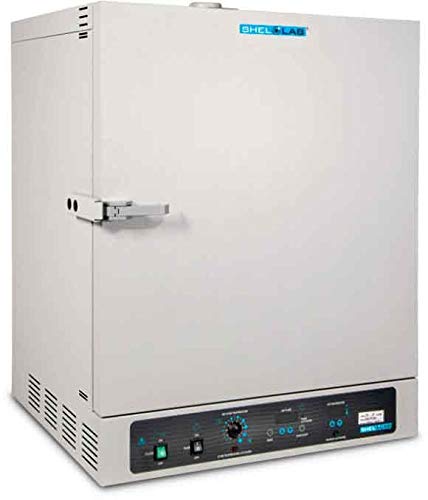
Figure 3.1: Front view of the Shel Lab Forced Air Oven, showing the main chamber, door handle, and control panel at the bottom. The Shellab logo is visible at the top of the oven.
Key Components:
- Oven Chamber: The insulated interior where samples are placed.
- Door: Provides access to the chamber and seals to maintain temperature. Features a robust handle.
- Control Panel: Located at the bottom front, includes power switch, temperature dial, timer controls, and display.
- Air Vents: Located on the sides and rear for proper air circulation and heat dissipation.
- Shelves: Removable shelves for organizing samples within the chamber.
4. Setup
4.1 Unpacking
- Carefully remove the oven from its packaging.
- Inspect the oven for any signs of shipping damage. Report any damage to the carrier immediately.
- Remove all packing materials from inside the chamber and from the exterior.
4.2 Placement
- Place the oven on a sturdy, level surface capable of supporting its weight.
- Ensure adequate clearance (at least 15 cm or 6 inches) around all sides of the oven for proper ventilation and heat dissipation. Do not place the oven directly against a wall or in an enclosed space.
- Avoid locations with direct sunlight, strong drafts, or extreme temperature fluctuations.
4.3 Electrical Connection
- Verify that the electrical supply matches the oven's requirements (115V, 60Hz).
- Plug the oven's power cord directly into a grounded three-prong electrical outlet. Do not use adapters or extension cords.
4.4 Initial Cleaning
Before first use, wipe down the interior and exterior surfaces with a mild, non-abrasive cleaner and a soft cloth. Ensure the oven is completely dry before plugging it in.
5. Operating Instructions
5.1 Control Panel Overview
The control panel features the main power switch, temperature control dial, and digital display for temperature and timer settings.
5.2 Powering On/Off
- To power on, flip the main power switch to the 'ON' position. The display will illuminate.
- To power off, flip the main power switch to the 'OFF' position.
5.3 Setting Temperature
- Turn the temperature control dial to the desired temperature setting.
- The oven will begin heating, and the display will show the current chamber temperature.
- Allow sufficient time for the oven to reach and stabilize at the set temperature before placing samples inside.
5.4 Using the Timer Function
This oven is equipped with a timer function for timed operations.
- Refer to the specific timer controls on the panel. Typically, there are buttons to set hours and minutes.
- Set the desired duration.
- Activate the timer. The oven will operate for the set duration and then either shut off or signal completion, depending on the model's specific timer logic.
5.5 Loading Samples
- Open the oven door carefully, being mindful of hot air.
- Place samples on the shelves, ensuring adequate space between items for proper air circulation. Do not overload the oven.
- Close the door securely.
6. Maintenance
Regular maintenance ensures optimal performance and extends the lifespan of your oven. Always disconnect the oven from power and allow it to cool completely before performing any maintenance.
6.1 Routine Cleaning
- Interior: Wipe the interior chamber with a soft cloth dampened with a mild, non-abrasive cleaner. For stubborn residues, a specialized laboratory cleaner may be used, ensuring it is safe for stainless steel (if applicable) and thoroughly rinsed.
- Exterior: Clean the exterior surfaces with a soft cloth and mild detergent. Avoid harsh chemicals that could damage the finish or control panel.
- Shelves: Remove shelves and clean them separately. They can often be washed with soap and water.
6.2 Calibration
For applications requiring precise temperature accuracy, periodic calibration by a qualified technician is recommended. Refer to your facility's standard operating procedures for calibration frequency.
7. Troubleshooting
This section addresses common issues you might encounter. If the problem persists after following these steps, contact customer support.
| Problem | Possible Cause | Solution |
|---|---|---|
| Oven not powering on | No power supply; Power switch off; Blown fuse/tripped breaker | Check power cord connection; Ensure power switch is ON; Check building's circuit breaker/fuse box. |
| Oven not heating | Temperature set too low; Door not closed properly; Heating element malfunction | Increase temperature setting; Ensure door is securely latched; Contact service if heating element is suspected. |
| Temperature unstable/fluctuating | Door opened frequently; Overloaded chamber; Sensor issue | Minimize door openings; Reduce sample load; Contact service for sensor diagnostics. |
| Unusual noise or odor | Foreign object in fan; Electrical issue; Contamination | Power off and inspect for obstructions; Disconnect power and contact service immediately for electrical issues; Clean chamber thoroughly. |
8. Specifications
Key technical specifications for the Shel Lab Forced Air Oven (Model: 5 CU FT, 115V).
- Brand: Shellab
- Heating Method: Forced Air
- Fuel Type: Electric
- Installation Type: Freestanding
- Timer Function: Available
- ASIN: B01NCSB5B6
- Date First Available: January 3, 2017
- Capacity: Approximately 5 cubic feet (based on model name)
- Voltage: 115V (based on model name)
9. Warranty and Support
For information regarding product warranty, please refer to the warranty card included with your purchase or visit the official Shellab website. For technical support, service, or to order replacement parts, please contact Shellab customer service.
Shellab Customer Service:
- Website: www.shellab.com (Example link, actual link not provided in input)
- Phone: Refer to Shellab's official website for current contact numbers.
- Email: Refer to Shellab's official website for current contact email.
Ask a question about this manual
Ask about setup, troubleshooting, compatibility, parts, safety, or missing instructions. Manuals+ will review the question and use this page’s manual context to help answer it.