
ARDWOLF A10
ARDWOLF A10 Fingerprint Keyless Entry Smart Biometric Door Lock Instruction Manual
Model: A10 | Brand: ARDWOLF
Product Overview
The ARDWOLF A10 is a smart biometric door lock designed for keyless entry, offering enhanced security and convenience for home and office environments. It features multiple access methods including fingerprint, digital keypad, and traditional backup keys.
Key Features:
- Double Verification Mode: Unlock using a combination of user code and fingerprint, or two different fingerprints, significantly increasing security.
- Large Capacity: Supports enrollment of up to 256 fingerprints and 300 user-defined 4-12 digit codes, suitable for various users including children and the elderly.
- OLED Display: An intuitive OLED screen guides users through adding or deleting users directly on the device, providing clear information.
- All-in-One Flexibility: Offers 256 fingerprint slots, 300 code slots, and 2 mechanical backup keys. An audit trail feature allows tracking of entry records.
- Quality Repair: Includes one year of after-sales service and local US repair service.
What's in the Box
The ARDWOLF A10 package includes the following components:
- ARDWOLF A10 Fingerprint Door Lock (Front and Back Panels)
- Lock Bolt
- Bolt Protector
- Strike Plate
- Pin
- Square Spindle
- Mechanical Keys (x2)
- Mifare Cards (x2)
- User Manual
- Fixing Screws (various sizes: B1, B2, A, C, D, E, F)
- Waterproof Rubber Pad

Image: All components included in the ARDWOLF A10 package.
Installation Guide
Follow these steps to properly install your ARDWOLF A10 Fingerprint Door Lock. Ensure you have all components listed above before beginning.
1. Door Preparation and Drilling
Verify your door thickness and frame dimensions meet the requirements:
- Door frame: ≥4.3" (110mm)
- Door thickness: between 1.38" (35mm) and 1.78" (45mm)
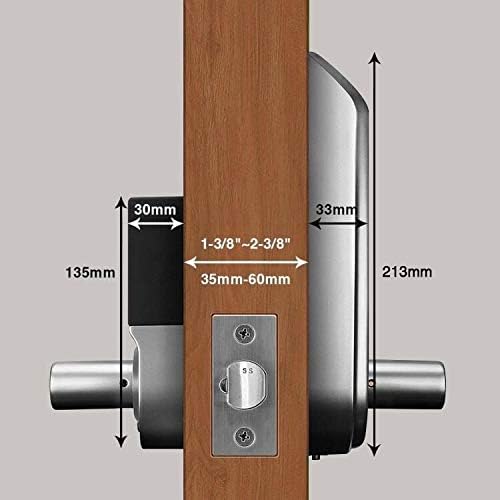
Image: Diagram showing door thickness and frame requirements.
Use the provided drill hole template to mark and drill the necessary holes on your door. Ensure precise measurements for proper alignment.
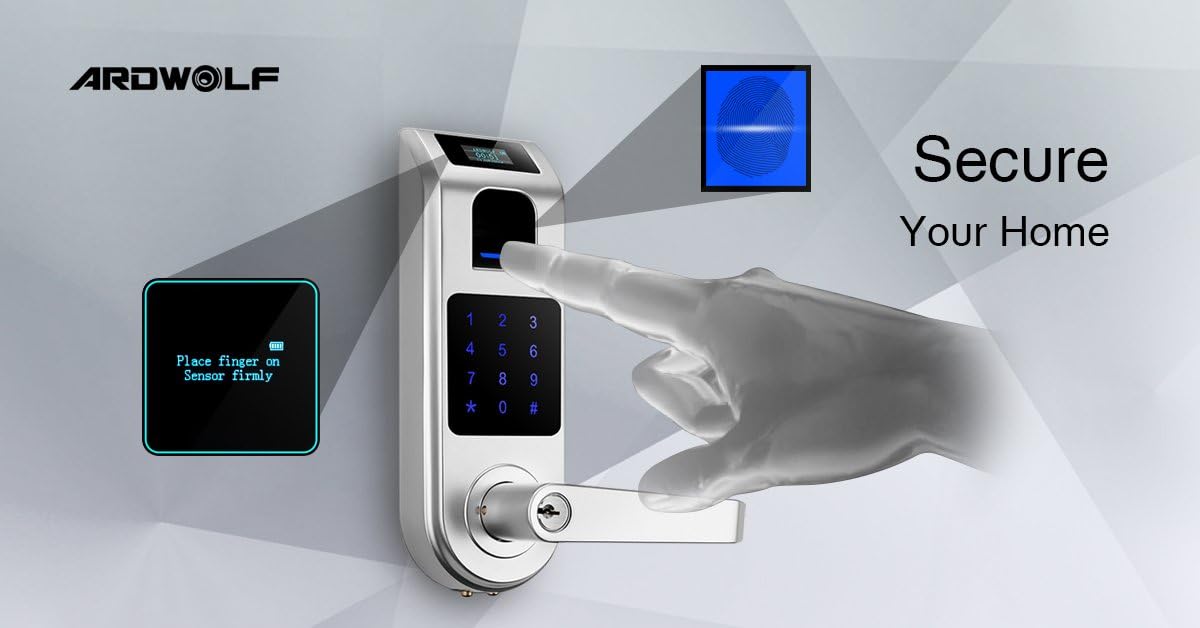
Image: Visual guide for using the drill hole template.
2. Install the Lock Bolt
Insert the lock bolt into the prepared hole on the door edge. Secure it using the appropriate screws (Screw A).
Video: This video demonstrates the installation process of the ARDWOLF A10 Door Lock, including securing the lock bolt.
3. Install Front Panel and Spindle
Attach the front panel of the lock, ensuring the wires are carefully routed. Insert the square spindle and fix it with the pin. Connect the screw C and F, then fix it in the hole shown on the front panel. Place the waterproof rubber pad.

Image: Front and interior view of the ARDWOLF A10 lock, showing the handle and keypad.
4. Install Batteries and Back Panel
Install 4 AA alkaline batteries into the battery compartment. Then, fix the back panel using 2 screws E.
5. Handle Direction Adjustment (if needed)
If the handle direction needs adjustment, follow these steps:
- For the Front Panel: Remove the 8 small screws. Carefully take out the mechanical system without damaging the wire. Remove the screw holding the handle, adjust the handle direction as desired, and then fix it. Reassemble the mechanical system and secure with the 8 screws.
- For the Back Panel: Remove the screw holding the handle, adjust the handle direction as desired, and then fix it.
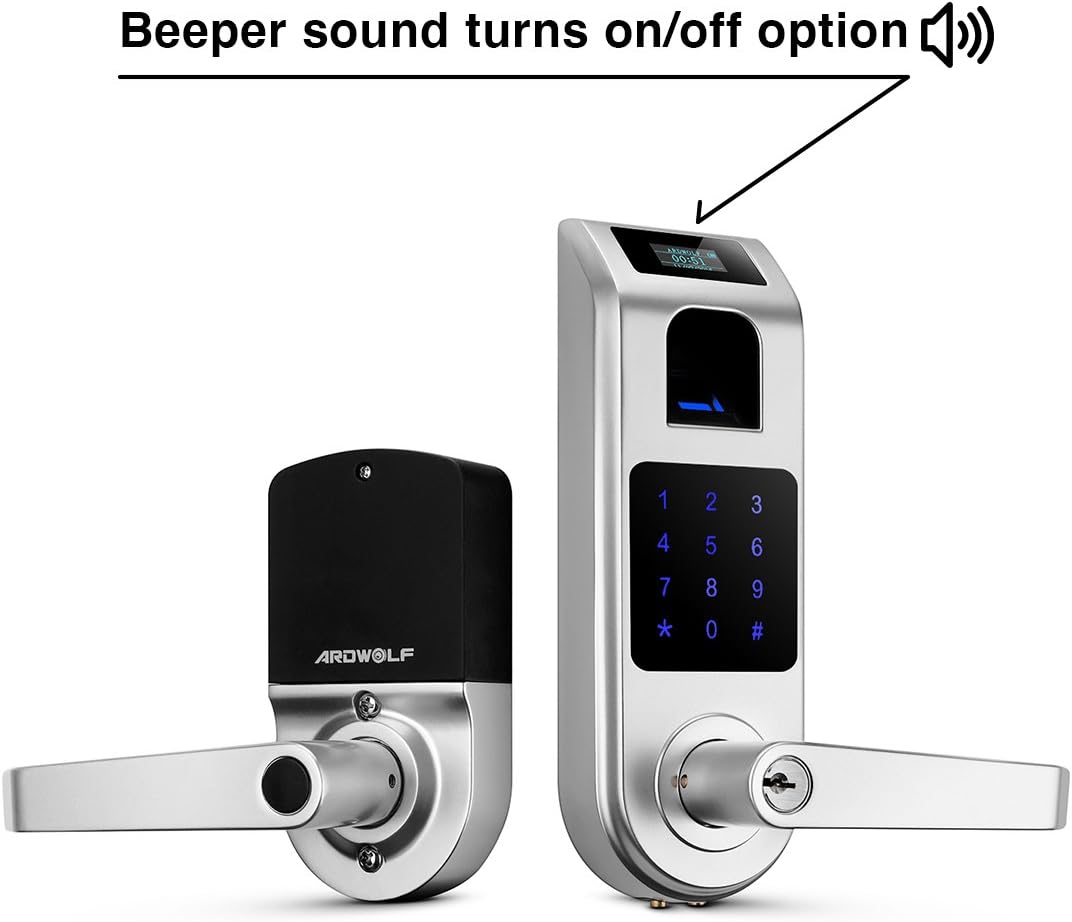
Image: Illustration of the reversible handle feature.
6. Installation Test
After installation, check the flexibility of both the outside and inside handles. Also, verify that the mechanical keys function correctly.
Operating Instructions
This section covers the basic operation and programming of your ARDWOLF A10 lock.
1. Initial Setup: Date and Time
Upon first use, set the date and time:
- Touch the keypad to activate the lock.
- Use '6' or '7' to move the cursor and '4' or '8' to select numbers (0-9).
- Press '#' (Enter) to confirm each setting.

Image: The OLED display guides you through date and time setup.
2. Enrolling a Master Fingerprint/Code
The first enrolled user becomes the Master. The Master can manage other users and lock settings.
- Touch '#' to activate the lock.
- The display will show "User Empty, Enroll Master". Press '#' (Enter).
- The display will show "Master ID: 0001". Press '#' (Enter).
- Place your finger on the sensor and lift it, then place it again. Repeat 3 times until "Enroll OK" is displayed.
- Enter a 6-8 digit password twice, pressing '#' (Enter) after each entry. "Enroll OK" will confirm.
Video: This video demonstrates how to set up the ARDWOLF A10 door lock, including enrolling a master user.
3. Enrolling Additional Users (Fingerprint or Code)
To add more users:
- Touch '#' to activate the lock.
- Verify Master: Place the Master fingerprint on the sensor or enter the Master password and press '#' (Enter).
- Navigate to "Enroll User" in the System Menu using '4' or '8' and press '#' (Enter).
- Choose "Enroll User" (for normal users) or "Enroll Master" (for additional masters) and press '#' (Enter).
- Enter a desired User ID (e.g., 0011) and press '#' (Enter).
- For Fingerprint: Place the user's finger on the sensor and lift it, then place it again. Repeat 3 times until "Enroll OK" is displayed.
- For Code: Enter a 6-8 digit password twice, pressing '#' (Enter) after each entry. "Enroll OK" will confirm.

Image: The OLED display showing steps for adding a user fingerprint.
4. Open Mode (Passage Mode)
This mode allows anyone to open the door without authentication. Useful for high-traffic periods.
- Touch '#' to activate the lock.
- Verify Master: Place the Master fingerprint on the sensor or enter the Master password and press '#' (Enter).
- Navigate to "System Setup" in the System Menu.
- Choose "Open Mode" and press '#' (Enter).
- Select "Switch On?" and press '#' (Enter) to activate. The display will show "Open Mode On".
- To deactivate, repeat steps 1-4, then select "Switch Off?" and press '#' (Enter). The display will show "Open Mode Off".
5. Init System (Factory Reset)
To delete all user data and reset the lock to factory settings:
- Touch '#' to activate the lock.
- Verify Master: Place the Master fingerprint on the sensor or enter the Master password and press '#' (Enter).
- Navigate to "System Setup" in the System Menu.
- Choose "System Init" and press '#' (Enter).
- Confirm initialization by pressing '#' (Enter) again. The display will show "Init OK".
Maintenance
Regular maintenance ensures optimal performance and longevity of your ARDWOLF A10 lock.
- Battery Replacement: Replace all 4 AA alkaline batteries when the low battery indicator appears on the OLED display. Do not mix old and new batteries.
- Cleaning: Wipe the touchscreen and fingerprint sensor with a soft, dry cloth. Avoid abrasive cleaners or solvents that could damage the surface.
- Environmental Protection: While the lock has some water resistance, avoid direct exposure to heavy rain or extreme moisture to prevent internal damage.
Troubleshooting
If you encounter issues with your ARDWOLF A10 lock, refer to the following common solutions:
- Lock Not Responding: Check battery levels and replace if necessary. Ensure the keypad is activated by touching it.
- Fingerprint Not Recognized: Ensure your finger is clean and dry. Place your finger firmly and completely on the sensor. Re-enroll your fingerprint if issues persist.
- Keypad Not Accepting Code: Verify the code is correct and entered within the time limit. Ensure the keypad is active.
- Handle Not Engaging: Check for any obstructions in the door latch mechanism. If the handle feels loose, re-check the installation screws.
- OLED Display Issues: If the display is blank or malfunctioning, try replacing the batteries. If the issue persists, contact customer support.
Specifications
| Feature | Detail |
|---|---|
| Brand | ARDWOLF |
| Model Number | A10 (4331021217) |
| Lock Type | Biometric, Keypad |
| Material | Metal |
| Color | Silver |
| Fingerprint Capacity | 256 |
| User Code Capacity | 300 (4-12 digits) |
| Backup Keys | 2 Mechanical Keys |
| Power Source | 4 AA batteries (required) |
| Connectivity Protocol | Wi-Fi |
| Item Weight | 4.81 pounds |
| Package Dimensions | 10.9 x 8.1 x 3.7 inches |
Warranty and Support
ARDWOLF provides a one-year after-sales service and local US repair service for this product. For any questions regarding installation or usage, please contact ARDWOLF customer support.
Please refer to the contact information provided in your product packaging or visit the official ARDWOLF website for further assistance.
Ask a question about this manual
Ask about setup, troubleshooting, compatibility, parts, safety, or missing instructions. Manuals+ will review the question and use this page’s manual context to help answer it.