
XtremepowerUS 75138
XtremepowerUS 13" Sand Filter 3/4HP Pool Pump User Manual
Model: 75138
Introduction
This manual provides essential information for the safe and efficient operation of your XtremepowerUS 13" Sand Filter 3/4HP Pool Pump. Please read thoroughly before installation, operation, and maintenance. Proper understanding and adherence to these instructions will ensure optimal performance and longevity of your pool filtration system.

Figure 1: XtremepowerUS 13" Sand Filter Pool Pump, showing the blue filter tank connected to the black pump unit via a grey hose.
Safety Information
Always observe basic safety precautions when installing and operating this electrical equipment. Failure to do so could result in serious injury or death.
- Electrical Safety: Always disconnect power to the pump before performing any service or maintenance. Ensure the pump is connected to a grounded outlet protected by a Ground Fault Circuit Interrupter (GFCI). Do not operate the pump if the power cord is damaged.
- Water and Chemical Safety: Do not operate the pump dry. Ensure the pump is filled with water before starting. Handle pool chemicals with care and follow manufacturer's instructions.
- Installation: Install the pump on a solid, level surface. Ensure adequate ventilation around the pump. Keep children and unauthorized persons away from the equipment.
- General Precautions: Do not modify the pump or filter in any way. Use only genuine replacement parts. Consult local building and plumbing codes before installation.
Package Contents
Verify that all components are present and undamaged before beginning installation. If any parts are missing or damaged, contact customer support.
- Sand Filter Tank (13-inch)
- 3/4HP Pool Pump
- Multi-Port Valve
- Filter Base
- Connecting Hoses and Clamps
- Pressure Gauge
- User Manual (this document)
Specifications
| Feature | Specification |
|---|---|
| Brand | XtremepowerUS |
| Model Number | 75138 |
| Filter Tank Size | 13 inches |
| Sand Capacity | 61 pounds |
| Pump Horsepower | 3/4 HP |
| Maximum Flow Rate | 2,400 GPH (Gallons Per Hour) |
| Maximum Pool Capacity | Up to 10,000 Gallons |
| Voltage | 115 Volts |
| Product Dimensions (L x W x H) | 17" x 13" x 22" |
| Item Weight | 27 Pounds |
| UPC | 602589761565 |

Figure 2: Product dimensions, indicating the height of the filter and pump, and the length and width of the base.
Setup and Installation
Follow these steps carefully for proper assembly and installation of your sand filter pump system.
- Positioning: Place the filter and pump on a firm, level surface, as close to the pool as possible. Ensure the location is well-drained and protected from direct weather exposure if possible.
- Assemble Base: Secure the pump and filter tank to the provided base according to the diagrams.
- Fill Filter Tank with Sand: Remove the multi-port valve from the top of the filter tank. Cover the standpipe opening inside the tank to prevent sand from entering. Slowly add the recommended amount of filter sand (61 lbs) to the tank. Ensure the sand is clean and of the correct grade for pool filters. Level the sand and remove the standpipe cover.
- Install Multi-Port Valve: Carefully place the multi-port valve onto the filter tank, ensuring the standpipe aligns correctly with the opening in the valve. Secure the valve to the tank using the provided clamp or bolts. Do not overtighten.
- Connect Hoses:
- Connect the hose from the pump discharge to the "PUMP" port on the multi-port valve.
- Connect the hose from the pool skimmer/main drain to the pump inlet.
- Connect the hose from the "RETURN" port on the multi-port valve to the pool return jet.
- Connect a backwash hose to the "WASTE" port on the multi-port valve, directing it to an appropriate drainage area.

Figure 3: Detail of a hose connection secured with a clamp to the multi-port valve.
- Install Pressure Gauge: Screw the pressure gauge into the designated port on the multi-port valve.
- Priming the Pump: Before starting, ensure the pump is filled with water. Open the air relief valve on the pump (if present) or the multi-port valve to allow air to escape as water fills the pump housing. Once water flows steadily, close the valve.
- Electrical Connection: Plug the pump into a properly grounded GFCI-protected electrical outlet.
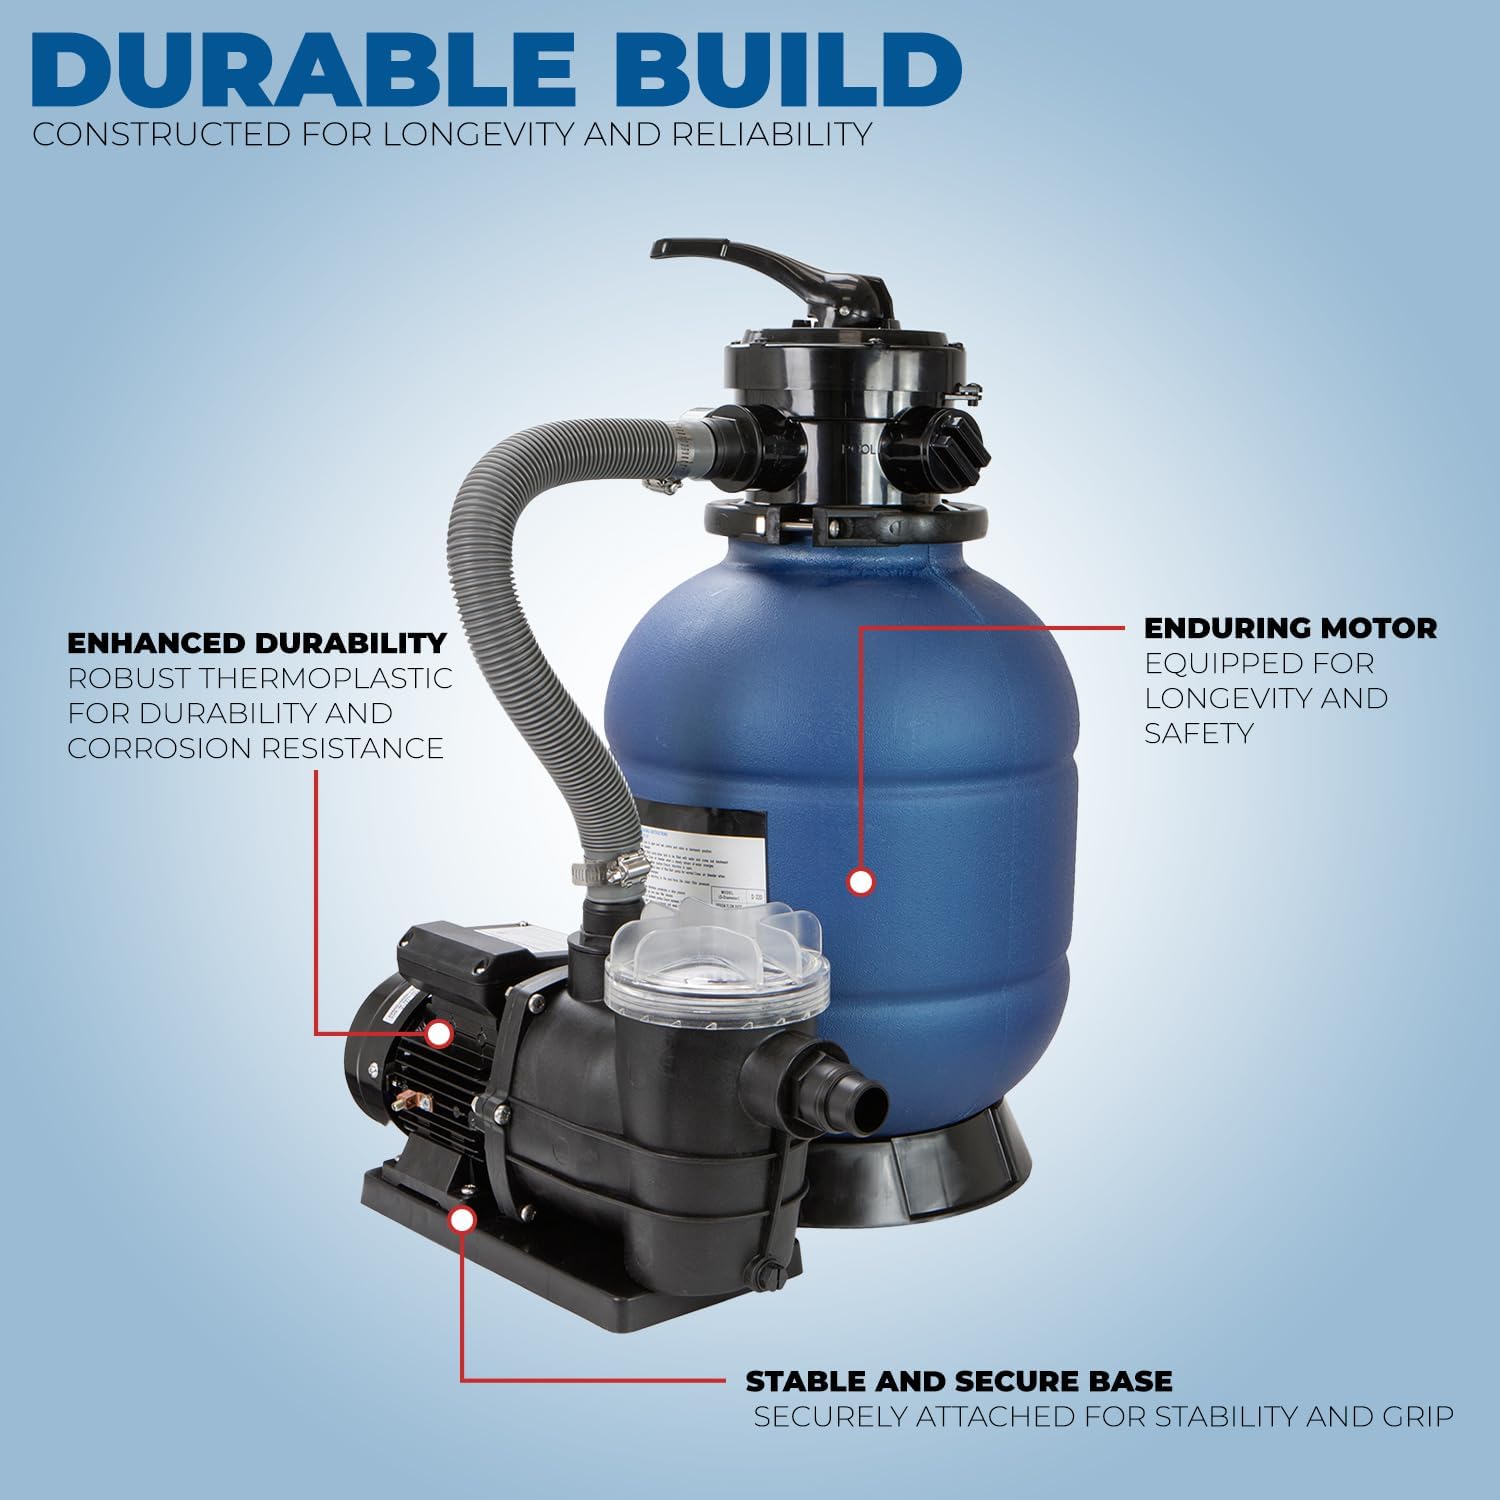
Figure 4: Component diagram highlighting the robust thermoplastic filter, enduring motor, and stable base for durability.
Operation
The multi-port valve controls the flow of water through the filter system. Always turn off the pump before changing the valve position to prevent damage.

Figure 5: The multi-port valve, illustrating its various operational settings for pool maintenance.
- FILTER: This is the normal operating position for filtering the pool water. Water flows from the pump, through the sand, and back to the pool.
- BACKWASH: Used for cleaning the filter sand. Water flows in reverse through the filter, flushing trapped debris out the waste port. Perform backwash when the pressure gauge reading is 8-10 PSI above its clean operating pressure.
- RINSE: Used after backwashing to settle the sand bed and flush any remaining dirty water from the valve. Run for 30-60 seconds after backwash. Water flows out the waste port.
- WINTER: Used for winterizing the filter. This position allows for drainage and prevents water from being trapped in the valve during freezing temperatures.
To start the pump, ensure the multi-port valve is in the "FILTER" position, the pump is primed, and then turn on the power. Monitor the pressure gauge for normal operating pressure.

Figure 6: The sand filter pump system positioned next to an above-ground pool, demonstrating its compatibility with large pool volumes up to 10,000 gallons.
Maintenance
Regular maintenance is crucial for the efficient operation and longevity of your sand filter pump.
- Backwashing: Backwash the filter regularly, typically when the pressure gauge reads 8-10 PSI above its clean starting pressure.
- Turn off the pump.
- Set the multi-port valve to "BACKWASH".
- Turn on the pump and run until the water flowing out of the waste line is clear (usually 2-3 minutes).
- Turn off the pump.
- Set the multi-port valve to "RINSE".
- Turn on the pump and run for 30-60 seconds.
- Turn off the pump.
- Set the multi-port valve back to "FILTER".
- Turn on the pump for normal operation.
- Strainer Basket Cleaning: Periodically check and clean the pump's strainer basket. Turn off the pump, close any necessary valves to prevent water flow, remove the strainer lid, empty debris, and replace.
- Sand Replacement: Filter sand typically needs to be replaced every 3-5 years, depending on usage and water quality. Refer to the "Setup and Installation" section for instructions on adding sand.
- Winterization: Before freezing temperatures, drain all water from the pump, filter, and hoses. Set the multi-port valve to the "WINTER" position. Store the pump and filter in a dry, protected area if possible, or cover them securely.

Figure 7: Visual representation of the filtration effectiveness, showing a pool's water clarity before and after using the sand filter system.
Troubleshooting
This section addresses common issues you might encounter with your sand filter pump. For problems not listed here, contact customer support.
| Problem | Possible Cause | Solution |
|---|---|---|
| Low Water Flow / Low Pressure | Clogged skimmer basket or pump strainer; dirty filter sand; air leak in suction line; low water level in pool. | Clean baskets; backwash/rinse filter; check all connections for leaks; add water to pool. |
| Cloudy Pool Water | Dirty filter sand; insufficient filtration time; improper chemical balance; too much sand in filter. | Backwash/rinse filter; increase pump run time; test and adjust pool chemicals; ensure correct sand level. |
| Pump Not Priming / Air in Pump | Low water level; air leak in suction line; clogged strainer basket; closed valves. | Ensure adequate water level; check and tighten all connections; clean strainer basket; open all necessary valves. |
| Pump Not Starting | No power; tripped GFCI; motor overload. | Check power supply; reset GFCI; allow motor to cool and reset if it has an overload protector. |
| Water Leaking from Connections | Loose hose clamps; worn O-rings/gaskets; cracked housing. | Tighten clamps; inspect and replace O-rings/gaskets; contact support if housing is cracked. |
Warranty and Support
For warranty information and technical support, please refer to the documentation included with your purchase or visit the official XtremepowerUS website. Keep your purchase receipt as proof of purchase for any warranty claims.
Online Resources: For additional guides, FAQs, and product registration, please visit the XtremepowerUS support page.
Related documents75138


Ask a question about this manual
Ask about setup, troubleshooting, compatibility, parts, safety, or missing instructions. Manuals+ will review the question and use this page’s manual context to help answer it.