Introduction
This manual provides instructions for the installation, operation, and maintenance of your Floureon 4-Channel 960H Digital Video Recorder (DVR) Security System. This system includes a 4-channel DVR and four 900TVL bullet cameras designed for indoor and outdoor use. Please read this manual thoroughly before installation and operation to ensure proper use and to prevent damage.
The system features H.264 video compression, 960H resolution recording, IR-Cut night vision cameras, and remote access capabilities via P2P technology for smartphones, tablets, and PCs.
Package Contents
Verify that all items are present in your package. If any items are missing or damaged, please contact customer support.
- 1 x 4-Channel 960H CCTV DVR (Hard Drive Not Included)
- 4 x 900TVL Bullet Security Cameras
- 4 x 60ft (18.3M) Video + Power Cables for Security Cameras
- 1 x 1-to-4 Power Splitter Cable for Cameras
- 1 x USB Mouse for DVR
- 1 x Power Supply for DVR
- 1 x Power Supply for Cameras
- 1 x English User's Manual
Safety Precautions
- Ensure proper ventilation for the DVR unit.
- Do not expose the DVR or cameras to extreme temperatures, humidity, or dust.
- Use only the provided power adapters.
- Avoid placing the DVR near strong magnetic fields.
- Do not attempt to open or repair the devices yourself. Refer all servicing to qualified personnel.
Setup
1. DVR Overview
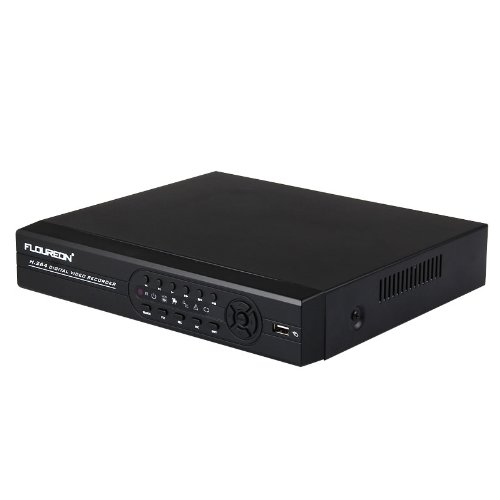
Front view of the Floureon 4-Channel DVR, showing control buttons and USB port.

Rear panel of the Floureon 4-Channel DVR, displaying video input (BNC), video output (BNC, VGA, HDMI), audio input/output, USB, Ethernet (NET), and power input ports.
2. Hard Drive Installation (Optional)
The DVR requires a 3.5-inch SATA II hard disk drive (up to 2TB) for recording. If you wish to record video, you must install a hard drive (not included).
- Unscrew and remove the top cover of the DVR.
- Connect the SATA data cable and power cable from the DVR to the hard drive.
- Secure the hard drive to the bottom of the DVR chassis using the provided screws.
- Replace the top cover and secure it with screws.
3. Camera Installation

Floureon bullet camera showing Infrared LEDs, Weather Resistant Sunshield, Adjustable Viewing Angle, and Mounting Bracket.
The 900TVL bullet cameras are designed for both indoor and outdoor use and are IP66 waterproof. Mount cameras in desired locations, ensuring a clear field of view and within range of the 60ft video/power cables.
- Use the mounting bracket to secure the camera to a wall or ceiling.
- Adjust the viewing angle as needed.
4. System Connection Diagram

Connection diagram illustrating how to connect the cameras to the DVR using video and power cables, connect the DVR to a monitor (VGA/HDMI), connect the USB mouse, and connect to a router for remote viewing.
- Connect Cameras to DVR: Use the provided 60ft video+power cables. Connect the BNC connector from each camera to a "VIDEO IN" port (CH1-CH4) on the DVR.
- Power Cameras: Connect the power connector from each camera cable to the 1-to-4 power splitter cable. Connect the splitter cable to the camera power supply.
- Connect Monitor: Connect a monitor to the DVR using either the VGA or HDMI output port.
- Connect USB Mouse: Plug the USB mouse into one of the USB ports on the DVR.
- Network Connection (for Remote Access): Connect an Ethernet cable from the DVR's "NET" port to your router.
- Power On: Connect the DVR power supply to the DVR and then plug both the DVR and camera power supplies into a power outlet.
Operating Instructions
1. Initial Setup and Hard Drive Formatting
Upon first power-up, the DVR will guide you through an initial setup wizard. If a hard drive is installed, it must be formatted before recording can begin. Navigate to the DVR's menu (usually by right-clicking with the mouse), find "HDD Management" or "Storage," and select "Format."
2. Live View
After successful connection, the live view of all connected cameras will be displayed on the monitor. You can switch between single-camera view, multi-camera view, and sequence display using the DVR's interface.
3. Recording Modes
The DVR supports various recording modes:
- Manual Recording: Start and stop recording manually.
- Schedule Recording: Set specific times for continuous recording.
- Motion Detection Recording: Recording starts automatically when motion is detected in the camera's view. You can configure motion detection zones and sensitivity.
- Alarm Recording: Recording triggered by external alarm inputs (if supported and configured).
Configure recording settings through the DVR's menu: Main Menu > Record > Record Config.
4. Playback
To review recorded footage, navigate to Main Menu > Playback. You can search by date, time, and event type (e.g., motion detection). The DVR supports 960H resolution playback for clear images.
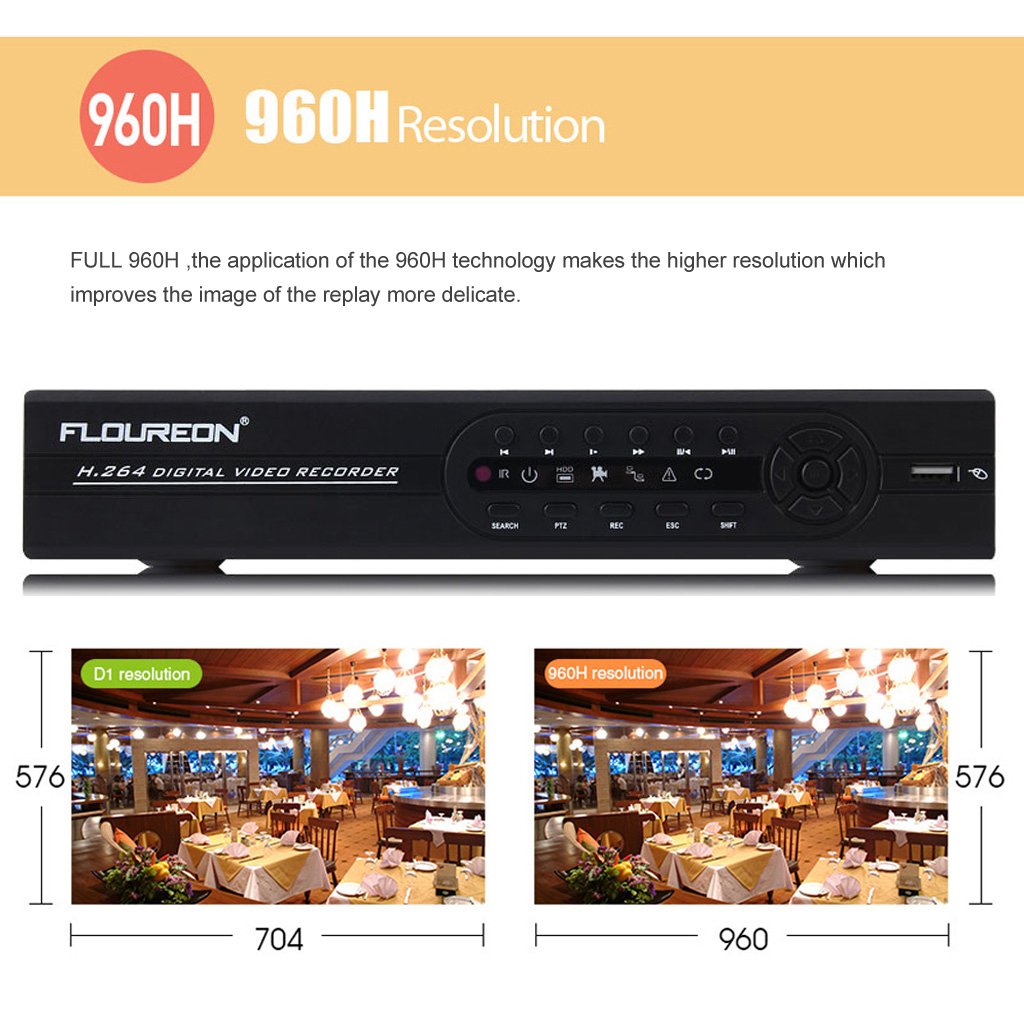
Image comparing D1 resolution (704x576) with 960H resolution (960x576), demonstrating the higher resolution and improved image detail provided by 960H technology.
5. Remote Access (P2P)
The DVR supports P2P (Peer-to-Peer) technology for easy remote access without complex port forwarding. Ensure the DVR is connected to your router via an Ethernet cable.
- Download App: Download the appropriate mobile application (e.g., XMEye, provided by Floureon) from your smartphone's app store.
- Register Account: Create an account within the app.
- Add Device: Scan the QR code displayed on the DVR's monitor (Main Menu > Network > P2P) or manually enter the device ID to add your DVR to the app.
- View Live/Playback: Once added, you can view live camera feeds and playback recorded footage from your smartphone, tablet, or PC.
6. Motion Detection and Email Alerts
Configure motion detection settings for each camera to trigger recording and send email alerts.
- Navigate to Main Menu > Alarm > Motion Detect.
- Select the camera channel, enable motion detection, and define the detection area and sensitivity.
- Configure email settings under Main Menu > Network > Email to receive alerts.
7. Day and Night Monitoring (IR-Cut)
The cameras feature a built-in IR-Cut filter that automatically switches between day (color) and night (black and white infrared) modes based on ambient light conditions, ensuring continuous surveillance.

Images demonstrating the effect of an IR-Cut filter on color accuracy and examples of day (color) and night (infrared black and white) monitoring views from the security cameras.
Maintenance
- Cleaning: Regularly clean the camera lenses and DVR casing with a soft, dry cloth. Do not use harsh chemicals.
- Firmware Updates: Check the Floureon website periodically for firmware updates for your DVR to ensure optimal performance and security.
- Hard Drive Health: Monitor the health of your hard drive through the DVR's system information. Consider replacing old hard drives to prevent data loss.
- Cable Inspection: Periodically inspect all cables for wear or damage, especially outdoor cables, and replace them if necessary.
Troubleshooting
No Video Display on Monitor
- Ensure the monitor is powered on and correctly connected to the DVR's VGA or HDMI port.
- Verify the DVR is powered on (check power indicator light).
- Try a different monitor or cable to rule out faulty equipment.
No Camera Image
- Check if the camera is properly connected to the DVR's video input.
- Ensure the camera is receiving power via the power splitter and power supply.
- Verify the power supply for cameras is working.
- Test the camera with a different cable or DVR channel if possible.
Cannot Access DVR Remotely
- Confirm the DVR is connected to your router via an Ethernet cable and the network status is "Online" in the DVR's network settings.
- Ensure your router has internet access.
- Verify the P2P service is enabled on the DVR (Main Menu > Network > P2P).
- Check if the mobile app is updated to the latest version.
- Re-add the device to the app if necessary.
No Recording
- Ensure a hard drive is installed and properly connected.
- Verify the hard drive has been formatted (Main Menu > HDD Management).
- Check recording schedules and motion detection settings to ensure they are correctly configured.
- Confirm the hard drive is not full. If full, enable overwrite mode or replace the drive.
Specifications
| Operation System | Embedded Linux |
| Video Compression | H.264 |
| Video System | PAL/NTSC Switch |
| Video Input | 4CH BNC Interface |
| Video Output | 1CH BNC Interface, HDMI (1920*1080), VGA (1080P, 1440*900, 1280*1024, 1024*768) |
| Video Resolution | 4CH 960H (PAL: 960*576, NTSC: 960*480) |
| Recording Mode | Schedule, Manual, Motion Detection |
| Backup | Flash Drive / USB HDD / Network |
| Hard Drive Interface | 3.5 inch SATA II Interface (Up to 2TB) |
| Remote Access | Cloud System (P2P), NO Port Mapping |
| Compatible Devices | Cameras, Personal Computers, Smartphones |
| Item Model Number | PKTVKACK |
| Image Sensor Type | CMOS Sensor |
| Sensor Size | 1/4 Inch |
| Signal System | NTSC |
| Horizontal Resolution | 900 TV Lines |
| Lens | 4mm Fixed |
| Waterproof Rating | IP66 |
| IR LEDs | 24pcs |
| IR Irradiation Distance | 10m~20m (32.81 Feet) |
| Special Feature | Day-and-night-camera, IR-Cut Filter |
Warranty and Support
Floureon provides a Full 1-Year US Warranty for this product. Additionally, Lifetime Support is available from Floureon.
For technical assistance, troubleshooting, or warranty claims, please contact Floureon customer support through their official website or the contact information provided in your product packaging.
All cameras are CE and FCC certified, ensuring compliance with safety and quality standards.