Introduction
This manual provides essential instructions for the safe and effective use of your Aqualung Dive Computer Battery Kit. It is designed for users of Aqualung i100, i300, i300C, and i550 dive computers. Please read this manual thoroughly before attempting any battery replacement or maintenance procedures.
The kit includes a replacement battery, O-ring, and silicone grease, which are crucial for maintaining the water integrity of your dive computer after battery replacement.
Safety Information
- Always ensure the dive computer is dry and clean before opening the battery compartment.
- Perform battery replacement in a clean, dust-free environment to prevent contamination of the O-ring seal.
- Do not use tools other than those specified or provided, as this may damage the computer casing or O-ring.
- After battery replacement, always perform a leak test before diving to ensure the seal is intact.
- Dispose of old batteries according to local regulations.
Kit Contents
The Aqualung Dive Computer Battery Kit typically includes the following components:
- 1 x CR2450 Lithium Battery
- 1 x Battery Compartment O-ring
- 1 x Small tube of Silicone Grease
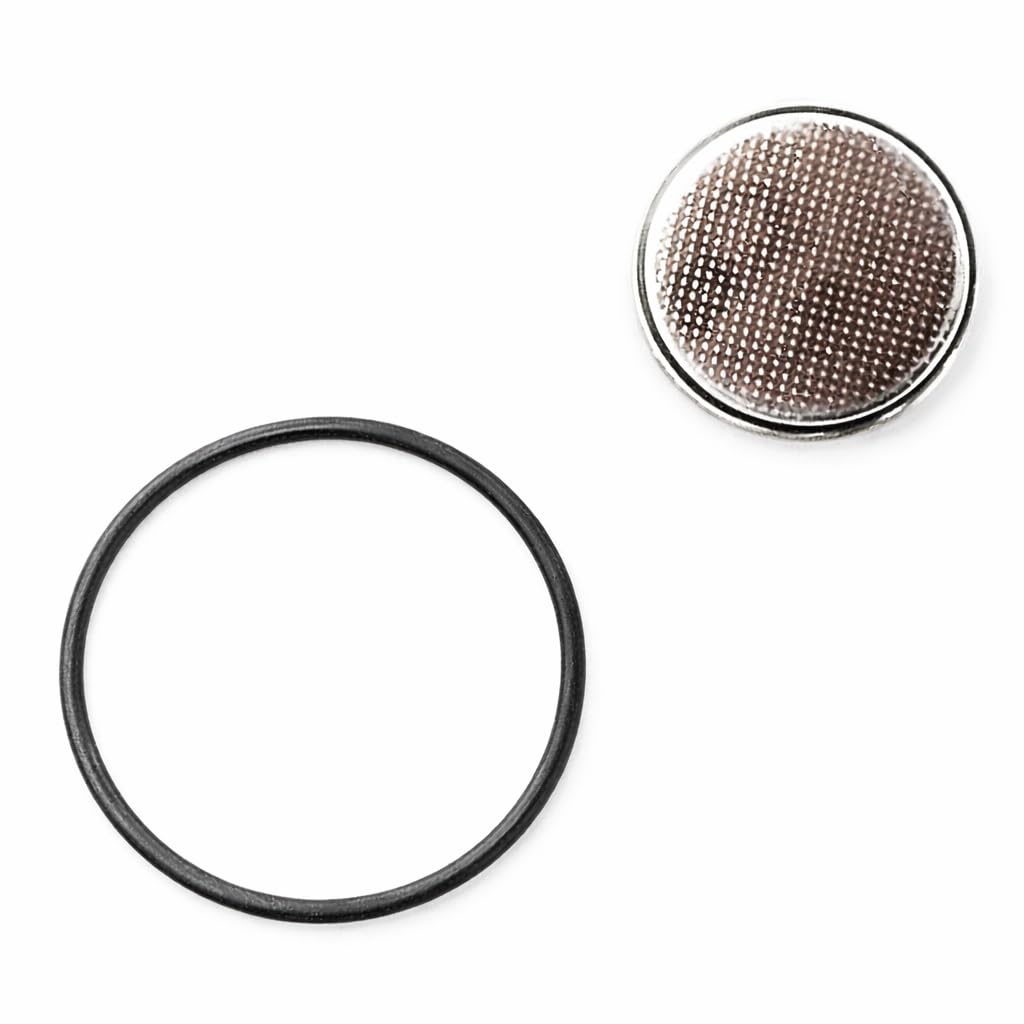
Image: Contents of the Aqualung Dive Computer Battery Kit, showing the CR2450 battery, O-ring, and a small tube of silicone grease.
Setup and Battery Replacement
Follow these steps carefully to replace the battery in your Aqualung dive computer. Refer to your specific dive computer's manual for exact compartment location and opening procedure if different.
- Prepare the Work Area: Ensure your workspace is clean, dry, and well-lit. Gather the battery kit and any necessary tools (e.g., a coin or specific tool for opening the battery cap, as per your dive computer's manual).
- Locate and Open Battery Compartment: Identify the battery compartment on your dive computer. Use the appropriate tool to carefully unscrew or unlatch the battery compartment cover.
- Remove Old Battery and O-ring: Gently remove the old battery. Carefully extract the old O-ring from its groove. Inspect the O-ring groove for any debris or damage. Clean if necessary.
- Install New O-ring: Apply a thin, even layer of the provided silicone grease to the new O-ring. Place the lubricated O-ring into the clean O-ring groove, ensuring it sits flat and is not twisted.
- Insert New Battery: Insert the new CR2450 battery into the compartment, observing the correct polarity (+/-) as indicated inside the compartment.
- Close Battery Compartment: Carefully align the battery compartment cover and screw or latch it back into place. Ensure it is securely tightened, but do not overtighten.
- Verify Functionality: Power on your dive computer to confirm the new battery is working. Check for any error messages or low battery indicators.
Operating Considerations (Post-Battery Change)
After replacing the battery, it is important to consider the following:
- Date and Time Settings: You may need to reset the date, time, and other personal settings on your dive computer.
- Surface Interval: Ensure your dive computer correctly registers the surface interval before your next dive.
- Leak Test: Before diving, perform a shallow water leak test (e.g., in a bucket of water or shallow end of a pool) to confirm the O-ring seal is watertight. Observe for any bubbles.
Maintenance
Proper maintenance of the battery compartment is crucial for the longevity and reliability of your dive computer.
- O-ring Inspection: Always replace the O-ring with each battery change. Never reuse an old O-ring. Inspect the O-ring groove for any nicks, cuts, or debris.
- Silicone Grease: Use only a small amount of silicone grease. Too much can attract debris and compromise the seal. Ensure even distribution.
- Storage: If storing the dive computer for an extended period, consider removing the battery to prevent potential leakage, although modern lithium batteries are less prone to this.
Troubleshooting
If you encounter issues after replacing the battery:
- Computer Not Powering On:
- Check battery polarity.
- Ensure the battery is seated correctly.
- Verify the battery is new and fully charged.
- Confirm the battery compartment cover is fully closed and making proper contact.
- Low Battery Warning Immediately After Replacement:
- Ensure the battery is new and not expired.
- Re-seat the battery to ensure good contact.
- Water Leakage (after leak test):
- Immediately cease use.
- Re-open the compartment and carefully inspect the O-ring for proper seating, damage, or debris.
- Ensure the compartment cover is tightened correctly.
- If leakage persists, seek professional service.
Specifications
| Feature | Detail |
|---|---|
| Brand | Aqualung |
| Model Number | NS911148 |
| Compatible Dive Computers | i100, i300, i300C, i550 |
| Battery Type | CR2450 Lithium |
| Material (O-ring) | Silicone |
| Item Dimensions (L x W x H) | 2 x 2 x 0.25 inches |
| UPC | 053242319829 |
Warranty Information
This product comes with a full manufacturer warranty. For specific details regarding the warranty period and coverage, please refer to the official Aqualung website or contact Aqualung customer support directly. Keep your proof of purchase for warranty claims.
Support and Contact
For further assistance, technical support, or inquiries regarding your Aqualung Dive Computer Battery Kit, please contact Aqualung customer service or visit their official website:
- Aqualung Official Website: www.aqualung.com
- Customer Service: Refer to the contact section on the official website for phone numbers or email support.