1. Introduction
Thank you for choosing the Taurus ORIÓN-300 Steam Iron. This manual provides essential information for the safe and efficient use, maintenance, and troubleshooting of your new appliance. Please read these instructions carefully before first use and keep them for future reference.

Figure 1: Taurus ORIÓN-300 Steam Iron. This image shows the overall design of the iron, highlighting its white and green color scheme and ergonomic handle.
2. Important Safety Instructions
When using electrical appliances, basic safety precautions should always be followed to reduce the risk of fire, electric shock, and personal injury.
- Read all instructions before using the iron.
- Use the iron only for its intended purpose.
- To protect against the risk of electric shock, do not immerse the iron in water or other liquids.
- Always turn the iron to OFF before plugging or unplugging from the outlet. Never yank cord to disconnect from outlet; instead, grasp plug and pull to disconnect.
- Do not allow cord to touch hot surfaces. Let the iron cool completely before putting away. Loop cord loosely around the iron when storing.
- The iron should always be turned to OFF before filling or emptying water, and when not in use.
- Do not operate the iron with a damaged cord or if the iron has been dropped or damaged. To avoid the risk of electric shock, do not disassemble the iron. Contact qualified service personnel for examination and repair. Incorrect reassembly can cause a risk of electric shock when the iron is used.
- Close supervision is necessary for any appliance being used by or near children. Do not leave the iron unattended while connected or on an ironing board.
- Burns can occur from touching hot metal parts, hot water, or steam. Use caution when you turn a steam iron upside down – there may be hot water in the reservoir.
- Use the iron on a stable surface.
3. Product Overview
The Taurus ORIÓN-300 Steam Iron is designed for efficient and comfortable ironing. Familiarize yourself with its components:
- Non-stick Titanium Soleplate: Provides excellent glide and durability.
- Water Tank (200 ml capacity): For steam and spray functions.
- Temperature Control Dial: Adjusts heat settings for different fabric types.
- Steam Control Selector: Regulates continuous steam output.
- Spray Button: Releases a fine mist of water.
- Self-Cleaning Button: Activates the self-cleaning function.
- Power Cord with 360° Swivel: Prevents tangling during use.
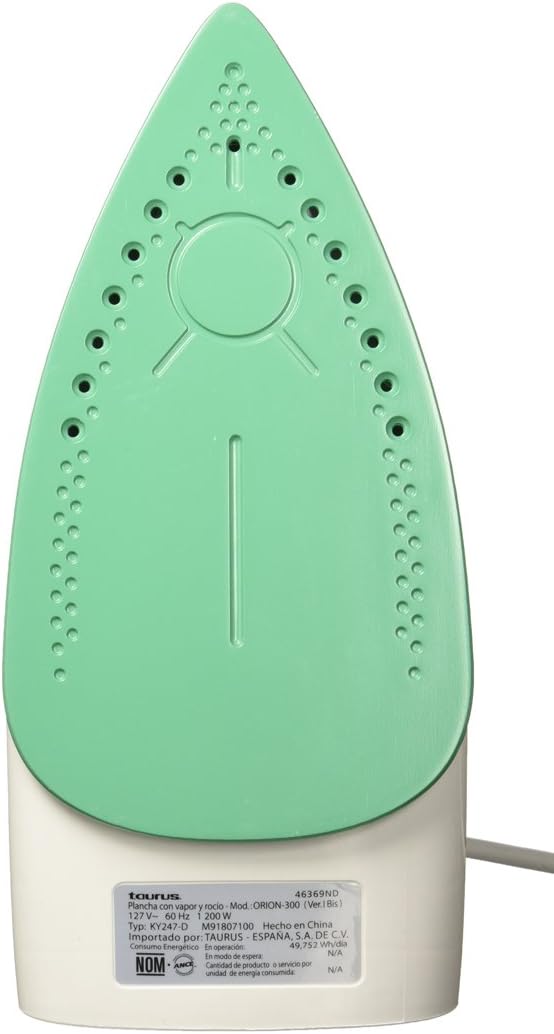
Figure 2: The titanium non-stick soleplate of the Taurus ORIÓN-300 iron, featuring steam vents for even steam distribution.
4. Setup
- Unpacking: Carefully remove the iron from its packaging. Remove any protective films or stickers from the soleplate.
- First Use: Before using for the first time, iron an old piece of fabric (e.g., an old towel) to remove any manufacturing residues from the soleplate. A slight odor or smoke may occur during the first few minutes of use; this is normal and will dissipate.
- Filling the Water Tank:
- Ensure the iron is unplugged from the power outlet and the temperature dial is set to OFF.
- Open the water filler cap.
- Fill the water tank with clean tap water up to the MAX fill line. Do not overfill.
- Close the water filler cap securely.
- Note: For areas with hard water, it is recommended to use a mixture of 50% tap water and 50% distilled water to prevent mineral buildup. Do not use perfumed water, water from tumble dryers, or chemically descaled water, as these can damage the iron.
5. Operating Instructions
- Preparing for Ironing:
- Sort laundry according to fabric type (e.g., linen, cotton, wool, silk, synthetics).
- Check garment labels for ironing instructions.
- Place the iron on its heel rest on a stable, heat-resistant surface.
- Plug the iron into a suitable power outlet (127V~ 60Hz).
- Setting the Temperature:
- Turn the temperature control dial to the desired setting based on the fabric type. Start with lower temperatures for delicate fabrics and increase for heavier ones.
- The indicator light will illuminate, indicating the iron is heating up. It will turn off when the set temperature is reached.
- Dry Ironing:
- Ensure the steam control selector is set to the "Dry Ironing" position (no steam).
- Wait for the indicator light to turn off, then begin ironing.
- Steam Ironing:
- Fill the water tank as described in the "Setup" section.
- Set the temperature control dial to a steam-suitable setting (usually between "••" and "•••" or "MAX" for cotton/linen). Steam will not be generated at low temperatures.
- Once the indicator light turns off, set the steam control selector to the desired steam level.
- Begin ironing. The iron will continuously emit steam.
- Spray Function:
- Press the spray button to release a fine mist of water onto stubborn wrinkles. This can be used during both dry and steam ironing.
- After Ironing:
- Turn the temperature control dial to the "OFF" position.
- Unplug the iron from the power outlet.
- Allow the iron to cool down completely on its heel rest before storing.
- Empty any remaining water from the tank to prevent mineral buildup.
6. Maintenance and Cleaning
Regular maintenance ensures optimal performance and extends the life of your iron.
- Self-Cleaning Function:
- Perform self-cleaning every 2-4 weeks, or more often if you use steam frequently or live in a hard water area.
- Fill the water tank to the MAX line.
- Plug in the iron and set the temperature to MAX. Set the steam control to "Dry Ironing".
- Once the indicator light turns off, unplug the iron.
- Hold the iron horizontally over a sink. Press and hold the self-cleaning button. Hot water and steam will be expelled from the soleplate, flushing out mineral deposits.
- Gently shake the iron back and forth until the water tank is empty.
- Release the self-cleaning button.
- Plug the iron back in and let it heat up to dry the soleplate. Unplug and let it cool completely before storing.
- Cleaning the Soleplate:
- Allow the iron to cool completely.
- Wipe the soleplate with a damp cloth and a non-abrasive liquid cleaner, if necessary. Do not use abrasive scouring pads or metal cleaners, as these can damage the non-stick coating.
- Cleaning the Exterior:
- Wipe the exterior of the iron with a soft, damp cloth. Dry thoroughly.
- Storage:
- Ensure the iron is cool and empty of water.
- Store the iron upright on its heel rest in a safe, dry place.
- Do not wrap the cord tightly around the hot iron.
7. Troubleshooting
| Problem | Possible Cause | Solution |
|---|---|---|
| Iron does not heat up. | Not plugged in; power outlet faulty; temperature dial set to OFF. | Check power connection; try another outlet; turn temperature dial to desired setting. |
| No steam or insufficient steam. | Water tank empty; temperature too low for steam; steam control set to dry ironing; steam vents clogged. | Fill water tank; set temperature to steam-suitable range; set steam control to desired steam level; perform self-cleaning. |
| Water leaks from soleplate. | Temperature too low for steam (water drips before turning to steam); water tank overfilled. | Increase temperature to steam-suitable setting; do not overfill water tank. |
| Soleplate is dirty or sticky. | Residue from fabrics or starch buildup. | Clean the soleplate as described in the Maintenance section. |
If the problem persists after trying these solutions, please contact customer support.
8. Specifications
- Brand: Taurus
- Model Name: ORIÓN-300
- Model Number: ORIÓN 300
- Color: White with Green
- Power: 1200 W
- Voltage: 127 V~
- Frequency: 60 Hz
- Soleplate Material: Non-stick Titanium
- Water Tank Capacity: 200 ml
- Special Features: Continuous Steam, Spray Function, Self-Cleaning, Temperature Control, 360° Swivel Cord
- Part Number: 03110605
9. Warranty and Support
Warranty: This product comes with a 2-year warranty from the date of purchase. Please retain your proof of purchase for warranty claims.
Customer Support: For technical assistance, service, or warranty inquiries, please contact Taurus customer service. Refer to the contact information provided with your product packaging or visit the official Taurus website for support details.
Do not attempt to repair the appliance yourself. Unauthorized repairs will void the warranty.


