
Introduction
This manual provides detailed instructions for the safe and effective use of your Dress Up America Go Talkie Walkie Talkies. Please read this manual thoroughly before operating the device and retain it for future reference.
The Go Talkie Walkie Talkies are designed for clear communication over distances, featuring 22 channels, a built-in flashlight, an LCD screen, and interchangeable theme plates for personalized use.
Package Contents
- 2 x Go Talkie Walkie Talkies
- 4 x Interchangeable Front Plates (Police, Fire, Army, Spy themes)
- User Manual (this document)
Component Identification
Familiarize yourself with the components of your Go Talkie Walkie Talkie:

Image: Labeled diagram of the Go Talkie Walkie Talkie. Key components include the Antenna, LED Flashlight, Backlit display, PTT/Talk button, Moni/Down button, Light on/off button, Scan/Up button, Menu/Power button, Speaker, Microphone, and Micro USB connection.
- Antenna: For transmitting and receiving signals.
- LED Flashlight: Provides illumination.
- PTT/Talk button: Press and hold to transmit your voice.
- Moni/Down Button: Used for monitoring channels and navigating menus.
- Menu/Power button: Press to access menu options or hold to power on/off.
- Speaker: For audio output.
- Backlit display: Shows channel, battery level, and other indicators.
- Light on/off button: Activates or deactivates the LED flashlight.
- Scan/Up button: Initiates channel scanning and navigates menus.
- Microphone: For voice input.
- Micro USB connection: For charging rechargeable batteries (not included).
Setup
1. Battery Installation
- Locate the battery compartment cover on the back of the walkie talkie.
- Gently slide or unclip the cover to open the compartment.
- Insert 3 AAA batteries (not included) into each walkie talkie, ensuring correct polarity (+/-).
- Replace the battery compartment cover, ensuring it is securely closed.
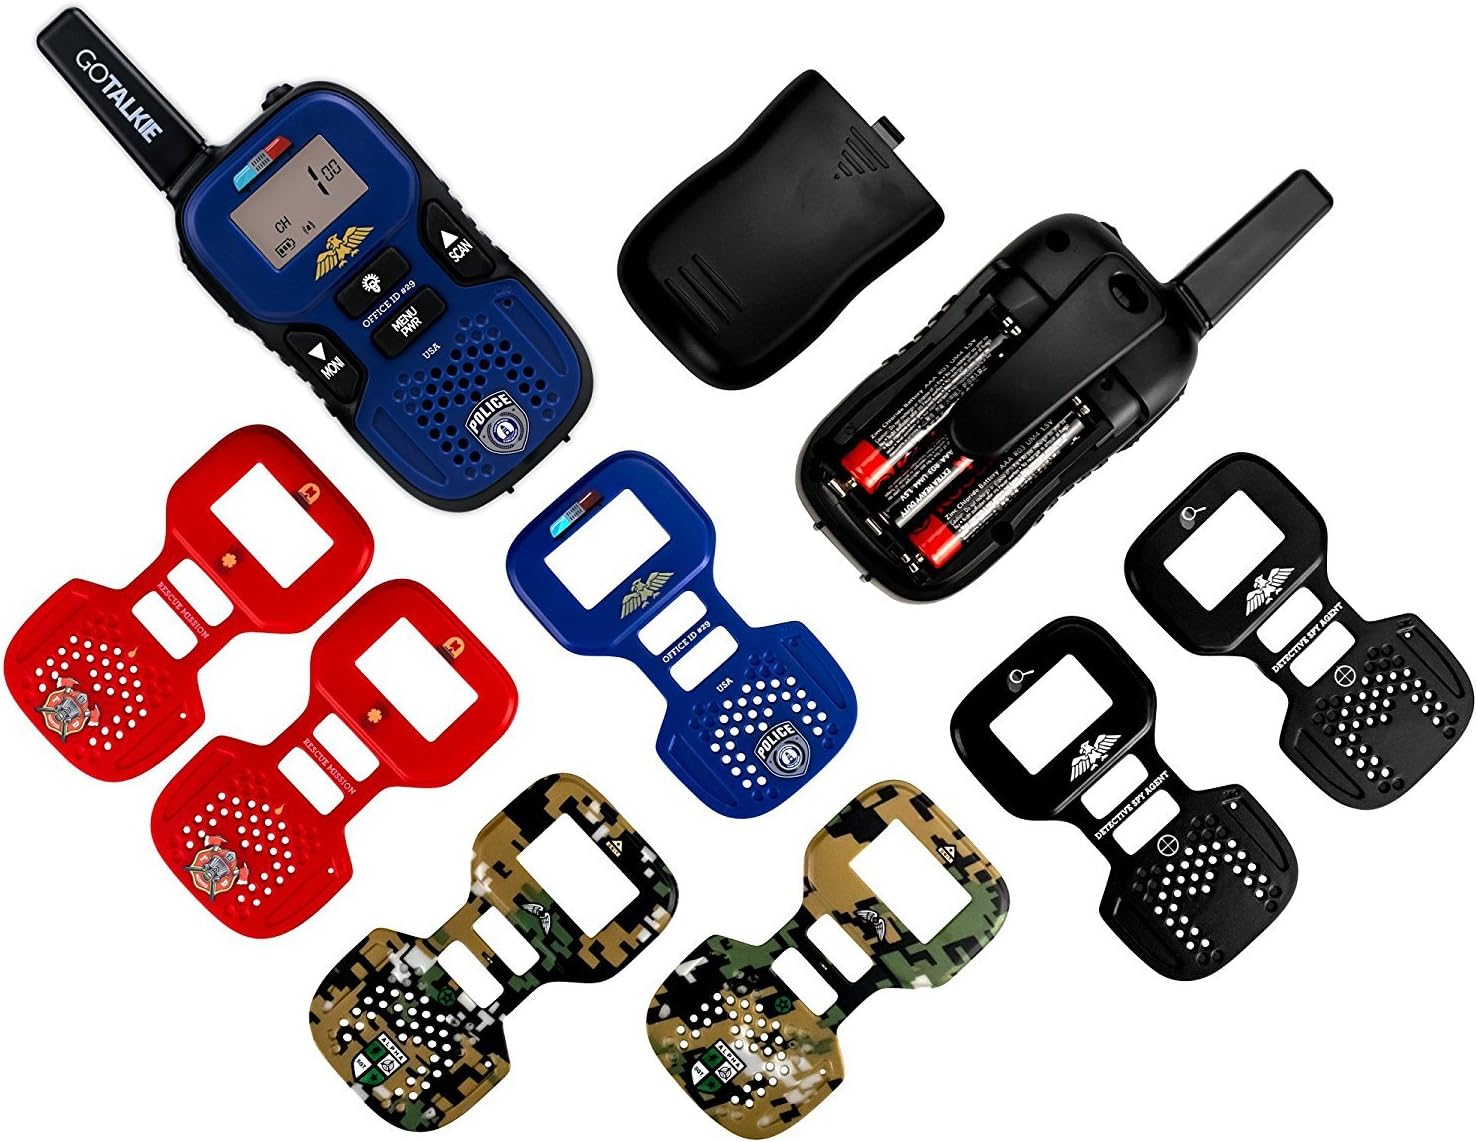
Image: Two Go Talkie Walkie Talkies, one with its battery compartment open showing AAA batteries, and various interchangeable front plates laid out.

Image: A Go Talkie Walkie Talkie with its battery compartment open, showing rechargeable AAA batteries and highlighting the Micro USB charging port.
Note: The walkie talkies are compatible with rechargeable AAA batteries (not included). These can be charged directly via the Micro USB port on the device using a standard USB charger (not included).
2. Attaching Interchangeable Front Plates
- Select your desired theme plate (Police, Fire, Army, or Spy).
- Align the plate with the front of the walkie talkie.
- Gently press the plate into place until it clicks securely.
- To change plates, carefully unclip the current plate and replace it with another.

Image: Four Go Talkie Walkie Talkies displayed with different interchangeable front plates: Police (blue), Fire (red), Army (camouflage), and Spy (black).

Image: An exploded view of a Go Talkie Walkie Talkie, illustrating how the interchangeable front plates (Fire, Soldier, Spy, Police) attach to the main device body.
Operating Instructions
1. Power On/Off
To power on the walkie talkie, press and hold the MENU/PWR button until the LCD screen illuminates. To power off, press and hold the MENU/PWR button again until the screen turns off.
2. Adjusting Volume
Use the SCAN/Up and MONI/Down buttons to adjust the speaker volume. The volume level will be displayed on the LCD screen.
3. Selecting a Channel
- With the walkie talkie powered on, press the MENU/PWR button once. The channel number on the LCD screen will flash.
- Use the SCAN/Up and MONI/Down buttons to select your desired channel (1-22).
- Press the MENU/PWR button again to confirm your selection and exit the channel setting mode.
- Ensure all walkie talkies you wish to communicate with are set to the same channel.
4. Transmitting and Receiving
- To transmit your voice, press and hold the PTT/Talk button. Speak clearly into the microphone, holding the walkie talkie approximately 2-3 inches from your mouth.
- Release the PTT/Talk button to stop transmitting and listen for a response.
- When receiving a transmission, the speaker will emit sound.
5. Using the Scan Function
To find active channels, press the SCAN/Up button (without pressing MENU first). The walkie talkie will scan through all 22 channels and stop on any active channel. Press PTT/Talk or MENU/PWR to stop scanning.
6. Using the Flashlight
To turn the built-in LED flashlight on or off, press the Light on/off button located on the front panel.
7. Monitoring Channels (MONI)
Press the MONI/Down button to temporarily disable the squelch function and listen for weak signals on the current channel. This can be useful for checking if a channel is clear before transmitting.
Maintenance
- Cleaning: Wipe the walkie talkies with a soft, damp cloth. Do not use harsh chemicals or abrasive cleaners.
- Battery Care: Remove batteries if the device will not be used for an extended period to prevent leakage.
- Storage: Store the walkie talkies in a cool, dry place away from direct sunlight and extreme temperatures.
- Water Resistance: These walkie talkies are NOT water resistant. Avoid exposure to water or moisture.
Troubleshooting
| Problem | Possible Cause | Solution |
|---|---|---|
| No power | Batteries are dead or incorrectly installed. | Replace batteries or ensure correct polarity. Charge rechargeable batteries if applicable. |
| Cannot communicate with other walkie talkie | Different channels selected; out of range; low battery. | Ensure both walkie talkies are on the same channel. Move closer to the other unit. Replace or charge batteries. |
| Poor sound quality / Static | Out of range; interference; low battery. | Move closer to the other unit. Avoid obstacles. Replace or charge batteries. |
| PTT button not working | Device is off; button malfunction. | Ensure device is powered on. If problem persists, contact customer support. |
Specifications
| Feature | Detail |
|---|---|
| Brand | Dress Up America (Go Talkie) |
| Model Number | 4101 |
| Number of Channels | 22 |
| Talking Range (General) | Up to 2.0 miles |
| Talking Range (Open Area) | Up to 3.7 miles (depending on terrain & atmospheric conditions) |
| Battery Type | 3 x AAA batteries per unit (not included), compatible with rechargeable AAA batteries |
| Battery Average Life | Approximately 9 hours (standby) |
| Charging Port | Micro USB (for rechargeable batteries) |
| Dimensions (approx.) | 3.3"h x 1.8"w x 1.1"d |
| Weight | 0.18 Kilograms (per unit) |
| Special Features | Built-in Flashlight, LCD Screen, 83 DCS Codes, Interchangeable Front Plates |
| Water Resistance Level | Not Water Resistant |

Image: A Go Talkie Walkie Talkie shown with its approximate dimensions: 3.3 inches in height, 1.8 inches in width, and 1.1 inches in depth.
Warranty and Support
This product is manufactured by GoTalkie for Dress Up America. For any questions, technical support, or warranty inquiries, please refer to the contact information provided with your purchase documentation or visit the official Dress Up America website. Please note that warranty terms may vary and typically cover manufacturing defects.
Keep your purchase receipt as proof of purchase for warranty claims.