
Introduction
Thank you for choosing the Jarvis Fully Standing Desk Frame Only. This electric adjustable desk frame is designed to provide a versatile and ergonomic workspace, allowing seamless transitions between sitting and standing positions. This manual will guide you through the assembly, operation, and maintenance of your new desk frame.
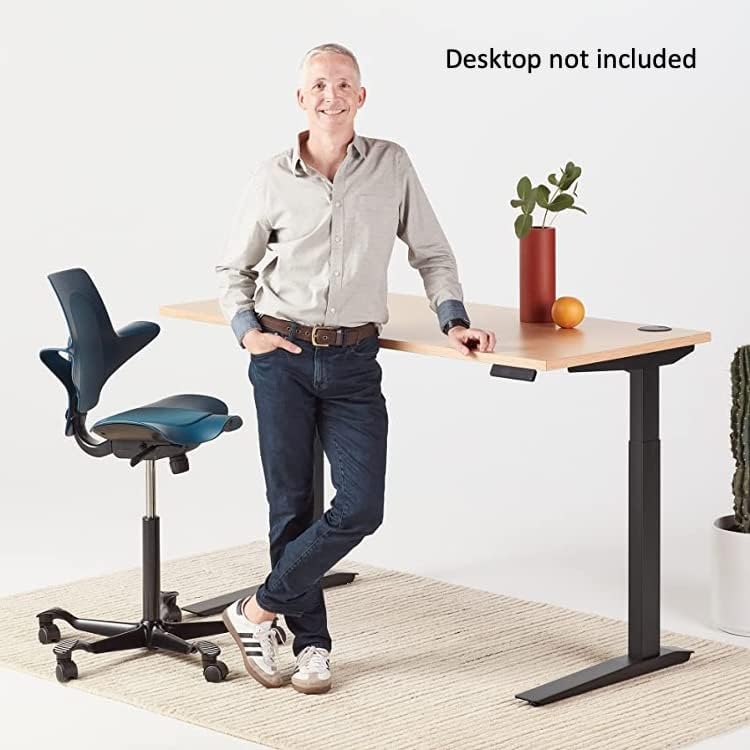
A person standing comfortably at a Jarvis Fully Standing Desk, demonstrating its ergonomic use. The desk features a light-colored wooden top and a black frame. Desktop not included.
Safety Information
- Ensure all components are securely fastened before use.
- Keep hands and objects clear of moving parts during height adjustments.
- Do not overload the desk. The maximum weight recommendation is 350 pounds.
- This product is intended for adult use.
- Refer to the product description for additional safety-related details.
Package Contents
Your Jarvis Fully Standing Desk Frame Only package includes the following components:
- Height adjustable desk frame (3-stage extended range)
- Digital display handset with 4 memory preset options
- Motorized lifting columns
- All necessary assembly hardware (screws, tools if included)
- Instruction manual
Note: Desktop is not included with this frame.

An exploded view of the Jarvis Standing Desk frame components, illustrating the various parts included in the package, such as the legs, crossbar, and control box.
Setup Instructions
Follow these steps to assemble your Jarvis Fully Standing Desk Frame. A Phillips head screwdriver is required; all other necessary tools are included in the box.
Assembly Video Guide
Video Description: This video provides a step-by-step guide on how to assemble the Jarvis Standing Desk. It covers attaching the lifting columns to the frame ends, securing side brackets, positioning the frame, attaching the handset, plugging in cords, attaching feet, and finally calibrating the desk. The video emphasizes checking all screws and using a friend for flipping the desk.
Step-by-Step Assembly
- Prepare Components: Unpack all components and ensure you have all parts listed in the package contents. You will need a Phillips head screwdriver.
- Attach Lifting Columns to Frame Ends: Insert one of the lifting columns into the frame end with the capture plate. Secure it using four small machine screws.
- Attach Side Brackets: Select the appropriate left or right side bracket. Slide the tabs on the side bracket into the frame end. Use two medium machine screws to secure the side bracket, but do not fully tighten until both screws are in place.
- Repeat for Second Leg: Repeat steps 1 and 2 for the second leg assembly.
- Attach Leg Assembly to Desktop: Place the assembled left leg onto the desktop (which should be upside down) to your right, with the frame end pointing towards the center of the top. Secure it using the provided desktop machine screws. Once flipped, this will be the left side.
- Secure Right Leg to Desktop: Insert all screws partway for the right leg assembly. Once all are in place, tighten them completely.
- Secure Center Rails to Desktop: Center the labeled midpoint marks on both center rails between the two frame ends. Use the pre-installed set screws to lock the center rails down firmly.
- Attach Handset: Attach the digital display handset to the underside of the desktop using two wood screws.
- Plug in Cords: Slide the control box onto the frame end with the capture plate. Connect the cables from both legs to the control box via the sockets labeled M1 and M2. Connect the handset to the control box via the socket labeled HS. Finally, connect the power cable via the power socket. Use the provided cable clips to manage cords neatly.
- Attach Feet to Lifting Columns: Loosely attach a foot to the bottom of each lifting column using four medium machine screws per foot. Insert all screws partway, then tighten them completely.
- Double/Triple Check All Screws: Ensure all screws everywhere on the desk are tight.
- Flip Over the Desk: With the help of a friend, lift the desk and gently flip it onto its feet. Support both the top and the frame, being careful not to put weight on the handset.
- Adjust Leveling Glides: Adjust the pre-installed leveling glides on the feet to ensure the desk is stable on an even surface.
Initial Calibration
After assembly, you need to calibrate your desk:
- Press and hold the down arrow on the handset until the desk reaches its lowest position, then release.
- Press and hold the down arrow again until the display reads "RESET".
- Continue to press and hold the down arrow until the desk lowers slightly, then rises slightly, and finally stops. This indicates successful calibration.
Operating Instructions
Your Jarvis desk is equipped with a digital display handset for easy height adjustment and memory presets.
Height Adjustment
- Use the Up (^) and Down (v) arrows on the handset to manually adjust the desk height. The current height will be displayed on the screen.
- The desk can be adjusted from a minimum height of 24.5 inches to a maximum height of 50 inches.
Memory Presets
The handset allows you to save up to four preferred height settings for quick adjustments.
Video Description: This video demonstrates how to program the memory presets on the Jarvis desk handset. It shows how to unlock the desk, scroll through memory features like max/min height, units, anti-collision sensitivity, and screen brightness. It also explains how to set a specific height to a memory button (1-4) by pressing 'M' then the desired number.
- To Set a Memory Preset:
- Adjust the desk to your desired height using the Up/Down arrows.
- Press the 'M' button. The display will show 'S-'.
- Press one of the numbered buttons (1, 2, 3, or 4) within 3 seconds. The height is now saved to that preset.
- To Use a Memory Preset: Simply press the corresponding numbered button (1, 2, 3, or 4). The desk will automatically move to the saved height.
Handset Functions (Advanced)
The handset offers additional functions accessible by holding the 'M' button for 3 seconds until 'Lock/Unlock Jarvis' appears:
- Set Max/Min Height: Define the maximum and minimum operational heights for your desk.
- Change Units: Switch between inches and centimeters.
- Adjust Anti-Collision Sensitivity: Modify how sensitive the desk is to obstructions during movement.
- Adjust Screen Brightness: Control the brightness of the digital display.
- Calibrate Height: Perform a full desk calibration if needed (as described in the Setup section).
Maintenance
To ensure the longevity and optimal performance of your Jarvis desk frame, follow these maintenance guidelines:
- Cleaning: Wipe down the frame with a soft, damp cloth. Avoid abrasive cleaners or solvents.
- Cable Management: Regularly check and organize cables to prevent tangling or damage, especially during height adjustments.
- Screw Tightness: Periodically check all screws and connections to ensure they remain tight.
- Lubrication: The motorized components are generally maintenance-free. Do not attempt to lubricate internal mechanisms unless specifically instructed by customer support.
Troubleshooting
If you encounter any issues with your Jarvis desk frame, refer to the following common solutions:
- Desk Not Moving:
- Check if the power cable is securely plugged into both the desk and the wall outlet.
- Ensure all motor cables are properly connected to the control box.
- Perform a calibration (see Initial Calibration in Setup section).
- Uneven Movement or Wobbling:
- Verify that all assembly screws are tightened securely.
- Adjust the leveling glides on the feet to ensure the desk is stable on an even surface.
- Ensure the desktop is properly secured to the frame.
- Display Error Codes: If the digital display shows an error code, refer to the full product manual or contact customer support for assistance.
- Anti-Collision Activation: If the desk stops unexpectedly during adjustment, it may have encountered an obstruction. Remove the obstruction and try again. Adjust anti-collision sensitivity if frequent false positives occur.
Specifications
| Feature | Detail |
|---|---|
| Brand | Jarvis |
| Model Number | vis001 |
| Frame Type | 3-Stage Extended Range |
| Height Adjustment Range | 24.5" to 50" |
| Lifting Capacity | 350 lbs |
| Speed | 1.5" per second |
| Supported Top Width | 44" to 82" |
| Supported Top Depth | 27" to 36" |
| Control Type | Digital Display Handset with 4 Memory Presets |
| Frame Material | Alloy Steel |
| Color | Black |
| Item Weight | 20 Kilograms |
| Assembly Required | Yes |

Side view of the Jarvis Standing Desk frame, illustrating its adjustable height and depth dimensions.
Warranty & Support
The Jarvis Fully Standing Desk Frame Only comes with an industry-leading 7-year limited warranty covering the frame, mechanical, and electrical components.
For customer support, troubleshooting assistance, or warranty claims, please contact Jarvis customer service:
- Phone: 888-508-3725
- Email: support@fully.com
- Online: Visit the Jarvis Store on Amazon
Please have your model number (vis001) and purchase date available when contacting support.


