1. Introduction
This manual provides instructions for the Ducasa 0.638.169 Remote Control, designed for use with Ducasa Richmond DPL low-level and Richmond DP full-height radiators. This remote allows for 24/7 programming and precise temperature control to enhance comfort and optimize energy consumption.
Please read this manual thoroughly before operating the device to ensure proper use and to prevent damage.
2. Setup
2.1. Package Contents
- Ducasa 0.638.169 Remote Control
- Wall mounting bracket
- 2 x AAA batteries
- User Manual (this document)
2.2. Battery Installation
- Locate the battery compartment on the back of the remote control.
- Slide the battery cover open.
- Insert two AAA batteries, ensuring correct polarity (+ and -).
- Close the battery cover securely.
- The LCD screen should illuminate, indicating successful battery installation.
2.3. Wall Mounting (Optional)
The remote control includes a wall mounting bracket for convenient storage.
- Choose a suitable location for the bracket, away from direct heat sources or extreme cold.
- Secure the bracket to the wall using appropriate screws (not included).
- Place the remote control into the bracket.
2.4. Initial Pairing with Radiator
The remote control automatically transmits information to the radiator. Ensure the remote is pointed towards the radiator when making adjustments.
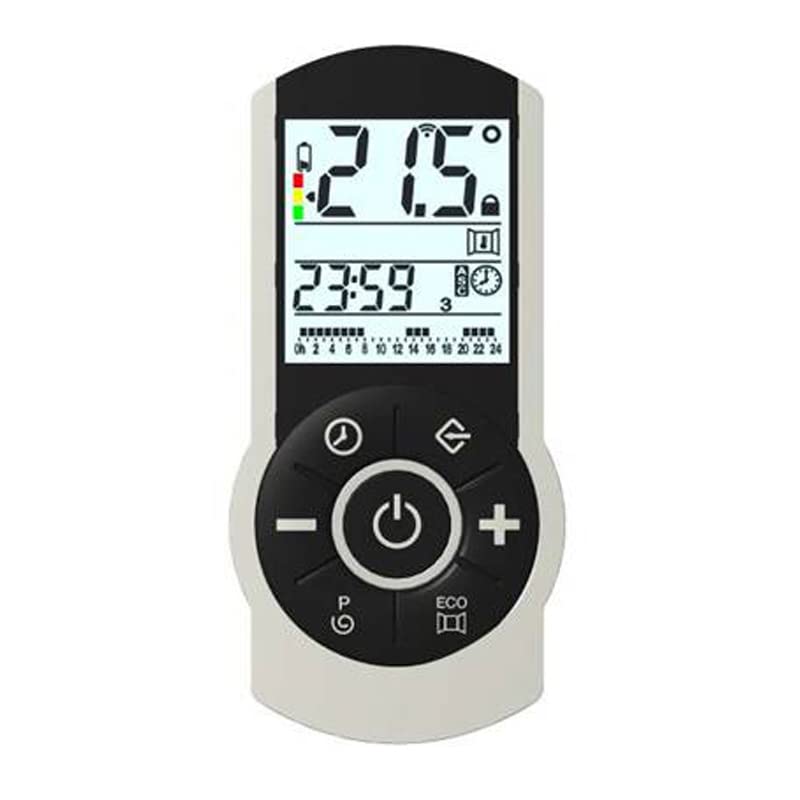
Image 1: Ducasa 0.638.169 Remote Control. This image shows the front view of the remote control with its LCD screen and buttons.
3. Operation
3.1. LCD Display Overview
The LCD screen displays the current time, operating mode, and set temperature.
3.2. Setting Time and Date
Refer to the on-screen programming instructions for setting the current time and date. This is crucial for accurate 24/7 programming.
3.3. Adjusting Temperature
- Use the + and - buttons to adjust the desired temperature.
- Comfort Temperature: Adjustable up to 32°C for occupied rooms.
- Economy Temperature: Adjustable as low as 7°C to prevent freezing when the room is unoccupied.
3.4. Programming Modes (24h/7d)
The remote allows for flexible 24-hour, 7-day programming. Follow the on-screen prompts to set specific comfort and economy periods throughout the week.
3.5. Manual Override
The manual override selector allows temporary deviation from the programmed schedule. This can be used to instantly switch between comfort and economy modes or to activate a 2-hour full power boost.
- Manual Override Selector: Press to cycle through available override options.
- 2-Hour Full Power Boost: Activates maximum heating for two hours, then returns to the programmed setting.
4. Maintenance
4.1. Cleaning
Wipe the remote control with a soft, dry cloth. Do not use abrasive cleaners or solvents, as these may damage the surface or internal components.
4.2. Battery Replacement
The remote control features a low battery warning indicator on the LCD screen. When this appears, replace both AAA batteries promptly to ensure continuous operation.
- Open the battery compartment.
- Remove old batteries.
- Insert new AAA batteries, observing correct polarity.
- Close the battery compartment.
5. Troubleshooting
5.1. Remote Control Not Responding
- Check Batteries: Ensure batteries are correctly installed and not depleted. Replace if necessary.
- Line of Sight: Make sure there is a clear line of sight between the remote and the radiator. Obstructions can block the infrared signal.
- Distance: Ensure the remote is within the effective operating range of the radiator.
5.2. Radiator Not Following Programmed Schedule
- Time Setting: Verify that the time and date on the remote control are set correctly.
- Program Review: Double-check the programmed schedule for any errors or unintended settings.
- Manual Override: Ensure no manual override is active, which would temporarily supersede the program.
5.3. LCD Display Issues
- Dim Display: This usually indicates low battery power. Replace batteries.
- No Display: Check battery installation and ensure batteries are new. If the issue persists, contact support.
6. Specifications
| Feature | Detail |
|---|---|
| Model Number | 0.638.169 |
| Compatibility | Ducasa Richmond DPL (low-level) and Richmond DP (full-height) radiators |
| Programming | 24 hours / 7 days |
| Temperature Range (Economy) | Adjustable from 7°C |
| Temperature Range (Comfort) | Adjustable up to 32°C |
| Display | LCD with time and operating mode |
| Power Source | 2 x AAA batteries |
| Special Features | Manual override, 2-hour full power boost, low battery warning, wall mounting bracket |
7. Warranty and Support
For warranty information and technical support, please refer to the documentation provided with your Ducasa radiator or visit the official Ducasa website. Keep your purchase receipt as proof of purchase for warranty claims.
Manufacturer: Ducasa
Manufacturer Part Number: 0.638.169
Website: www.ducasa.com