
1. Safety Information
Please read and understand all instructions before beginning installation. Failure to do so may result in electric shock, fire, or other injuries that could be hazardous or fatal. This manual contains important information for the safe installation and operation of this lighting fixture.
- WARNING: Risk of electric shock. Disconnect power at the fuse or circuit breaker before installing or servicing.
- All electrical connections must be in accordance with local codes and ordinances, National Electric Code (NEC), and ANSI/NFPA 70-1999.
- Consult a qualified electrician if you are unsure about wiring procedures.
- This fixture is UL-rated for damp locations. Do not install in areas with direct water exposure.
- Do not exceed the maximum wattage for bulbs specified (E-27 type, 3 bulbs).
- Handle glass components with care to prevent breakage and injury.
2. Package Contents
Carefully unpack your new lighting fixture and lay out all parts on a clear area. Ensure all items listed below are present and undamaged. If any parts are missing or damaged, do not attempt to assemble or install the fixture. Contact customer support for assistance.
- Faladesa Ceiling Lamp Fixture (Metal Base with Glass Shade)
- Mounting Bracket
- Hardware Pack (screws, wire nuts)
Note: Three E-27 light bulbs are NOT INCLUDED and must be purchased separately.
3. Setup and Installation
3.1 Tools Required (Not Included)
- Phillips Head Screwdriver
- Flathead Screwdriver
- Wire Strippers
- Electrical Tape
- Safety Glasses
- Ladder
3.2 Pre-Installation
- Turn off power: Locate the circuit breaker or fuse box and turn off the power to the junction box where you will be installing the fixture. Verify the power is off using a voltage tester.
- Prepare the area: Clear the work area and ensure you have a stable ladder.
3.3 Mounting the Fixture
- Attach the mounting bracket to the ceiling junction box using the screws provided. Ensure the bracket is securely fastened.
- Make electrical connections: Connect the fixture's wires to the house wires according to the following:
- Connect the black wire from the fixture to the black (hot) wire from the junction box.
- Connect the white wire from the fixture to the white (neutral) wire from the junction box.
- Connect the ground wire (bare copper or green) from the fixture to the ground wire from the junction box.
- Carefully tuck all wires into the junction box.
- Align the fixture's base with the mounting bracket and secure it with the provided screws.
- Install three E-27 bulbs (not included) into the sockets. Do not overtighten.
- Carefully place the glass shade onto the fixture and secure it according to the design (typically with decorative nuts or clips).
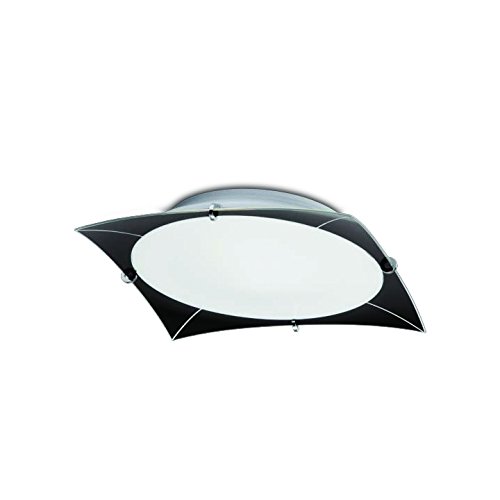
Image showing the Faladesa Ceiling Lamp in various colors (yellow, orange, green, black) and a technical drawing with dimensions: 12.99 inches length, 12.99 inches width, and 2.75 inches depth.
4. Operation
Once the Faladesa Ceiling Lamp is properly installed and bulbs are inserted, restore power at the circuit breaker. The lamp can then be operated using a standard wall switch connected to the fixture's circuit.
4.1 Bulb Replacement
- Turn off power: Always turn off the power to the fixture at the circuit breaker before replacing bulbs.
- Allow bulbs to cool completely before touching them.
- Carefully remove the glass shade to access the bulbs.
- Unscrew the old E-27 bulb(s) counter-clockwise.
- Screw in new E-27 bulb(s) clockwise. Do not overtighten.
- Reattach the glass shade securely.
- Restore power at the circuit breaker.
5. Maintenance
Regular maintenance will help preserve the appearance and functionality of your Faladesa Ceiling Lamp.
- Cleaning: Turn off power before cleaning. Use a soft, dry or slightly damp cloth to wipe the metal base and glass shade. Do not use abrasive cleaners, solvents, or polishes as they may damage the finish.
- Inspection: Periodically check all connections and mounting hardware to ensure they remain secure.
- Bulb Type: Always use E-27 type bulbs. Refer to the specifications for maximum wattage.
6. Troubleshooting
If you experience issues with your Faladesa Ceiling Lamp, refer to the following common problems and solutions:
| Problem | Possible Cause | Solution |
|---|---|---|
| Light does not turn on | No power to the fixture | Check circuit breaker or fuse. Ensure wall switch is on. |
| Loose or incorrect wiring | Turn off power and check all wire connections. Consult a qualified electrician if unsure. | |
| Faulty bulb(s) | Replace bulb(s) with new E-27 bulbs. | |
| Light flickers | Loose bulb | Turn off power, tighten bulb(s). |
| Incompatible dimmer switch | Ensure dimmer switch is compatible with the bulb type used. | |
| Loose wiring connection | Turn off power and check all wire connections. |
If the problem persists after trying these solutions, please contact customer support.
7. Specifications
| Feature | Detail |
|---|---|
| Brand | Faladesa |
| Model Number | B01MY4CK03 |
| Dimensions (L x W x H) | 12.99 inches x 12.99 inches x 2.75 inches |
| Bulb Type | E-27 (3 bulbs required, not included) |
| Material | Metal base, Glass shade |
| Mounting Type | Ceiling Mount |
| Location Rating | UL-rated for damp locations |
| Item Weight | 1.5 Pounds |
| Power Source | Corded Electric |
8. Warranty and Support
For warranty information or technical support, please contact Faladesa customer service. Keep your purchase receipt as proof of purchase for any warranty claims.
Contact information for support can typically be found on the product packaging or the manufacturer's official website.