1. Introduction
This manual provides comprehensive instructions for the installation, operation, and maintenance of your Avaya IP Phone 1616-I. The Avaya 1616-I is a feature-rich IP telephone designed for business environments, offering advanced communication capabilities over an IP network. It is compatible with various VoIP services and Avaya communication systems.

Figure 1: Angled view of the Avaya IP Phone 1616-I, showcasing its handset, display, and keypad.
2. Package Contents
Upon unpacking, verify that all components are present. The Avaya IP Phone 1616-I package typically includes:
- Avaya IP Phone 1616-I unit
- Handset
- Handset coiled cord
- Ethernet cable
- Desk stand
- Power adapter (if not using Power over Ethernet - PoE)
If any items are missing or damaged, contact your vendor immediately.
3. Setup
3.1 Connecting the Phone
Follow these steps to connect your Avaya IP Phone 1616-I:
- Attach the Desk Stand: Securely attach the desk stand to the back of the phone unit.
- Connect the Handset: Plug one end of the coiled cord into the handset and the other end into the handset port on the phone unit (typically marked with a handset icon).
- Connect to Network (Ethernet): Plug one end of the Ethernet cable into the LAN port on the back of the phone (often marked with a network icon) and the other end into an active Ethernet port on your network switch or router.
- Connect Power:
- Power over Ethernet (PoE): If your network switch supports PoE, the phone will power on automatically once the Ethernet cable is connected. No separate power adapter is needed.
- External Power Adapter: If PoE is not available, connect the power adapter to the power port on the back of the phone and then plug the adapter into a standard electrical outlet.
- Initial Boot-up: The phone will power on and begin its boot-up sequence. This may take a few minutes as it obtains an IP address and connects to your communication system.

Figure 2: Frontal view of the Avaya IP Phone 1616-I, showing the display and button layout for operation.
4. Operating Instructions
4.1 Basic Call Functions
- Making a Call:
- Lift the handset or press the Speaker button.
- Dial the desired number using the keypad.
- Press the Call or Dial softkey (if available) or wait for the call to connect.
- Answering a Call:
- When the phone rings, lift the handset or press the Speaker button.
- Alternatively, press the Answer softkey.
- Ending a Call:
- Place the handset back in the cradle or press the Speaker button again.
- Alternatively, press the End Call softkey.
4.2 Advanced Features
- Hold: During an active call, press the Hold button. The caller will hear hold music. To retrieve the call, press the Hold button again or the corresponding line button.
- Transfer: During an active call, press the Transfer button. Dial the number to which you want to transfer the call. You can either announce the call (wait for the person to answer) or complete a blind transfer (hang up or press Transfer again).
- Conference: During an active call, press the Conference button. Dial the number of the third party. Once they answer, press Conference again to join all parties.
- Voicemail: Press the Message button (envelope icon) to access your voicemail. Follow the audio prompts to listen to, save, or delete messages.
- Contacts/Directory: Press the Contacts or Directory button to access your stored contacts. Use the navigation keys to scroll and select a contact, then press Call to dial.
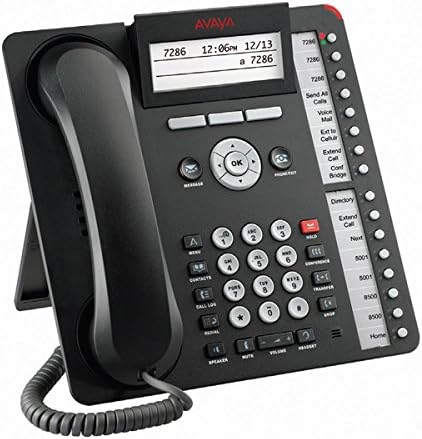
Figure 3: The Avaya IP Phone 1616-I display showing active soft keys and call information, illustrating operational context.
5. Maintenance
Proper maintenance ensures the longevity and optimal performance of your Avaya IP Phone 1616-I.
- Cleaning:
- Use a soft, slightly damp, lint-free cloth to clean the phone's exterior.
- Avoid using harsh chemicals, abrasive cleaners, or aerosol sprays, as these can damage the phone's finish and internal components.
- Ensure the phone is unplugged from power before cleaning.
- Environmental Conditions:
- Keep the phone away from direct sunlight, excessive heat, and moisture.
- Do not block ventilation openings.
6. Troubleshooting
This section addresses common issues you might encounter with your Avaya IP Phone 1616-I.
| Problem | Possible Cause | Solution |
|---|---|---|
| No dial tone | Phone not powered on or not connected to network. | Check power connection (PoE or adapter). Ensure Ethernet cable is securely plugged into the LAN port and an active network port. |
| Display is blank | No power or phone is in sleep mode. | Verify power connection. Press any button to wake the display. If still blank, power cycle the phone. |
| Cannot make/receive calls | Network connectivity issue or registration failure with the IP PBX. | Check network cable. Restart the phone. If the issue persists, contact your system administrator. |
| Poor audio quality | Network congestion or faulty cable/handset. | Check network connection. Try a different Ethernet cable. Test with another handset if available. |
For issues not listed here, or if troubleshooting steps do not resolve the problem, contact your system administrator or Avaya support.
7. Specifications
| Feature | Detail |
|---|---|
| Brand | AVAYA Co |
| Model Number | 700504843 |
| ASIN | B01MXVUV6P |
| Color | Black |
| Telephone Type | Corded |
| Power Source | AC adapter (or Power over Ethernet) |
| Dialer Type | Single Keypad |
| Answering System Type | Digital |
| Compatible Devices | VoIP Services |
| Multiline Operation | Single-Line Operation |
| Caller Identification | Yes |
| First Available Date | December 8, 2016 |
8. Warranty and Support
Warranty Information: For details regarding the warranty coverage for your Avaya IP Phone 1616-I, please refer to the documentation provided at the time of purchase or visit the official Avaya website. Warranty terms typically cover manufacturing defects for a specified period.
Technical Support: If you require technical assistance, have questions about advanced features, or encounter issues not covered in the troubleshooting section, please contact your authorized Avaya dealer or IT support department. You may also find additional resources on the official Avaya support portal.
Parts Replacement: As stated by the manufacturer, parts should be installed by experienced technicians to ensure proper function and to maintain warranty validity.