Introduction
The Original KW820 Car Scanner Tool is a powerful diagnostic device designed to help technicians and home users accurately diagnose vehicle issues. It supports all nine OBDII test modes on OBDII EOBD compliant vehicles, providing fast and easy access to engine-based fault codes. This manual provides detailed instructions for the proper use and maintenance of your KW820 scanner.
Safety Information
Always follow basic safety precautions when operating the KW820 scanner to prevent personal injury or damage to the vehicle or scanner.
- Ensure the vehicle is parked on a level surface with the parking brake engaged.
- Do not wear loose clothing or jewelry when working near the engine.
- Keep the scanner away from water, oil, and extreme temperatures.
- Never connect or disconnect the scanner while the vehicle's ignition is on, unless instructed otherwise.
- Refer to your vehicle's service manual for specific diagnostic procedures and safety warnings.
Package Contents
Verify that all items listed below are included in your package:
- 1 x KW820 Code Scanner Unit
- 1 x OBD II Cable
- 1 x Carrying Case
- 1 x User's Manual (this document)

Image: The KW820 scanner unit, its OBD II cable, a black carrying case, and the user manual are shown together.
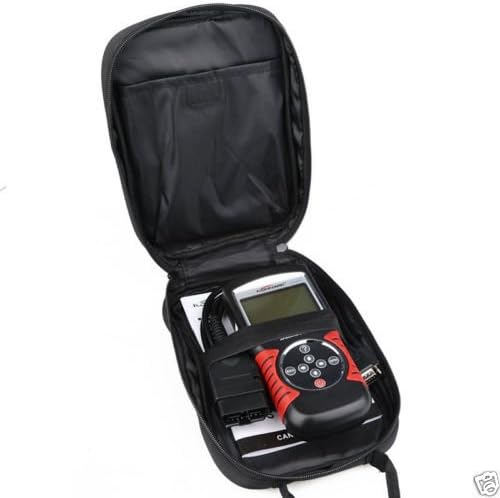
Image: The KW820 scanner and its cable neatly stored inside the zippered carrying case.
Product Overview
The KW820 scanner features a robust design with an easy-to-read backlit LCD screen and intuitive button layout.

Image: A close-up of the KW820 scanner, highlighting its LCD screen and the circular array of navigation buttons (ESC, ENTER, up, down, left, right) and power button.
- LCD Screen: Large, backlit display for clear viewing of diagnostic information.
- Navigation Buttons: Used to scroll through menus and data.
- ENTER Button: Confirms selections or enters sub-menus.
- ESC Button: Returns to the previous screen or cancels an operation.
- Power Button: Turns the device on/off (though it primarily powers via OBDII connection).
- OBD II Cable: Connects the scanner to the vehicle's OBD II port.
- Diagnostic Interface: 15-pin connector for the OBD II cable.

Image: A side view of the KW820 scanner, clearly showing the 15-pin diagnostic interface where the OBD II cable connects.
Setup
- Locate the OBD II Port: The OBD II port is typically located under the dashboard on the driver's side of the vehicle. Refer to your vehicle's manual if you cannot find it.
- Connect the Scanner: With the vehicle's ignition off, firmly plug the KW820's OBD II cable into the vehicle's OBD II port.
- Power On: Turn the vehicle's ignition to the "ON" position (do not start the engine). The scanner will automatically power on and establish communication with the vehicle's onboard computer.
- Language Selection: If prompted, select your preferred language using the navigation buttons and press ENTER. The scanner supports English, Spanish, French, and German.
Operating Instructions
The KW820 scanner provides various diagnostic functions. Navigate through the menus using the directional buttons and confirm selections with the ENTER button.

Image: The KW820 scanner's screen showing the "OBDII" logo, indicating it is ready for diagnostic operations.
1. Reading Diagnostic Trouble Codes (DTCs)
- From the main menu, select "Read Codes" or a similar option.
- The scanner will display any stored generic (P0, P2, P3, U0) and manufacturer-specific (P1, P3, U1) codes.
- Use the navigation buttons to scroll through the codes and their definitions.
2. Clearing Diagnostic Trouble Codes (DTCs)
Clearing DTCs will turn off the Check Engine Light (MIL) and reset monitors. Ensure the underlying issue has been resolved before clearing codes.
- From the main menu, select "Erase Codes" or "Clear DTCs".
- Confirm your selection when prompted.
- The scanner will clear the codes and reset the vehicle's monitors.
3. Viewing Freeze Frame Data
Freeze Frame Data records engine conditions at the moment a DTC was set, providing valuable information for diagnosis.
- Select "Freeze Frame" from the main menu.
- The scanner will display parameters such as engine RPM, vehicle speed, coolant temperature, and fuel system status at the time of the fault.
4. Live PCM Datastream
View real-time sensor data from the vehicle's Powertrain Control Module (PCM).
- Select "Live Data" or "Data Stream" from the main menu.
- The scanner will display various parameters like engine RPM, oxygen sensor voltages, calculated load value, and short-term fuel trim.
- Data can be displayed numerically or graphically (for 1996 and newer vehicles).
5. I/M Readiness Status
Check the status of the vehicle's emission-related monitors to determine if the vehicle is ready for an emissions test.
- Select "I/M Readiness" from the main menu.
- The scanner will indicate whether each monitor (e.g., O2 Sensor, EVAP System) is "OK" (complete), "INC" (incomplete), or "N/A" (not applicable).
6. O2 Sensor Test Data
Access the results of the oxygen sensor monitor test.
- Select "O2 Sensor Test" from the main menu.
- Review the oxygen sensor readings to diagnose potential issues with the sensor or catalytic converter.
7. Vehicle Information
Retrieve important vehicle identification information.
- Select "Vehicle Info" from the main menu.
- The scanner will display the Vehicle Identification Number (VIN), Calibration ID (CIN), and Calibration Verification Number (CVN).
Maintenance
Software Updates
The KW820 scanner's software is upgradeable via the internet to ensure compatibility with new vehicles and diagnostic protocols.
- Visit the official manufacturer's website (if available, otherwise search for "KW820 software update").
- Download the update software and instructions to your PC.
- Connect the KW820 scanner to your PC using a compatible USB cable (not included, typically a standard mini-USB to USB-A cable).
- Follow the on-screen instructions provided by the update software to complete the process.
Cleaning
To maintain the scanner's performance and appearance:
- Use a soft, damp cloth to clean the exterior of the scanner.
- Do not use abrasive cleaners or solvents.
- Keep the screen free of dust and smudges for optimal readability.
Troubleshooting
If you encounter issues with your KW820 scanner, refer to the following common problems and solutions:
- Scanner does not power on:
- Ensure the OBD II cable is securely connected to both the scanner and the vehicle's OBD II port.
- Verify the vehicle's ignition is in the "ON" position.
- Check the vehicle's fuse for the OBD II port (refer to your vehicle's manual).
- "Link Error" or "Communication Error" message:
- Confirm the vehicle supports the OBD II protocol (most vehicles 1996 and newer in the US, Europe, and Asia).
- Ensure the ignition is "ON" and the engine is off.
- Try connecting to a different OBD II compliant vehicle to rule out a vehicle-specific issue.
- Inspect the OBD II cable for any damage.
- Screen is blank or unreadable:
- Adjust the screen contrast if available in the settings menu.
- Ensure the scanner is receiving power.
Specifications
| Feature | Description |
|---|---|
| Model | KW820 |
| Brand | Original |
| Supported Protocols | ISO15765-4 (CAN), and all other current OBD-II protocols |
| Interface | 15-pin Diagnostic Interface, Wired Output Protocol |
| Baud Rate | 115200bps |
| Working Voltage | 12V DC |
| Cable Length | 56.7 inches (149 cm) |
| Screen Size | 2.8 Inches (backlit LCD) |
| Features | Reads/clears DTCs, views freeze frame data, live PCM datastream, O2 sensor test, I/M readiness, vehicle info (VIN, CIN, CVN), multilingual menu, software upgradeable. |
| Compatible Makes | BMW, Volvo, Chevrolet, Universal, Honda, Toyota, VW, Benz, Hyundai, Buick, Audi, Ford, and other OBDII compliant vehicles. |
Support
For further assistance or technical support, please refer to the manufacturer's official website or contact their customer service department. Keep your product model number (KW820) and purchase information readily available when seeking support.