1. Introduction
This manual provides essential information for the safe and effective operation, setup, and maintenance of the Brookfield AMETEK DV1MLV DV1 Viscometer. The DV1MLV is a laboratory instrument designed for precise measurement of fluid viscosity, with a minimum range of 1 cP (mPa•s) and a maximum range of 2M, operating at speeds from 0.3 to 100 RPM. Please read this manual thoroughly before using the instrument.
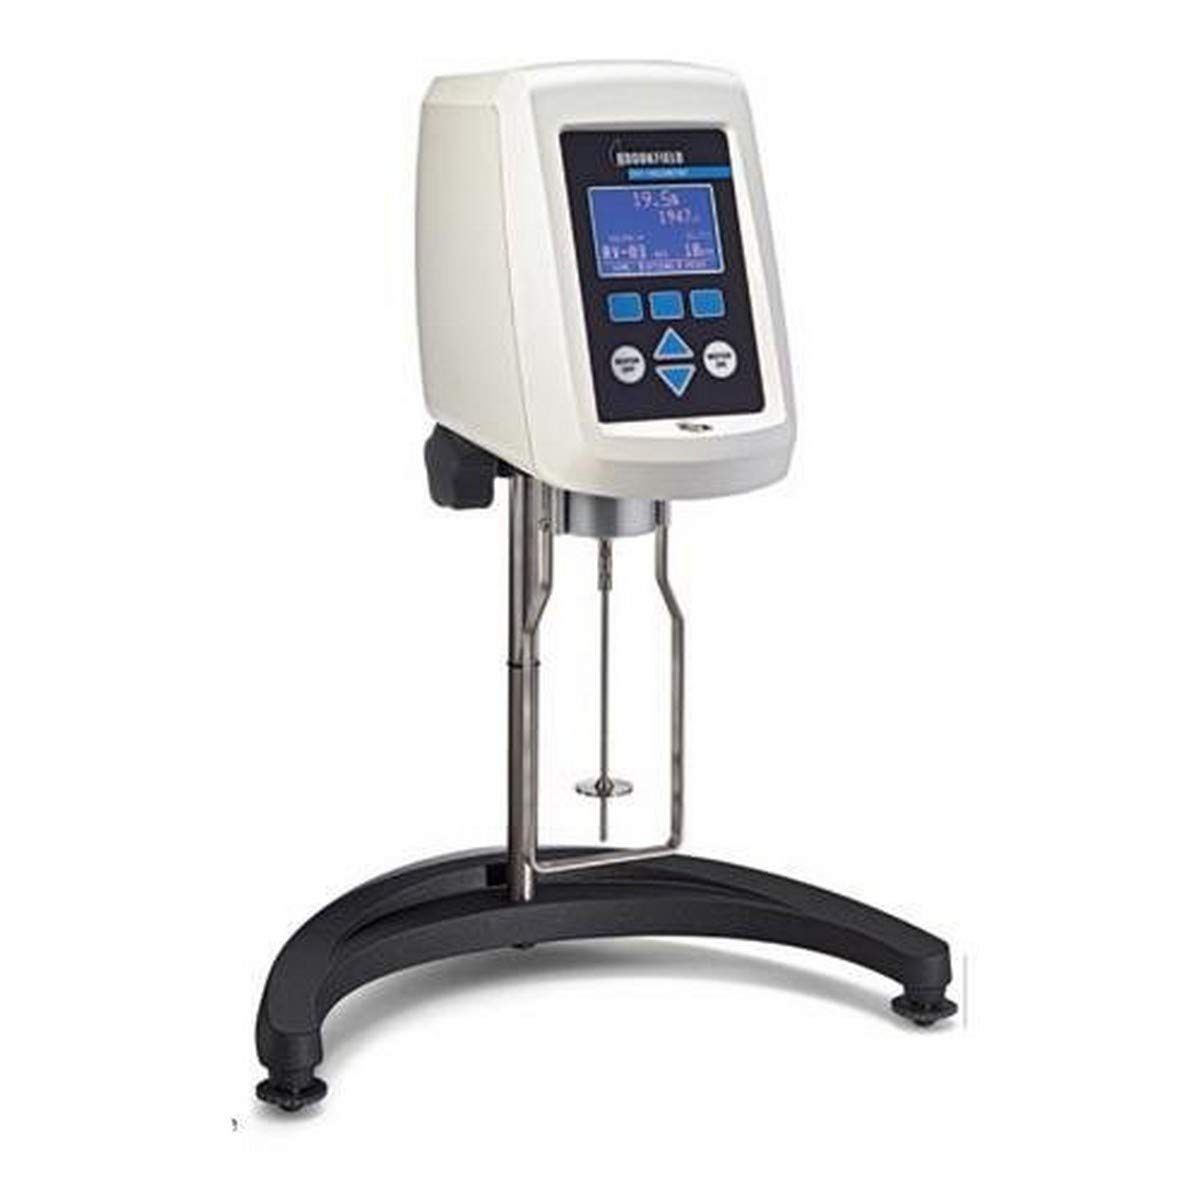
Figure 1: The Brookfield AMETEK DV1MLV DV1 Viscometer. This image shows the complete viscometer unit, including the main head unit with its digital display and control buttons, the vertical support rod, the sample cup holder, and the base with leveling feet. A spindle is attached to the viscometer head, ready for use.
2. Safety Information
Always observe the following safety precautions to prevent injury and damage to the instrument:
- Ensure the viscometer is placed on a stable, level surface.
- Do not operate the instrument in environments with excessive vibration, dust, or corrosive fumes.
- Use only genuine Brookfield AMETEK accessories and spindles.
- Disconnect power before cleaning or performing any maintenance.
- Avoid touching rotating parts during operation.
- Do not immerse the viscometer head in liquid.
- Refer to the material safety data sheet (MSDS) for any chemicals being tested.
3. Package Contents
Verify that all components are present upon unpacking:
- DV1MLV Viscometer Head Unit
- Lab Stand with Leveling Feet
- Set of Standard Spindles (LV series)
- Spindle Guard Leg
- Power Adapter
- Instruction Manual (this document)
- Carrying Case (optional, depending on model variant)
4. Setup
- Unpacking: Carefully remove all components from the packaging. Retain packaging for future transport or storage.
- Assembly:
- Attach the viscometer head unit to the lab stand's support rod. Secure it firmly using the locking knob.
- Ensure the base is on a flat, stable surface. Adjust the leveling feet until the bubble level (if present on the unit) indicates a level position.
- Power Connection: Connect the power adapter to the viscometer and then to a suitable power outlet.
- Spindle Attachment: Gently screw the desired spindle onto the coupling at the bottom of the viscometer head. Ensure it is finger-tight. Avoid overtightening.
- Spindle Guard Leg: If using, attach the spindle guard leg to the viscometer head. This protects the spindle from accidental contact.
5. Operating Instructions
5.1 Basic Operation
- Power On: Press the power button. The display will illuminate and show the current settings.
- Select Spindle: Use the navigation buttons to select the appropriate spindle code (e.g., LV-1, LV-2) that matches the physical spindle attached.
- Set Speed (RPM): Use the navigation buttons to set the desired rotational speed (0.3 to 100 RPM).
- Prepare Sample: Pour the sample fluid into a suitable beaker or container. Ensure the sample volume is sufficient to immerse the spindle to the immersion mark.
- Immerse Spindle: Lower the viscometer head until the spindle is immersed in the sample fluid up to its immersion mark. Ensure no air bubbles are trapped beneath the spindle.
- Start Measurement: Press the "Start" button. The spindle will begin to rotate, and the display will show the viscosity reading in cP (mPa•s).
- Record Reading: Allow the reading to stabilize before recording the viscosity value.
- Stop Measurement: Press the "Stop" button to halt spindle rotation.
- Clean Spindle: Carefully remove the spindle from the sample and clean it immediately to prevent sample residue from drying.
5.2 Advanced Features (if applicable)
The DV1MLV may include features such as auto-ranging, temperature measurement (with optional probe), and data output. Refer to the on-screen menu for specific functions and settings. Consult the full technical manual for detailed instructions on advanced programming and data management.
6. Maintenance
Regular maintenance ensures the longevity and accuracy of your viscometer.
- Cleaning:
- Clean spindles immediately after use with a solvent appropriate for the sample material. Dry thoroughly.
- Wipe the exterior of the viscometer head and stand with a soft, damp cloth. Do not use abrasive cleaners or immerse the unit.
- Calibration: Periodically verify the calibration of the viscometer using certified viscosity standards. Refer to the calibration section in the full technical manual for detailed procedures.
- Storage: When not in use, store the viscometer and its accessories in a clean, dry environment, preferably in its original carrying case.
7. Troubleshooting
| Problem | Possible Cause | Solution |
|---|---|---|
| No power/Display off | Power cable disconnected, faulty outlet, unit off. | Check power connections, try a different outlet, ensure unit is powered on. |
| Inaccurate readings | Incorrect spindle, improper immersion, temperature variation, calibration needed, dirty spindle. | Verify spindle selection, ensure correct immersion, control sample temperature, perform calibration, clean spindle thoroughly. |
| Spindle not rotating | Motor obstruction, incorrect speed setting, internal fault. | Check for obstructions, ensure speed is set above 0 RPM, contact technical support if problem persists. |
| Error message on display | Specific operational issue or internal fault. | Note the error code and consult the full technical manual or contact Brookfield AMETEK support. |
8. Specifications
- Model: DV1MLV
- Viscosity Range: 1 cP (mPa•s) minimum to 2M maximum (depending on spindle and speed)
- Speed Range: 0.3 to 100 RPM
- Manufacturer: Brookfield AMETEK, Inc
- Dimensions (Package): 5 x 5 x 5 inches
- Weight (Package): 2 Pounds
- ASIN: B01MU51CMM
9. Warranty and Support
For information regarding product warranty, service, or technical support, please contact Brookfield AMETEK, Inc. directly or visit their official website. Keep your purchase receipt and product serial number readily available when seeking support.
Note: Warranty terms and conditions may vary by region and purchase date.