Introduction
This manual provides comprehensive instructions for setting up and operating your Timelink Smartlight Rubber Alarm Clock, Model TL88192D. Please read these instructions carefully to ensure proper use and to maximize the functionality of your device. Retain this manual for future reference.

Front view of the Timelink Smartlight Rubber Alarm Clock, displaying 12:38 PM with a blue backlight. The clock features a soft rubber case and a large digital display.
Features
- Easy-to-Read Display: Large LCD screen with bold time digits for clear visibility.
- Automatic Smart Night Light: Built-in light sensor automatically adjusts brightness, softly illuminating the display in dark rooms and dimming in daylight.
- Soft Rubber Case: Durable silicone rubber housing provides protection and prevents slipping.
- Simple Controls & Large Snooze Button: Intuitive buttons for time and alarm adjustments, with an oversized snooze button for easy access.
- Portable & Versatile Design: Compact, battery-operated design suitable for various environments.
Package Contents
- Timelink Smartlight Rubber Alarm Clock (Model TL88192D)
- Printed Instruction Manual
- Protective corrugated box and inner tray
Setup
Battery Installation
- Locate the battery compartment cover on the back of the alarm clock.
- Slide the cover downwards to open the compartment.
- Insert two (2) AA batteries (not included) according to the polarity indicators (+/-) inside the compartment.
- Replace the battery compartment cover by sliding it upwards until it clicks into place.

Rear view of the alarm clock, highlighting the battery compartment and the 'OFF ON ALARM', 'LOCK TIME ALARM SET', and 'OFF ON LIGHT' switches.
Initial Time Setting
- On the back of the clock, slide the switch to the 'TIME SET' position.
- Use the 'HOUR' button on the top of the clock to adjust the hour. Press and hold to advance quickly.
- Use the 'MIN' button on the top of the clock to adjust the minute. Press and hold to advance quickly.
- Once the correct time is set, slide the switch on the back back to the 'LOCK' position to prevent accidental changes.
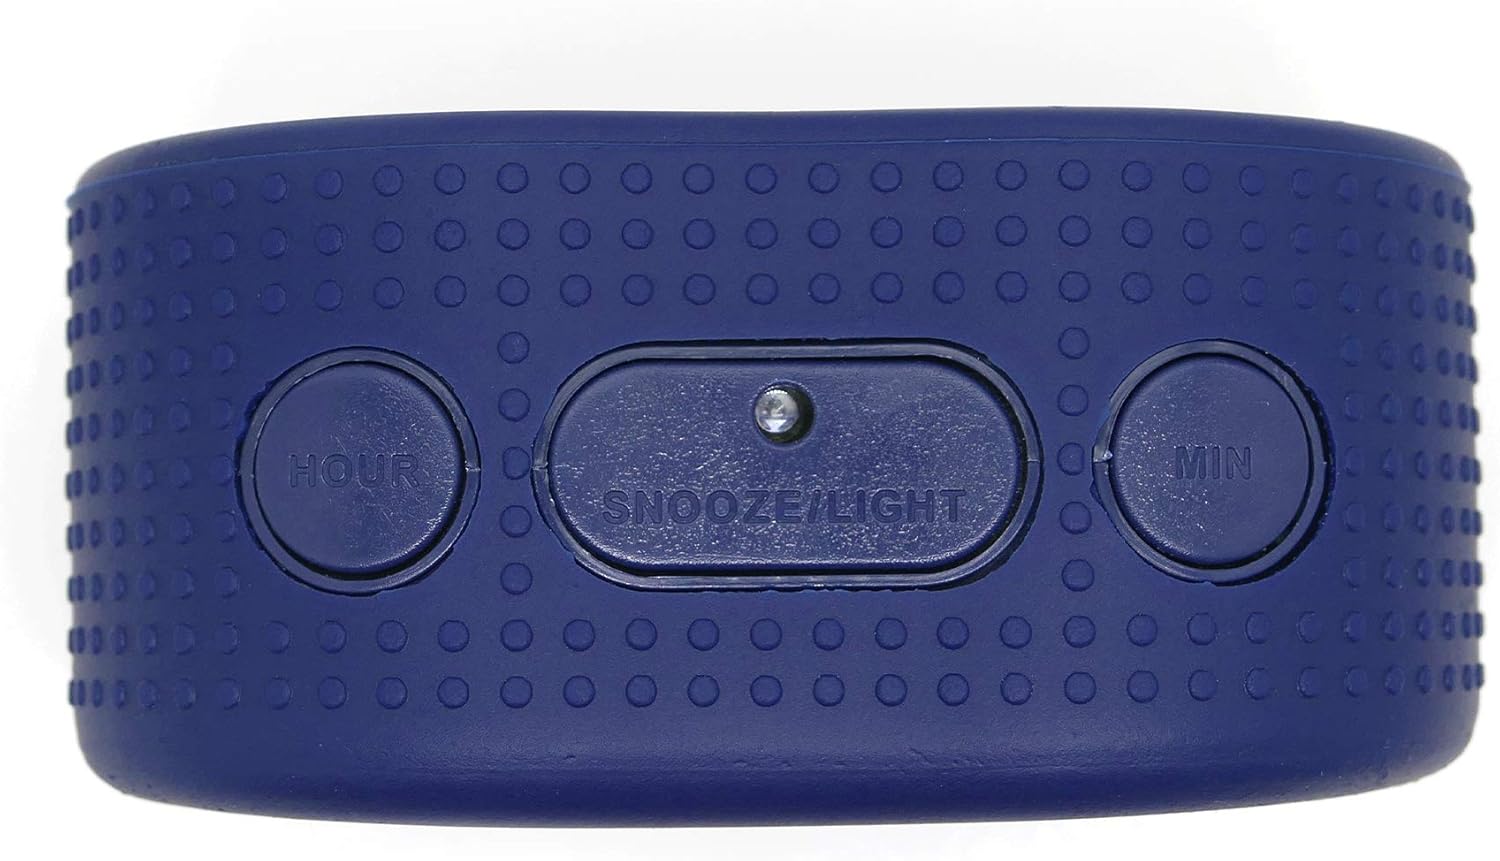
Top view of the alarm clock, showing the 'HOUR', 'SNOOZE/LIGHT', and 'MIN' buttons used for setting time and alarm.
Operating Instructions
Setting the Alarm
- On the back of the clock, slide the switch to the 'ALARM SET' position.
- Use the 'HOUR' button on the top of the clock to adjust the alarm hour.
- Use the 'MIN' button on the top of the clock to adjust the alarm minute.
- Once the desired alarm time is set, slide the switch on the back back to the 'LOCK' position.
- To activate the alarm, slide the 'OFF ON ALARM' switch on the back to the 'ON' position. An alarm icon will appear on the display.
Using the Snooze Function
- When the alarm sounds, press the large 'SNOOZE/LIGHT' button on the top of the clock.
- The alarm will pause for approximately 5 minutes and then sound again.
- To turn off the alarm completely, slide the 'OFF ON ALARM' switch on the back to the 'OFF' position.
Automatic Night Light and Backlight
- Automatic Night Light: To enable the automatic night light, slide the 'OFF ON LIGHT' switch on the back to the 'ON' position. The built-in light sensor will detect ambient light levels and automatically illuminate the display softly in dark environments.
- On-Demand Backlight: To temporarily illuminate the display brightly, press the 'SNOOZE/LIGHT' button on the top of the clock. The backlight will stay on for a few seconds.

The alarm clock displaying 12:08 with a green backlight, indicating the automatic night light feature is active in a dim environment.
This video demonstrates the features of the Timelink Rubber Smartlight Digital Alarm Clock, including its display and controls.
Maintenance
Cleaning
- Wipe the clock with a soft, dry cloth.
- Do not use abrasive cleaners or solvents, as these may damage the rubber case or display.
Battery Replacement
- When the display becomes dim or the clock stops functioning, it is time to replace the batteries.
- Follow the battery installation steps outlined in the Setup section.
- Dispose of used batteries responsibly according to local regulations.
Troubleshooting
| Problem | Solution |
|---|---|
| Display is blank or dim. | Check battery installation. Replace with fresh AA batteries. Ensure 'OFF ON LIGHT' switch is in 'ON' position for automatic night light. |
| Alarm does not sound. | Ensure the 'OFF ON ALARM' switch on the back is in the 'ON' position. Verify the alarm time is set correctly. |
| Time is incorrect. | Slide the switch on the back to 'TIME SET' and re-adjust the hour and minute. Ensure the switch is returned to 'LOCK'. |
| Snooze function not working. | Ensure the alarm is active. Press the 'SNOOZE/LIGHT' button firmly when the alarm is sounding. |
Specifications
- Model Number: TL88192D
- Brand: Timelink
- Color: Blue
- Display Type: Digital LCD
- Power Source: Battery Powered (2 AA batteries required, not included)
- Product Dimensions: 4.25"W x 2.6"H (approximately)
- Material: Plastic, Rubber
- Special Feature: Automatic Night Light, Snooze, On-Demand Backlight
- Mounting Type: Tabletop
- Item Weight: 5.3 ounces
Warranty and Support
For warranty information or technical support, please refer to the contact details provided with your purchase documentation or visit the official Timelink website. Please have your model number (TL88192D) available when contacting support.