1. Setup
The Smartby XRT010 remote control is designed for immediate use with compatible Vizio TV models without requiring any programming. Simply insert batteries, and the remote will be ready to operate your television.
1.1 Battery Installation
To install batteries:
- Locate the battery compartment cover on the back of the remote control.
- Slide the cover downwards or press the latch to open it.
- Insert two AAA Alkaline batteries (not included), ensuring the positive (+) and negative (-) terminals match the diagrams inside the compartment.
- Replace the battery compartment cover, ensuring it clicks securely into place.
Note: The remote uses Alkaline batteries. Ensure correct polarity during installation.
1.2 Compatibility
This remote control is compatible with a wide range of Vizio TV models, including but not limited to:
- E320-A0, E241-A1, E290-A1, E390-A1, E320-A1, E420-A0, E470-A0, E420VSE, E390VL, E471VLE, E240AR, E320AR, E420AR, E500AR, E291-A1
- E320VT, E370VT, E420VT, E240AR, E320AR, E420AR, E500AR, E370VP, E420VP, E420VSE, E390VL, E322MV, E321VT, E321ME, E321MV, E191VA, E221VA, E261VA
If your Vizio TV model is listed above, the remote should function without additional setup.
2. Operating Instructions
The XRT010 remote control utilizes infrared (IR) technology. Ensure a clear line of sight between the remote and your Vizio TV's IR receiver for optimal performance. Point the remote directly at the television when pressing buttons.
2.1 Remote Control Layout
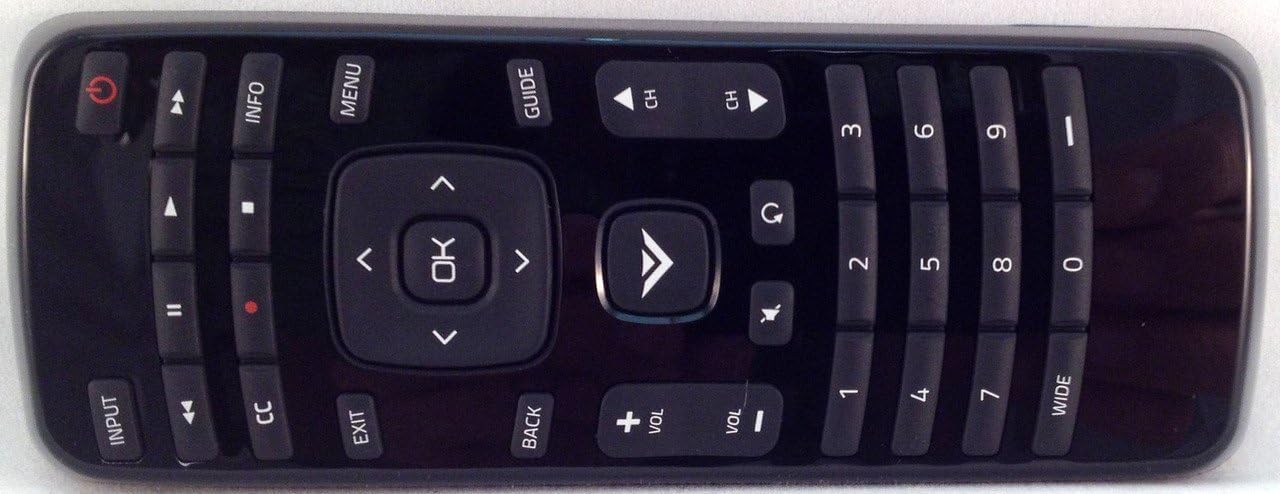
Image 1: Smartby XRT010 Remote Control (Front View)
This image displays the full layout of the Smartby XRT010 remote control, highlighting the power button, navigation pad, volume and channel controls, and numerical keypad.
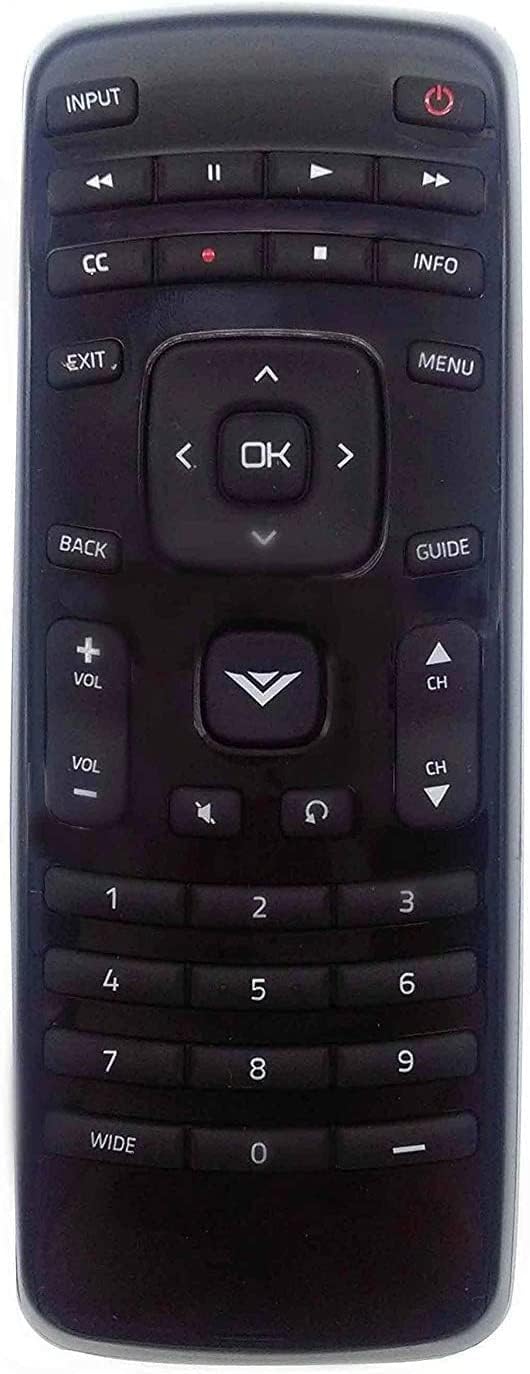
Image 2: Smartby XRT010 Remote Control (Angled View)
This image provides an angled perspective of the remote, offering a clearer view of the button textures and the overall ergonomic shape.
2.2 Button Functions
| Button | Function |
|---|---|
| Power (⏻) | Turns the TV on or off. |
| Input | Cycles through available input sources (HDMI, AV, etc.). |
| Volume (+/-) | Adjusts the TV's volume level. |
| Mute (🔇) | Mutes or unmutes the TV's audio. |
| Channel (CH ▲/▼) | Changes the TV channel up or down. |
| Navigation Pad (▲▼◄►) | Navigates through on-screen menus and options. |
| OK | Confirms selections in menus. |
| Menu | Opens the TV's main menu. |
| Guide | Displays the electronic program guide (if available). |
| Info | Displays information about the current program or input. |
| Exit | Exits the current menu or screen. |
| Back | Returns to the previous menu or screen. |
| CC | Activates or deactivates Closed Captions. |
| Number Buttons (0-9) | Directly enters channel numbers. |
| Wide | Adjusts the screen aspect ratio (functionality may vary by TV model). |
3. Maintenance
3.1 Cleaning the Remote
To clean the remote control:
- Wipe the surface with a soft, dry cloth.
- For stubborn dirt, slightly dampen the cloth with water or a mild, non-abrasive cleaner.
- Do not use harsh chemicals, solvents, or abrasive cleaning pads, as these can damage the remote's finish or internal components.
- Ensure no liquid enters the remote's interior.
3.2 Battery Replacement
Replace batteries when the remote's response becomes sluggish or stops working. Refer to section 1.1 for battery installation instructions. Always replace both batteries at the same time with new ones of the same type (AAA Alkaline).
3.3 Storage
Store the remote control in a cool, dry place away from direct sunlight and extreme temperatures. If the remote will not be used for an extended period, remove the batteries to prevent leakage and potential damage.
4. Troubleshooting
| Problem | Possible Cause | Solution |
|---|---|---|
| Remote not responding. | Dead or incorrectly inserted batteries. Obstruction between remote and TV. Remote out of range. | Replace batteries, ensuring correct polarity. Remove any objects blocking the signal path. Move closer to the TV (within 10 meters). |
| Specific buttons not working. | Dirt or debris under the button. Button malfunction. | Clean the remote surface around the button. If the issue persists, the button may be faulty. |
| Intermittent response. | Weak batteries. Interference from other devices. | Replace batteries. Ensure no strong light sources (e.g., direct sunlight, fluorescent lights) are interfering with the IR signal. |
| Remote does not control TV. | Incompatible TV model. | Verify your Vizio TV model is listed in the compatibility section (1.2). This remote is designed for specific Vizio models and does not require programming. |
5. Specifications
| Feature | Detail |
|---|---|
| Brand | Smartby |
| Model Name | XRT010 |
| Connectivity Technology | Infrared (IR) |
| Compatible Devices | Vizio Televisions (specific models listed in Section 1.2) |
| Special Feature | Ergonomic design |
| Number of Buttons | Varies by specific button layout, but core functions are covered. |
| Maximum Range | 10 Meters (approximately 33 feet) |
| Battery Type | 2 x AAA Alkaline (not included) |
| Item Weight | 1.44 ounces (approximately 40.8 grams) |
6. Warranty & Support
6.1 Product Support
For technical assistance or inquiries regarding your Smartby XRT010 remote control, please contact the manufacturer or retailer where the product was purchased. Refer to their official website or contact information provided with your purchase for support options.
6.2 Return Policy
This product typically comes with a 30-day return policy for refund or replacement, subject to the terms and conditions of the retailer. Please consult your purchase documentation or the retailer's website for specific details regarding returns and exchanges.