Introduction
Thank you for choosing the SMITH'S 10-Second Knife & Scissor Sharpener. This compact and efficient tool is designed to quickly restore a sharp edge to your knives and scissors, ensuring optimal performance for your kitchen and outdoor tasks. Please read this manual carefully before use to ensure safe and effective operation.
Safety First
- Always exercise extreme caution when handling sharp objects.
- Keep fingers and hands away from the sharpening slots during use.
- Ensure the sharpener is placed on a stable, non-slip surface before sharpening. The integrated non-slip feet help secure the device.
- Do not apply excessive downward pressure, as this can damage the blade or the sharpener.
- Keep out of reach of children.
Product Overview
The SMITH'S 10-Second Knife & Scissor Sharpener features a durable yellow housing with two distinct sharpening stages for knives and a dedicated slot for scissors. Its lightweight and portable design makes it ideal for various applications.
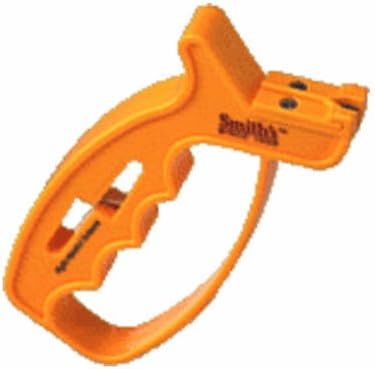
Image: The yellow SMITH'S 10-Second Knife & Scissor Sharpener, showcasing its compact design and sharpening slots.
Key Components:
- Coarse Sharpening Slot: Features carbide blades for quickly setting the edge on very dull or damaged knives.
- Fine Sharpening Slot: Features ceramic rods for finishing the edge, honing, and light touch-ups.
- Scissor Sharpening Slot: A dedicated slot for sharpening scissors.
- Non-Slip Feet: Rubberized feet on the base provide stability during use.
Setup
The sharpener requires minimal setup. Simply place it on a flat, stable surface such as a countertop or workbench. The non-slip feet will help keep it securely in place during sharpening.
Operating Instructions
Sharpening Knives:
- Hold the sharpener firmly on a stable surface.
- For very dull or damaged knives, start with the Coarse (Carbide) slot. Insert the heel of the knife blade into the slot at a 90-degree angle to the sharpener.
- Pull the knife blade through the slot from heel to tip, applying light, consistent downward pressure. Repeat this motion 3-5 times, or until a new edge is established.
- Next, move to the Fine (Ceramic) slot. Insert the heel of the knife blade into the slot.
- Pull the knife blade through the slot from heel to tip, applying very light, consistent downward pressure. Repeat this motion 5-7 times to hone and polish the edge.
- Test the sharpness of your knife. If needed, repeat the fine sharpening steps.
Sharpening Scissors:
- Open the scissors fully.
- Locate the dedicated scissor sharpening slot on the sharpener.
- Insert one blade of the open scissors into the slot, ensuring the cutting edge is against the sharpening element.
- Close the scissors as if cutting, pulling the blade through the sharpening slot. Repeat this motion 3-5 times for each blade.
- Test the sharpness of your scissors on a piece of paper.
Maintenance
- After each use, wipe the sharpener with a damp cloth to remove any metal filings. Do not rinse under running water.
- Store the sharpener in a dry place.
- The sharpening elements are designed for long-lasting performance and do not require replacement under normal use.
Troubleshooting
| Issue | Solution |
|---|---|
| Knife/Scissor not sharpening effectively | Ensure correct technique (consistent pressure, full blade pull). For very dull blades, more passes through the coarse slot may be needed. |
| Sharpener slips during use | Ensure the sharpener is on a clean, dry, stable surface. The non-slip feet require a good grip. |
Specifications
- Brand: SMITH'S SINCE 1886
- Model: 10-Second Knife & Scissor Sharpener
- Material: Corundum (sharpening elements), Plastic (housing)
- Color: Yellow
- Item Weight: 3.2 ounces
- Grit Type: Fine (Ceramic) and Coarse (Carbide)
- Product Dimensions: 4.5 x 4.6 x 8.1 inches
- UPC: 027925190029
Warranty and Support
For warranty information or product support, please refer to the manufacturer's official website or contact their customer service directly. Keep your proof of purchase for any warranty claims.