1. Product Overview
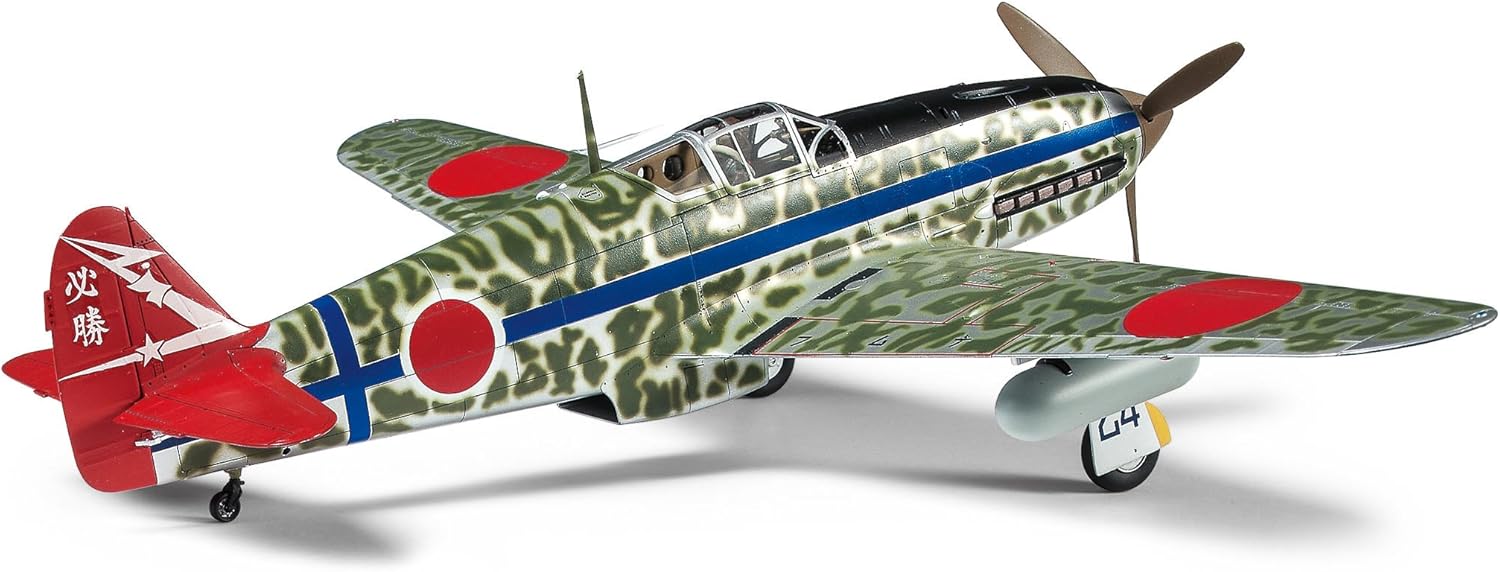
This instruction manual provides detailed guidance for assembling the Tamiya 61115 1/48 Kawasaki KI-61-ID Hien (Tony) Plastic Model Airplane Kit. The Kawasaki Ki-61-Id Hien, known as 'Tony' by the Allies, was a distinctive Japanese Army fighter aircraft from World War II, notable for its liquid-cooled Ha-40 engine and sleek design. This model kit accurately replicates the Ki-61-Id variant, which featured an elongated nose housing 20mm cannons and 12.7mm machine guns in the wings.
Key features of this model include:
- Accurate depiction of the Ki-61-Id Type Hien with its elongated nose and slim fuselage.
- Detailed representation of the inverted Ha-40 V12 engine, including supercharger and other components.
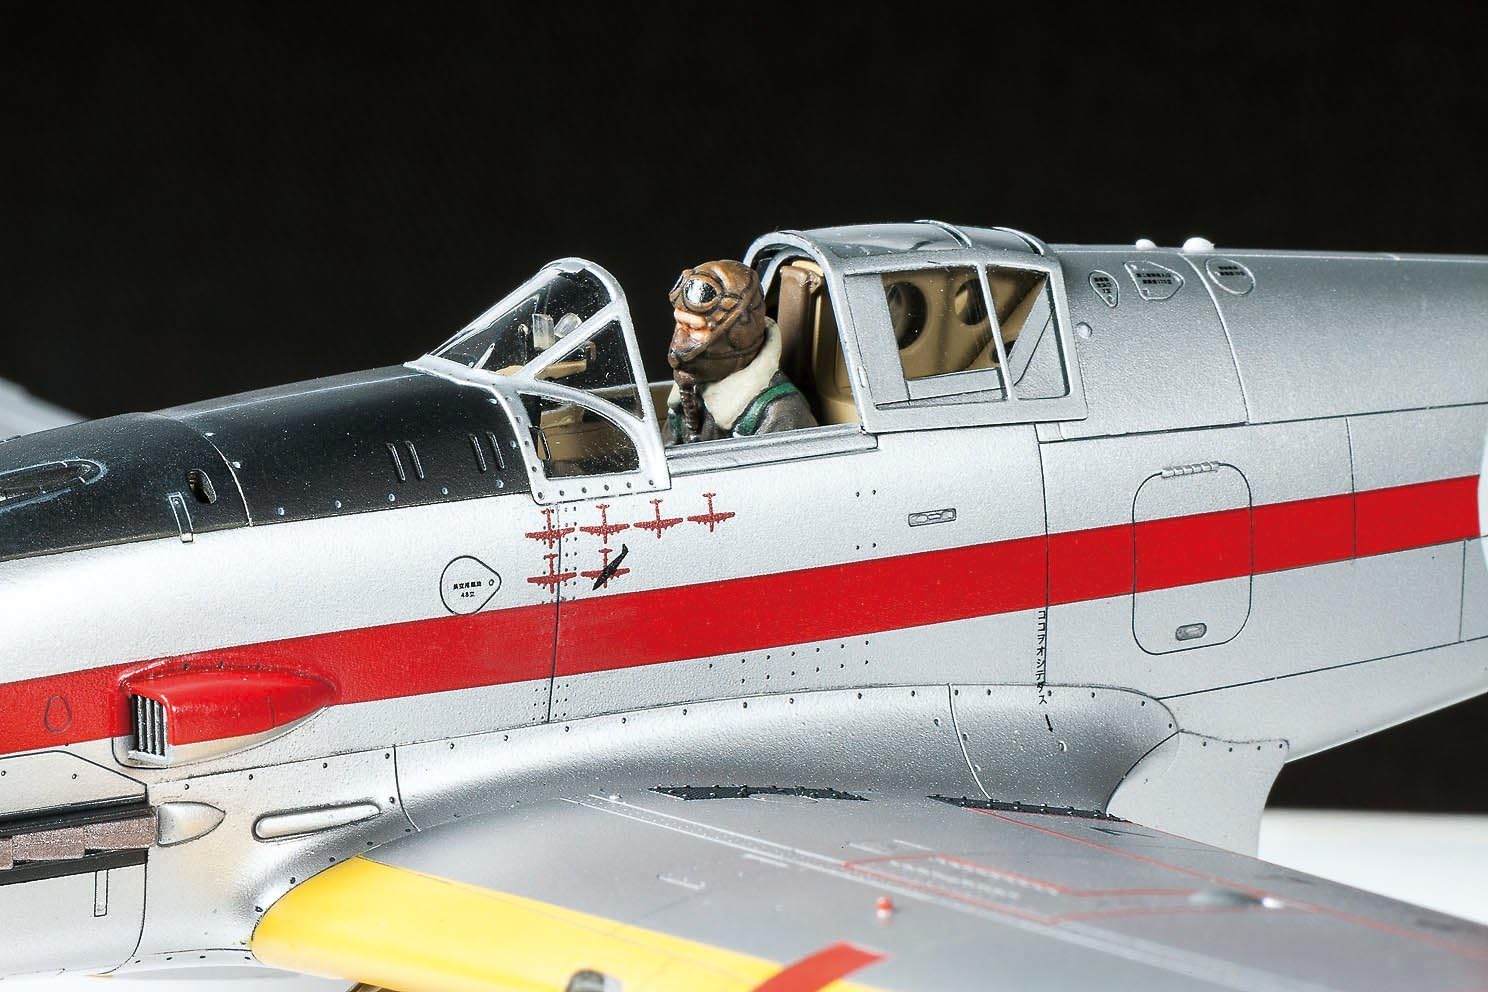
- A meticulously crafted cockpit interior, featuring 20mm cannon ammo cases and an oil tank.
- Precisely detailed fuselage underside radiator, complete with air intake slats.
- Canopy parts designed for assembly in either an open or closed position.

2. Setup and Assembly
Assembly of this plastic model kit requires careful attention to detail, along with painting and the use of adhesives. Please read all instructions thoroughly before beginning.
2.1 Tools and Materials Required
Before starting, ensure you have the following tools and materials:
- Plastic nippers or side cutters for removing parts from sprues.
- Hobby knife or craft blade for cleaning sprue gates and fine detailing.
- Tweezers for handling small parts and decals.
- Small files or sanding sticks for smoothing edges.
- Plastic cement (e.g., Tamiya Plastic Cement) for bonding parts.
- Paints (acrylic or enamel) as specified in the painting guide.
- Paintbrushes of various sizes or an airbrush for painting.
- Masking tape for precise painting.
- Decal setting solution and softener for applying decals.

2.2 Assembly Steps
- Part Preparation: Carefully cut each part from its sprue using nippers. Use a hobby knife to clean any excess plastic (flash) or sprue gates.
- Sub-Assembly: Follow the numbered steps in the included instruction booklet to assemble major components such as the cockpit, engine, wings, and fuselage sections. Test fit parts before applying cement.
- Painting: Refer to the detailed painting guide for recommended colors and application techniques. Apply paint in thin, even coats, allowing sufficient drying time between each.


- Decal Application: Once painting is complete and dry, apply the included decals according to the marking guide. Use decal setting solutions to help decals conform to curved surfaces and eliminate air bubbles.
- Final Assembly: Join all painted and decaled sub-assemblies to complete the model. Ensure all delicate parts, such as antennas or landing gear, are securely attached.


3. Operating (Display and Handling)
This model is designed for static display. Proper handling and display practices will ensure its longevity and appearance.
- Handling: Always handle the model by its sturdy sections, such as the main fuselage or wings, to avoid damaging delicate parts like landing gear, antennas, or propellers.
- Display Location: Place the model on a stable, flat surface away from high traffic areas where it might be accidentally knocked over.
- Environmental Factors: Avoid displaying the model in direct sunlight, which can cause paint to fade and plastic to become brittle over time. Keep it away from extreme temperatures or high humidity.
4. Maintenance
Regular maintenance will help preserve the appearance of your model.
- Dusting: Use a soft, dry brush (such as a makeup brush or a dedicated model dusting brush) to gently remove dust. For hard-to-reach areas, a can of compressed air can be used, but hold it at a distance to avoid damaging parts.
- Cleaning: If necessary, lightly dampen a soft cloth with water (and a tiny amount of mild soap if needed) to clean surfaces. Avoid harsh chemicals or abrasive cleaners, as these can damage paint and plastic.
- Storage: If storing the model, ensure it is placed in a protective container to prevent dust accumulation and physical damage.
5. Troubleshooting
Here are solutions to common issues encountered during model assembly or display:
- Parts Not Fitting: Double-check that all sprue gates have been completely removed from the parts. Ensure the parts are oriented correctly according to the instruction diagrams. Sometimes, a small amount of sanding or trimming may be required for a perfect fit.
- Paint Not Adhering or Uneven: Ensure the plastic surface is clean and free of oils or mold release agents before painting. Apply paint in multiple thin coats rather than one thick coat. Allow each coat to dry fully before applying the next.
- Decals Not Lying Flat: Use a decal setting solution to help decals conform to irregular surfaces and eliminate air bubbles. Apply a small amount of solution to the area before placing the decal, and then another small amount on top.
- Broken Small Parts: If a small part breaks, it can often be reattached using a small amount of plastic cement or super glue. For structural repairs, consider reinforcing with a small piece of plastic rod or wire if possible.
6. Specifications
| Feature | Detail |
|---|---|
| Brand Name | TAMIYA |
| Model Name | 1/48 Kawasaki KI-61-ID Hien (Tony) Plastic Model Airplane Kit |
| Model Number | TAM61115 |
| Scale | 1/48 |
| Material Type | Plastic |
| Item Weight | 0.11 Kilograms |
| Item Dimensions (L x W x H) | 13.88 x 7.88 x 2.13 inches |
| Assembly Required | Yes |
| Batteries Required | No |
| Included Components | Plastic model kit parts, Decals and Markings, Instruction Manual |
| Educational Objective | Develop fine motor skills, patience, historical understanding, and following instructions |
| Recommended Age | 14 years and up |
| Global Trade Identification Number (GTIN) | 04950344611157 |
7. Warranty and Support
Manufacturer Warranty: This product does not come with a manufacturer's warranty. Please refer to the retailer's return policy for any issues upon receipt.
Extended Protection Plans: Extended protection plans may be available for purchase from your retailer at the time of purchase. These plans are separate from any manufacturer warranty and offer additional coverage.
Customer Support: For questions regarding assembly, missing parts, or general inquiries about Tamiya products, please visit the official Tamiya website or contact their customer service directly. Contact information can typically be found on the Tamiya corporate website.