Introduction
Thank you for choosing the Nilfisk Multi II 30T Wet and Dry Vacuum Cleaner. This manual provides essential information for the safe and efficient operation, maintenance, and troubleshooting of your vacuum cleaner. Please read these instructions carefully before using the appliance and keep them for future reference.
The Nilfisk Multi II 30T is designed for versatile indoor and outdoor cleaning tasks, capable of handling both wet and dry debris. It features a powerful 1400W motor, a 22-liter capacity, and a convenient power outlet for connecting power tools.

Image: Overview of the Nilfisk Multi II 30T vacuum cleaner highlighting key features such as tank capacity, power outlet, blow function, and filter cleaning.
Important Safety Information
WARNING: Read all safety warnings and all instructions. Failure to follow the warnings and instructions may result in electric shock, fire, and/or serious injury.
- Always disconnect the plug from the power outlet before cleaning or servicing the machine.
- Do not vacuum flammable, explosive, or hot materials (e.g., hot ashes, gasoline).
- Do not use the appliance if the power cord or plug is damaged.
- This appliance is not intended for use by persons (including children) with reduced physical, sensory or mental capabilities, or lack of experience and knowledge, unless they have been given supervision or instruction concerning use of the appliance by a person responsible for their safety.
- Ensure the filter is correctly installed for dry vacuuming. Remove the filter for wet vacuuming unless specified otherwise for specific filter types.
- Do not immerse the appliance in water.
- Use only Nilfisk original accessories and spare parts.
Package Contents
Verify that all components are present and undamaged upon unpacking. The standard package includes:

Image: A visual representation of the accessories included with the Nilfisk Multi II 30T, showing the floor nozzle, crevice nozzle, suction hose, hose hook, filter, and a dust bag.
- Nilfisk Multi II 30T Vacuum Unit
- Suction Hose (4 meters)
- Extension Tubes
- Floor Nozzle
- Crevice Nozzle
- Washable Filter
- Dust Bag (for dry vacuuming)
- Hose Hook
- User Manual
Setup and Assembly
The Nilfisk Multi II 30T requires some assembly before first use. Follow these steps:
- Attach the Wheels: Securely attach the wheels to the base of the vacuum unit.
- Connect the Suction Hose: Insert the large end of the suction hose into the inlet port on the front of the vacuum unit until it clicks into place. For the blow function, connect the hose to the exhaust port.
- Assemble Extension Tubes and Nozzle: Connect the extension tubes to the handle end of the suction hose, then attach the desired nozzle (floor nozzle or crevice nozzle).
- Install Filter: For dry vacuuming, ensure the washable filter is correctly installed. For wet vacuuming, the filter should be removed unless using a specialized wet filter.
- Insert Dust Bag (Optional for Dry Use): For dry vacuuming, you can insert a dust bag into the tank. This provides a capacity of 14 liters. Without a bag, the capacity is 18 liters.

Image: The Nilfisk Multi II 30T fully assembled with its hose and floor nozzle, illustrating its large capacity and strong performance for various cleaning tasks including outdoor, indoor, garden leaves, vehicle interiors, liquids, solids, and workshop debris.
Operating Instructions
1. Dry Vacuuming
- Ensure the washable filter is clean and correctly installed.
- Optionally, insert a dust bag for easier disposal of dry debris.
- Connect the vacuum to a suitable power outlet.
- Turn the vacuum ON using the power switch.
- Use the appropriate nozzle for the surface (e.g., floor nozzle for carpets and hard floors, crevice nozzle for tight spaces).
2. Wet Vacuuming
- Remove the dust bag and the standard washable filter. For wet vacuuming, the standard filter must be removed to prevent damage. Some specialized wet filters may be used, refer to their specific instructions.
- Connect the vacuum to a suitable power outlet.
- Turn the vacuum ON.
- Use the floor nozzle to pick up liquids. The vacuum will automatically stop suction when the maximum liquid level is reached.
- After wet vacuuming, empty the tank and clean it thoroughly. Allow all components to dry completely before storing or switching back to dry vacuuming.

Image: Demonstrates the vacuum's capability to clean both wet spills and dry debris from hard floor surfaces using the floor nozzle.
3. Blow Function
- Disconnect the suction hose from the inlet port.
- Connect the suction hose to the exhaust port (usually located at the rear or side of the motor head).
- Turn the vacuum ON. The air will now blow out through the hose, useful for clearing leaves, inflating items, or drying surfaces.

Image: A user demonstrating the blow function of the vacuum cleaner to clear fallen leaves from an outdoor patio.
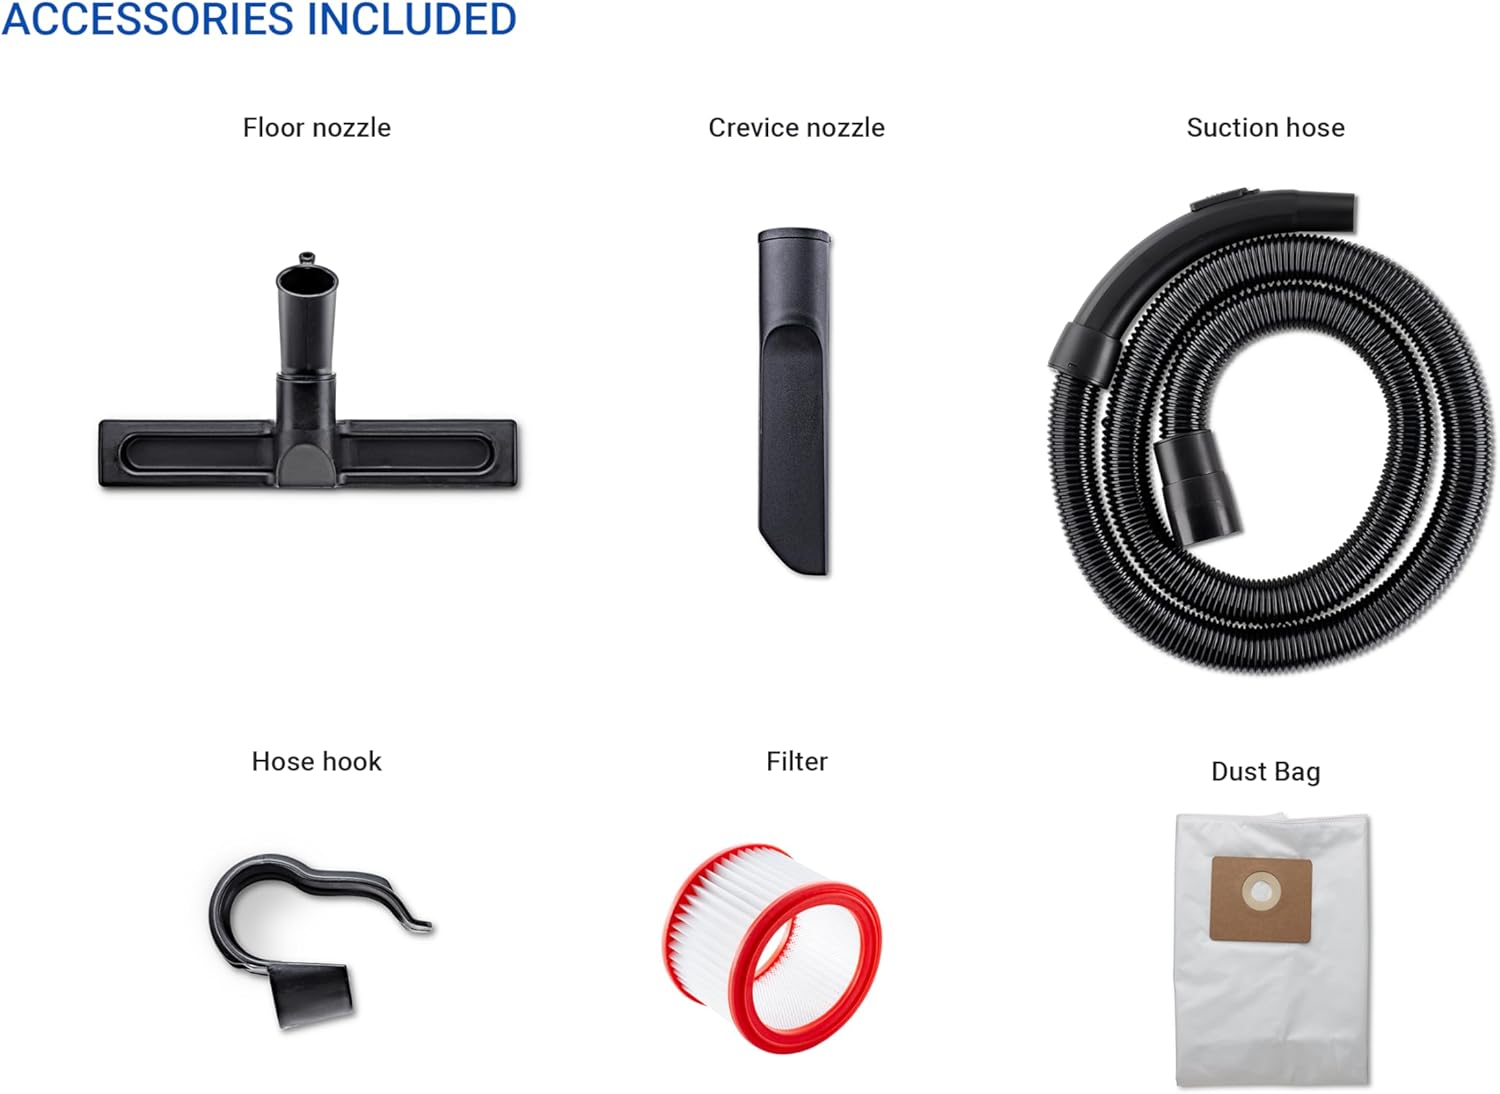
Image: The vacuum's blow function being used to inflate an inflatable object, showcasing its versatility beyond just cleaning.
4. Power Outlet for Power Tools (1100W)
- The vacuum cleaner is equipped with a power take-off outlet (1100W) for connecting power tools.
- Plug your power tool into the integrated power outlet on the vacuum cleaner.
- When the power tool is switched on, the vacuum cleaner will automatically start, providing dust extraction during tool operation. It will switch off shortly after the power tool is turned off.
- Ensure the vacuum is set to dry mode with the filter installed when using with power tools for dust extraction.

Image: A user demonstrating the integrated power outlet feature, connecting a power tool to the vacuum for efficient dust extraction during operation.
5. Versatile Cleaning Applications
- Carpet and Hard Floors: Use the floor nozzle for general cleaning.
- Vehicle Interiors: The crevice nozzle is ideal for reaching tight spots in cars.
- Workshops and Garages: Effectively clean up sand, sludge, wood chippings, and DIY debris.

Image: The vacuum cleaner being used to clean the interior of a car, highlighting its suitability for automotive detailing.
Maintenance
1. Filter Cleaning (Push&Clean)
The Nilfisk Multi II 30T features a semi-automatic Push&Clean filter cleaning function:
- With the vacuum running, block the hose inlet with your hand.
- Press and hold the "Push&Clean" button (often marked with a filter icon) for a few seconds. This creates an airwave that cleans the filter from the inside out.
- Release the button. Repeat if necessary until suction power is restored.
- The filter clean indicator will alert you when the filter needs cleaning.
The filter is washable. For thorough cleaning, remove the filter and rinse it under running water. Allow it to dry completely before re-installing.
2. Emptying the Tank
- Dry Debris (with dust bag): Remove the motor head, then carefully lift out and dispose of the full dust bag. Replace with a new bag.
- Dry Debris (bagless): Remove the motor head and empty the tank into a waste receptacle.
- Liquids: Remove the motor head and carefully pour out the liquid from the tank.
After emptying, clean the tank with water and mild detergent if necessary. Ensure the tank is dry before reassembling, especially if switching from wet to dry vacuuming.
3. General Cleaning and Storage
- Wipe the exterior of the vacuum cleaner with a damp cloth. Do not use harsh cleaning agents.
- Check the hose and nozzles for blockages regularly and clear them if found.
- Store the vacuum cleaner in a dry, protected area, away from extreme temperatures.
Troubleshooting
| Problem | Possible Cause | Solution |
|---|---|---|
| Vacuum does not start. | No power supply; damaged cord/plug. | Check power connection; inspect cord/plug for damage. |
| Low suction power. | Clogged filter; full dust bag/tank; blocked hose/nozzle. | Clean filter using Push&Clean or manually; empty dust bag/tank; clear blockages from hose/nozzle. |
| Motor stops during wet vacuuming. | Tank is full (float switch activated). | Empty the tank. |
| Dust escapes from vacuum. | Filter not installed correctly or damaged; dust bag full/damaged. | Check filter installation; replace damaged filter/dust bag. |
If the problem persists after attempting these solutions, please contact Nilfisk customer support.
Specifications
| Feature | Detail |
|---|---|
| Model Number | 18451559 |
| Input Power | 1400 Watts |
| Power Take-Off (for tools) | 1100 Watts |
| Capacity (Bagless) | 18 Liters |
| Capacity (with Dust Bag) | 14 Liters |
| Hose Length | 4 Meters |
| Filter Type | Washable |
| Special Features | Wet & Dry Function, Blow Function, Push&Clean Filter Cleaning, Power Outlet for Tools |
| Product Dimensions (L x W x H) | 42.6 x 37.4 x 68.4 cm (10.7 x 6.2 x 6.2 inches) |
| Item Weight | 21.1 pounds (9.6 kg) |
| Noise Level | 1.18 Decibels |
| Power Source | Corded Electric |
| Assembly Required | Yes |
Warranty and Support
Nilfisk products are manufactured to high-quality standards and come with a manufacturer's warranty. Please refer to the warranty card included with your product for specific terms and conditions, including warranty period and coverage details.
For technical support, spare parts, or service inquiries, please contact Nilfisk customer service. Contact information can typically be found on the Nilfisk official website or on the warranty documentation.
Online Resources: For additional information, FAQs, and product registration, visit the official Nilfisk website: www.nilfisk.com


