1. Introduction
This manual provides essential instructions for the safe and effective use, installation, and maintenance of your Pacer Pumps Drain & Fill Plug Kit. Please read this manual thoroughly before using the product and retain it for future reference. Proper understanding and adherence to these instructions will ensure optimal performance and longevity of the product.
2. Safety Information
Always prioritize safety when handling and installing the Drain & Fill Plug Kit. Failure to follow safety guidelines can result in property damage or injury.
- Ensure the system is depressurized and drained before removing or installing plugs.
- Wear appropriate personal protective equipment (PPE), such as gloves and eye protection, when working with fluids or tools.
- Do not overtighten plugs, as this can damage the threads or the plug itself.
- Verify that the plugs are compatible with the fluid and operating conditions of your application.
- Keep out of reach of children.
3. Package Contents
The Pacer Pumps Drain & Fill Plug Kit includes the following components:
- 4 x Polypropylene Drain & Fill Plugs
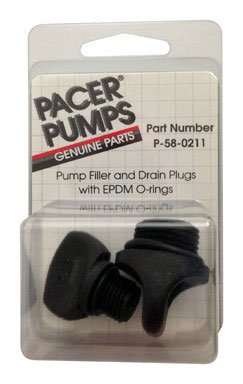
Figure 1: Contents of the Pacer Pumps Drain & Fill Plug Kit. The image displays four black polypropylene plugs, designed for draining and filling applications.
4. Setup
Follow these steps for proper setup and installation of the drain and fill plugs:
- Inspect Plugs: Before installation, visually inspect each plug for any signs of damage, cracks, or deformities. Do not use damaged plugs.
- Prepare Opening: Ensure the threaded opening where the plug will be installed is clean and free of debris, old sealant, or rust.
- Apply Sealant (Optional): For a more secure and leak-proof seal, apply a suitable thread sealant or PTFE tape to the threads of the plug. Consult your system's manufacturer recommendations for appropriate sealant types.
- Insert and Hand-Tighten: Carefully insert the plug into the threaded opening and hand-tighten until snug.
- Final Tightening: Using an appropriate wrench, tighten the plug an additional 1/4 to 1/2 turn past hand-tight. Avoid overtightening, which can strip threads or crack the polypropylene material.
- Verify Seal: After installation, check for any leaks once the system is refilled or pressurized.
5. Operating
The Drain & Fill Plug Kit is designed for sealing openings in fluid systems, allowing for controlled draining and filling operations.
- For Draining: Ensure the system is safely depressurized. Place a suitable collection container beneath the drain point. Slowly loosen and remove the drain plug to allow fluid to exit. Once drained, clean the plug and reinstall it as per the 'Setup' instructions.
- For Filling: After draining and reinstalling the drain plug, locate the fill point. Remove the fill plug. Carefully introduce the appropriate fluid into the system. Monitor the fluid level and stop filling when the desired level is reached. Clean the fill plug and reinstall it as per the 'Setup' instructions.
- Always ensure plugs are securely tightened before operating the system to prevent leaks.
6. Maintenance
Regular maintenance ensures the longevity and reliable performance of your plugs.
- Cleaning: Periodically clean the plugs with mild soap and water to remove any residue or buildup. Avoid harsh chemicals that may degrade the polypropylene material.
- Inspection: Before each use or during routine system checks, inspect the plugs for any signs of wear, cracking, or thread damage. Replace any damaged plugs immediately.
- Storage: Store unused or removed plugs in a clean, dry place away from direct sunlight and extreme temperatures.
7. Troubleshooting
If you encounter issues with your Drain & Fill Plugs, consider the following common problems and solutions:
- Leakage:
- Ensure the plug is tightened correctly, but not overtightened.
- Check for thread damage on both the plug and the receiving port.
- Verify that thread sealant or PTFE tape was applied correctly.
- Inspect the plug for cracks or defects; replace if necessary.
- Difficulty Tightening/Loosening:
- Ensure threads are clean and free of debris.
- Apply a small amount of thread lubricant (compatible with polypropylene) if necessary.
- Do not force the plug; cross-threading can cause permanent damage.
8. Specifications
| Attribute | Value |
|---|---|
| Product Dimensions | 6.4 x 2.75 x 4.5 inches |
| Item Weight | 6.4 ounces |
| Material | Polypropylene |
| Color | Black |
| UPC | 095616582118 |
| Number of Items | 4 |
| ASIN | B01MQ2NOSZ |
| Manufacturer | Pacer Pumps |
9. Warranty Information
Specific warranty details for the Pacer Pumps Drain & Fill Plug Kit are typically provided by the manufacturer or the seller at the time of purchase. Please refer to your purchase documentation or contact the seller directly for information regarding warranty coverage, terms, and conditions.
10. Support
For technical assistance, troubleshooting beyond this manual, or inquiries regarding your Pacer Pumps Drain & Fill Plug Kit, please contact the manufacturer or the retailer from whom you purchased the product. Have your model number (B01MQ2NOSZ) and purchase details ready when contacting support.