ZENY AB-130A-0.4
ZENY Airbrush Kit with Compressor Instruction Manual
Model: AB-130A-0.4
1. Introduction
This manual provides comprehensive instructions for the safe and effective use of your ZENY Airbrush Kit with Compressor. This versatile dual-action airbrush system is designed for a wide range of applications, including makeup, painting, temporary tattoos, nail art, and cake decorating. Please read this manual thoroughly before initial use to ensure proper setup, operation, and maintenance.
2. Package Contents
Upon unpacking, please verify that all the following components are included in your ZENY Airbrush Kit:
- 1x TC-100 Black Mini Air Compressor
- 1x Model AB-130A-0.4 Dual-action Airbrush Set (with 0.4 mm needle/nozzle and 7cc gravity feed fluid cup)
- 1x Airbrush Air Hose
- 1x 110V AC Adapter
- 1x Airbrush Holder
- Nozzle Wrench and 2 cc Eye Dropper

Figure 2.1: All components of the ZENY Airbrush Kit. This image displays the black mini air compressor, the dual-action airbrush gun, the air hose, the power adapter, and small accessories like a nozzle wrench and eye dropper.
3. Technical Specifications
| Component | Specification |
|---|---|
| Air Compressor Model | TC-100 |
| Air Compressor Input | 12V DC, 0.8Amp |
| Max Pressure | 25 PSI |
| Air Output | 10L/Min |
| Airbrush Model | AB-130A-0.4 |
| Airbrush Type | Dual-Action, Gravity Feed |
| Needle/Nozzle Size | 0.4 mm |
| Fluid Cup Capacity | 7 cc (with lid) |
| Power Source | Corded Electric |
| Noise Level | 30 dB |
| Product Dimensions | 8.27 x 5.43 x 5.91 inches |
| Item Weight | 2.49 pounds |

Figure 3.1: Rear view of the TC-100 Mini Air Compressor, displaying its model number, input voltage, pressure, and air output specifications.
4. Setup Instructions
Follow these steps to set up your airbrush kit for first use:
- Unpack Components: Carefully remove all items from the packaging. Inspect for any damage.
- Connect Air Hose: Attach one end of the air hose to the air outlet port on the mini air compressor. Ensure a secure connection.
- Connect Airbrush: Connect the other end of the air hose to the air inlet on the bottom of the airbrush gun. Tighten gently to prevent air leaks.
- Install Airbrush Holder: If desired, insert the airbrush holder into the designated slot on top of the compressor for convenient storage during breaks.
- Connect Power Adapter: Plug the 110V AC adapter into the power input jack on the compressor. Then, plug the adapter into a standard electrical outlet.
- Adjust Pressure (Optional): The compressor has an air flow adjustment control. Turn the knob clockwise for higher pressure and counter-clockwise to reduce pressure. Start with a moderate setting and adjust as needed for your application.
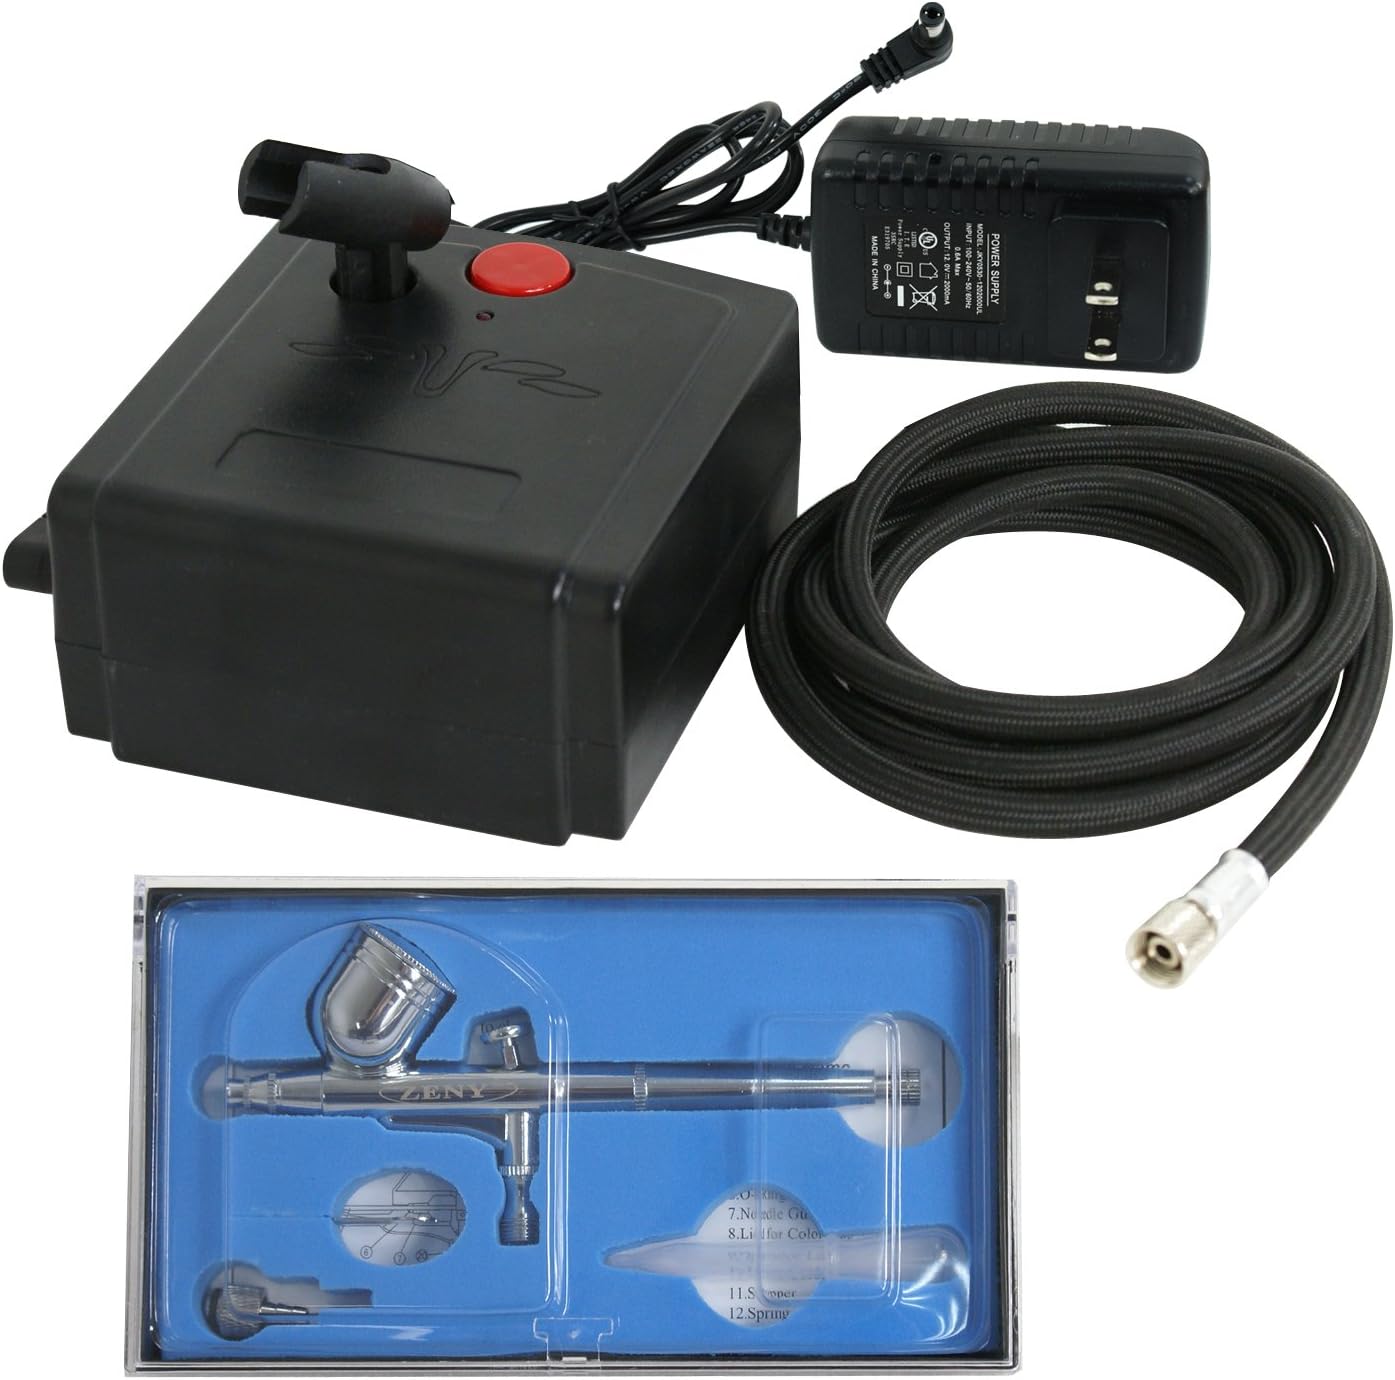
Figure 4.1: Lay out all components before assembly. This image shows the airbrush, compressor, hose, and power adapter ready for connection.
5. Operating Instructions
Your ZENY airbrush features a dual-action trigger for precise control over air and fluid flow.
- Power On: Press the red power button on the compressor to turn it on. The compressor will begin to build pressure.
- Prepare Fluid: Ensure your chosen fluid (e.g., watercolor pigments, inks, dyes, acrylics, automotive urethanes, lacquers, enamels) is properly thinned for airbrushing. Pour the fluid into the 7cc gravity feed fluid cup on top of the airbrush.
- Air Only: To release air only (useful for drying surfaces or clearing the nozzle), press the dual-action trigger down vertically.
- Air and Fluid Spray: To spray both air and fluid, press the trigger down vertically and then pull it back. The further you pull back, the more fluid will be released, allowing for a wider spray pattern.
- Adjusting Spray Pattern: The adjusting screw at the back of the airbrush allows you to pre-set the maximum needle travel, controlling the spraying thickness. Turn clockwise for a finer line and counter-clockwise for a thicker line.
- Practice: It is recommended to practice on scrap material to get accustomed to the airbrush's feel and adjust settings for desired results.
6. Maintenance and Cleaning
Proper cleaning and maintenance are crucial for the longevity and optimal performance of your airbrush kit. Always clean the airbrush immediately after each use.
- Empty Fluid Cup: Empty any remaining fluid from the gravity feed cup.
- Rinse: Fill the cup with an appropriate cleaning solution (water for water-based paints, or a specific airbrush cleaner for other types). Spray the cleaner through the airbrush until it runs clear.
- Back-Flush: Place your finger over the nozzle cap and pull back the trigger. This will force air back into the fluid cup, creating bubbles that help clean the inside of the cup and needle area. Repeat several times.
- Disassemble (Periodically): For thorough cleaning, especially if paint has dried inside, carefully disassemble the airbrush. Refer to the included diagram for component breakdown. Clean the needle, nozzle, and fluid passages with appropriate brushes and cleaning solutions.
- Lubrication: Apply a small amount of airbrush lubricant to the needle and trigger mechanism as needed to ensure smooth operation.
- Compressor Care: The TC-100 compressor is maintenance-free and oil-less. Keep it clean and free from dust. Ensure proper ventilation during use.
7. Troubleshooting
If you encounter issues with your airbrush kit, try these common solutions:
| Problem | Possible Cause | Solution |
|---|---|---|
| No Air Flow | Compressor off; hose disconnected; clogged nozzle. | Ensure compressor is on and plugged in; check hose connections; clean nozzle. |
| No Fluid Spray | Clogged nozzle/needle; paint too thick; empty fluid cup. | Thoroughly clean airbrush components; thin paint appropriately; refill fluid cup. |
| Inconsistent Spray Pattern | Partially clogged nozzle; bent needle; improper pressure. | Clean airbrush; inspect needle for damage; adjust compressor pressure. |
| Air Bubbles in Fluid Cup | Loose nozzle; damaged nozzle/needle. | Tighten nozzle; inspect and replace damaged parts if necessary. |
8. Warranty and Support
ZENY is committed to providing high-quality products and satisfactory services. For specific warranty details, product support, or to inquire about replacement parts, please contact ZENY customer service directly. Contact information can typically be found on the product packaging or the official ZENY website.
For additional resources and product information, you may visit the ZENY Store on Amazon.
Related Documents - AB-130A-0.4
 |
Zeny 5 in 1 Cavitation, Radio Frequency Machine: Features, Operation, and Specifications Comprehensive guide to the Zeny 5 in 1 Cavitation, Radio Frequency Machine, detailing its functions for weight loss, body shaping, and anti-aging. Includes operational procedures, important notes, technical specifications, and safety warnings. |
 |
ZENY Portable Washing Machine H03-1020A User Manual User manual for the ZENY Portable Washing Machine, Model H03-1020A, providing operating instructions, safety precautions, and maintenance guidelines. |
 |
Zeny Grievance Redressal Policy: Complaint Resolution Process and Guidelines This document outlines Zeny's Grievance Redressal Policy, detailing the process for resolving customer complaints related to investment advisory and mutual fund distribution services. It adheres to SEBI and AMFI regulations, providing a tiered escalation system and contact information for effective complaint management. |
 |
Zeny Terms of Use - Daily Sachet Technologies Private Limited Official Terms of Use for Zeny, a platform by Daily Sachet Technologies Private Limited, governing access to its website, mobile app, and platform services, including mutual fund investments. |
 |
Zeny Privacy Policy - Protecting Your Personal Information Read the Zeny Privacy Policy to understand how Daily Sachet Technologies Private Limited collects, uses, stores, and shares your personal information for its platform and financial services. Learn about your rights and data security. |
 |
Toyota MR2 SRS Airbag Tc Terminal Circuit Troubleshooting Guide (1993) Detailed troubleshooting guide for the 1993 Toyota MR2 SRS Airbag system's Tc Terminal Circuit. Includes diagnostic charts and step-by-step procedures for resolving airbag warning light issues. |
Ask a question about this manual
Ask about setup, troubleshooting, compatibility, parts, safety, or missing instructions. Manuals+ will review the question and use this page’s manual context to help answer it.