1. Product Overview
The TESCOM SG1 Series is a compact, lightweight, high-purity single-stage pressure regulator designed for specialty and industrial gas flows. It is suitable for applications requiring less than 10 SCFM / 283 SLPM. This regulator features a sensitive, extra long-life metal diaphragm to ensure gas purity and integrity. The SG165152 model is constructed with a 316L Stainless Steel body and diaphragm, PCTFE seat, and Teflon seals, offering an outlet pressure range of 0 to 250 psig and a Cv flow rate of 0.2.
Key features include:
- Sensitive, extra long-life metal diaphragm: Ensures gas purity and integrity.
- Cartridge Valve design: Incorporates a 10 micron filter that protects the regulator seat and simplifies service.
- Increased regulator diaphragm endurance: For extended operational life.
- Longer service life: Seat is protected from impurities with an integrated 10 micron filter.
- High regulator cycle life: Exceeds stringent industry standards.
This regulator is ideal for laboratory and point-of-use gas systems in medical, pharmaceutical, food and beverage, and other high purity applications, as well as process analyzer gases, metal fabrication, and specialty and industrial gas cylinders.
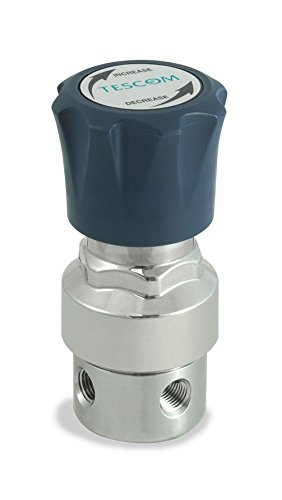
Image 1: Front view of the TESCOM SG165152 Single-Stage Pressure Regulator, showing its compact design and connection ports.
2. Safety Information
Read and understand all instructions and warnings before installing, operating, or maintaining this product. Failure to follow these instructions could result in serious injury or property damage.
- Qualified Personnel: Only trained and qualified personnel should install, operate, and maintain this equipment.
- Pressure Limits: Do not exceed the maximum inlet or outlet pressure ratings specified for this regulator.
- Gas Compatibility: Ensure the regulator materials are compatible with the gas being used. Incompatible materials can lead to corrosion, leaks, or failure.
- Leak Testing: Always perform a leak test after installation and before putting the system into service.
- Oxygen Service: For oxygen service, ensure all components are oxygen-cleaned and free of hydrocarbons. This product meets oxygen cleaning in accordance with ASTM G93 and has passed industry standards for oxygen ignition tests.
- Ventilation: Use in a well-ventilated area, especially when working with hazardous or inert gases.
- Personal Protective Equipment (PPE): Always wear appropriate PPE, including safety glasses, gloves, and protective clothing.
3. Setup
Proper installation is crucial for safe and effective operation.
- Inspection: Before installation, visually inspect the regulator for any signs of damage. Ensure all connections are clean and free of debris.
- Mounting: Mount the regulator securely in a location that allows for easy access to the gauges and adjustment knob. Ensure it is protected from physical damage and excessive vibration.
- Inlet Connection: Connect the high-pressure gas source to the inlet port of the regulator. This model features a 1/4" NPTF connection. Use appropriate thread sealant (e.g., PTFE tape) compatible with the gas and pressure, applying it only to the male threads. Tighten connections securely but do not overtighten.
- Outlet Connection: Connect the downstream system to the outlet port. Ensure all downstream components are rated for the intended outlet pressure.
- Purging (if applicable): If using a purge system, connect the purge gas lines as per system design.
- Leak Test: After all connections are made, perform a thorough leak test using a compatible leak detection solution or electronic leak detector. Do not use open flames for leak detection.
4. Operating Instructions
Follow these steps for safe operation of your TESCOM SG165152 regulator.
- Ensure Outlet Valve is Closed: Before opening the inlet pressure, ensure any downstream shut-off valves are closed or the system is isolated.
- Open Inlet Pressure Slowly: Slowly open the main valve on the gas cylinder or supply line. Observe the inlet pressure gauge to ensure it is within the regulator's rated limits.
- Adjust Outlet Pressure: Turn the regulator's adjustment knob clockwise to increase the outlet pressure. Turn it counter-clockwise to decrease the outlet pressure. Adjust slowly and observe the outlet pressure gauge until the desired pressure is reached.
- Open Downstream Valve: Once the desired outlet pressure is set, slowly open the downstream valve to allow gas flow to the application.
- Monitor Operation: Continuously monitor both inlet and outlet pressures during operation to ensure stable performance.
- Shut Down: To shut down the system, first close the main valve on the gas cylinder or supply line. Then, vent the pressure from the regulator and downstream system by opening the downstream valve or a vent valve. Finally, turn the regulator adjustment knob counter-clockwise until it is fully backed out (no spring tension).
5. Maintenance
Regular maintenance ensures optimal performance and extends the life of your regulator.
- Periodic Inspection: Regularly inspect the regulator for external damage, corrosion, or leaks. Check gauges for proper function.
- Filter Replacement: The cartridge valve design incorporates a 10 micron filter that protects the regulator seat. This filter should be inspected and replaced periodically, especially if flow restriction is observed or during routine system maintenance. Refer to TESCOM service manuals for detailed instructions on cartridge valve replacement.
- Cleaning: Clean the exterior of the regulator with a mild detergent and water. Do not use abrasive cleaners or solvents that could damage the finish or seals.
- Diaphragm Life: The extra long-life metal diaphragm is designed for durability. However, if pressure instability or leakage from the bonnet area occurs, the diaphragm may require inspection or replacement by qualified personnel.
- Professional Servicing: For internal repairs or component replacement, it is recommended to send the regulator to an authorized TESCOM service center or have it serviced by TESCOM-trained technicians.
6. Troubleshooting
This section addresses common issues you might encounter.
| Problem | Possible Cause | Solution |
|---|---|---|
| No outlet pressure | Inlet valve closed; Regulator adjustment knob backed out; Clogged filter; Regulator failure. | Open inlet valve; Turn adjustment knob clockwise; Inspect/replace filter; Contact service. |
| Outlet pressure fluctuates | Inlet pressure instability; Diaphragm damage; Seat leakage. | Check inlet supply; Contact service for diaphragm/seat inspection. |
| Gas leakage | Loose connections; Damaged seals/gaskets; Diaphragm rupture. | Tighten connections; Replace seals/gaskets; Contact service for diaphragm replacement. |
| Cannot achieve desired outlet pressure | Regulator range too low; Clogged filter; Regulator malfunction. | Verify regulator range; Inspect/replace filter; Contact service. |
7. Specifications
Technical specifications for the TESCOM SG165152 Single-Stage Pressure Regulator.
- Model Number: SG165152
- Outlet Pressure Range: 0 to 250 psig / 1724 kPa / 17.2 bar
- Cv Flow Rate: 0.2
- Body Material: 316L Stainless Steel
- Diaphragm Material: 316L Stainless Steel
- Seat Material: PCTFE
- Seal Material: Teflon
- Connection: 1/4" NPTF
- Ports: 5
- Package Dimensions: 22.86 x 22.86 x 22.86 cm
- Item Weight: 1.09 kg
- Industry Standards / Approvals: Oxygen cleaning in accordance with ASTM G93, Passed oxygen ignition tests, ASME B31 / ASME BPVC, CGA E-4, ISO 2503 / ISO 9090, ISO 7291, CRN
8. Warranty and Support
For specific warranty information, please refer to the documentation provided with your purchase or visit the official TESCOM website. For technical support, service, or spare parts, please contact your authorized TESCOM distributor or TESCOM customer service. When contacting support, please have your model number (SG165152) and serial number (if applicable) ready.