Introduction
This manual provides detailed instructions for the setup, operation, and maintenance of your Night Owl 8-Channel HD DVR Security System. This system features 1080p High Definition cameras with Dual Sensor Technology, combining motion detection and heat detection to minimize false alerts and provide real-time threat notifications.
The system includes an 8-channel DVR with a pre-installed 1TB hard drive and 8 indoor/outdoor 1080p wired infrared cameras, designed to offer comprehensive surveillance for your property.
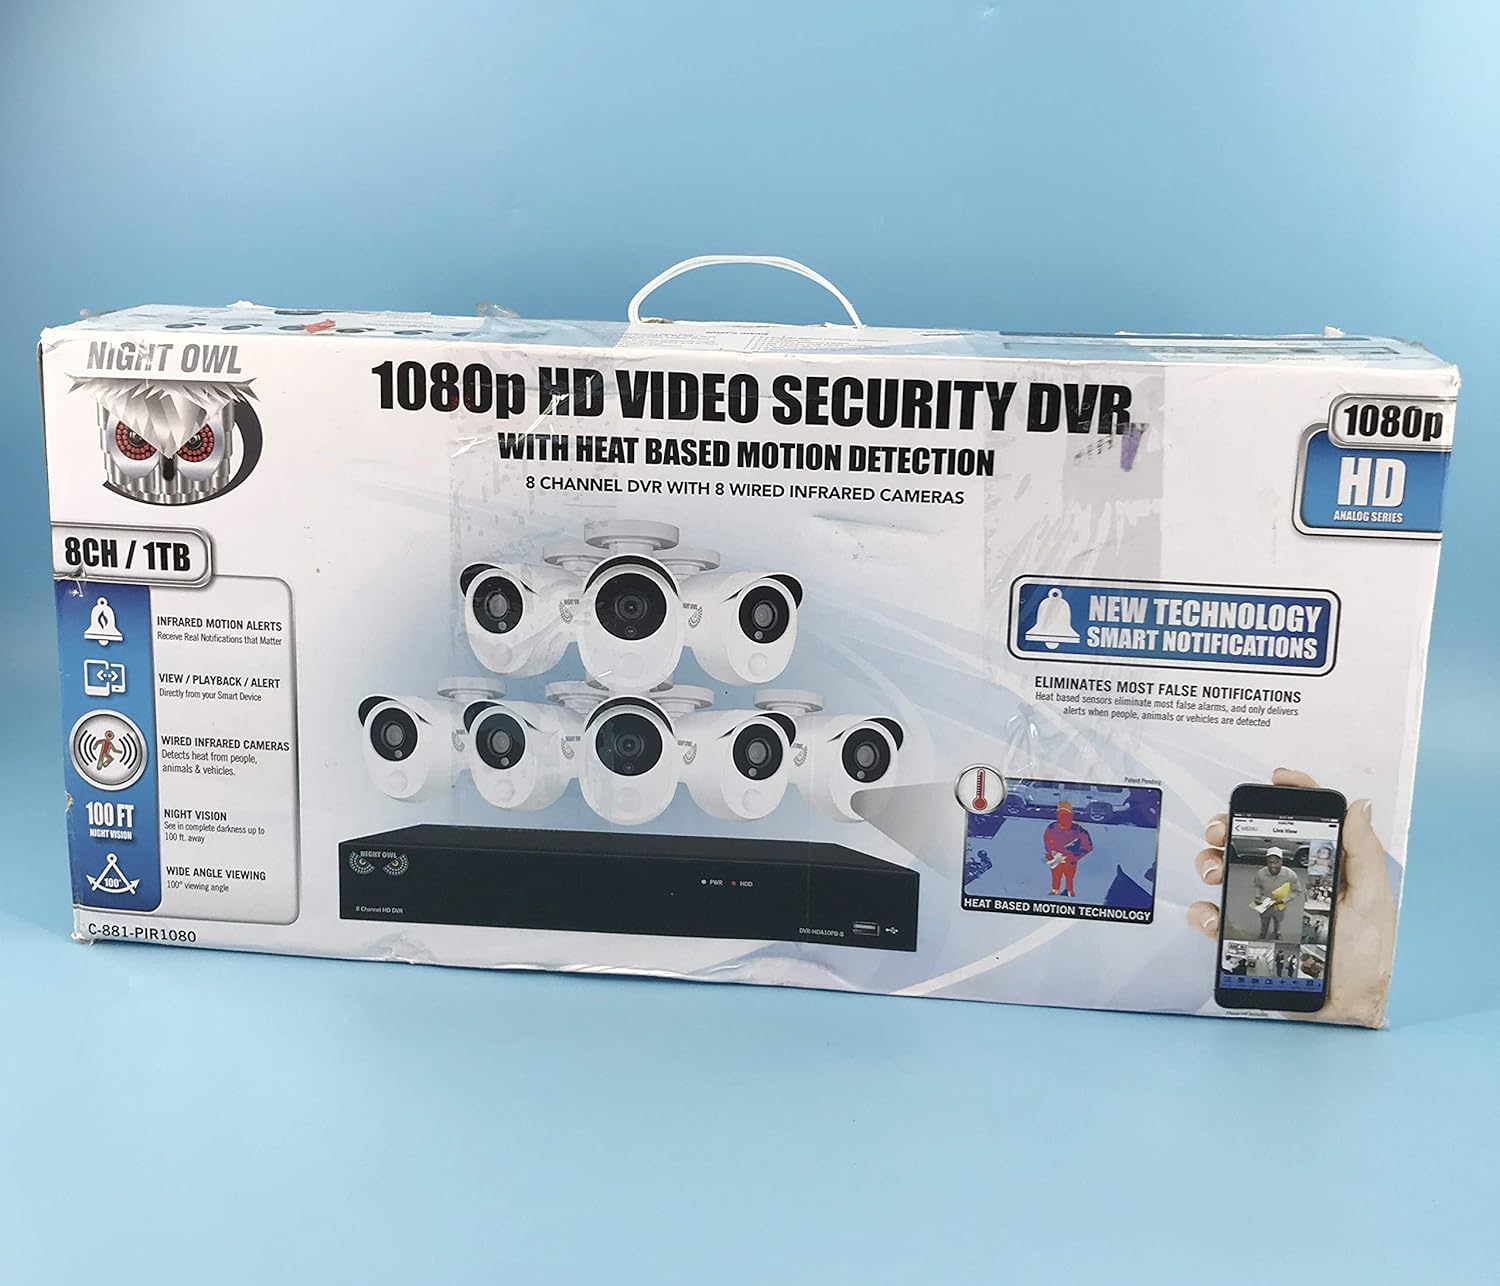
Image: The retail packaging for the Night Owl 8-Channel HD DVR Security System, showcasing the DVR and eight 1080p cameras.
What's Included
Verify that all components listed below are present in your package:
- 1 x 8 Channel 1080p DVR with pre-installed 1 TB Hard Drive
- 8 x Indoor/Outdoor 1080p Wired Infrared Cameras
- 8 x 60 ft. Bundles of Camera Cable
- 24 x Mounting Hardware Screws
- 1 x 6 ft. HDMI Cable
- 1 x RJ-45 Cable (Ethernet)
- 1 x USB Mouse
- 1 x Remote Control (Includes Batteries)
- 1 x Software CD
- 1 x Quick Setup Guide
- 1 x DC 12V/2A DVR Power Adapter
- 2 x DC 12V/1.5A Camera Power Adapter
- 2 x 4-Way Camera Power Splitter
- 3 x Night Owl Security Stickers

Image: All included accessories and components of the Night Owl security system, including the DVR, cameras, cables, power adapters, mouse, and remote control.
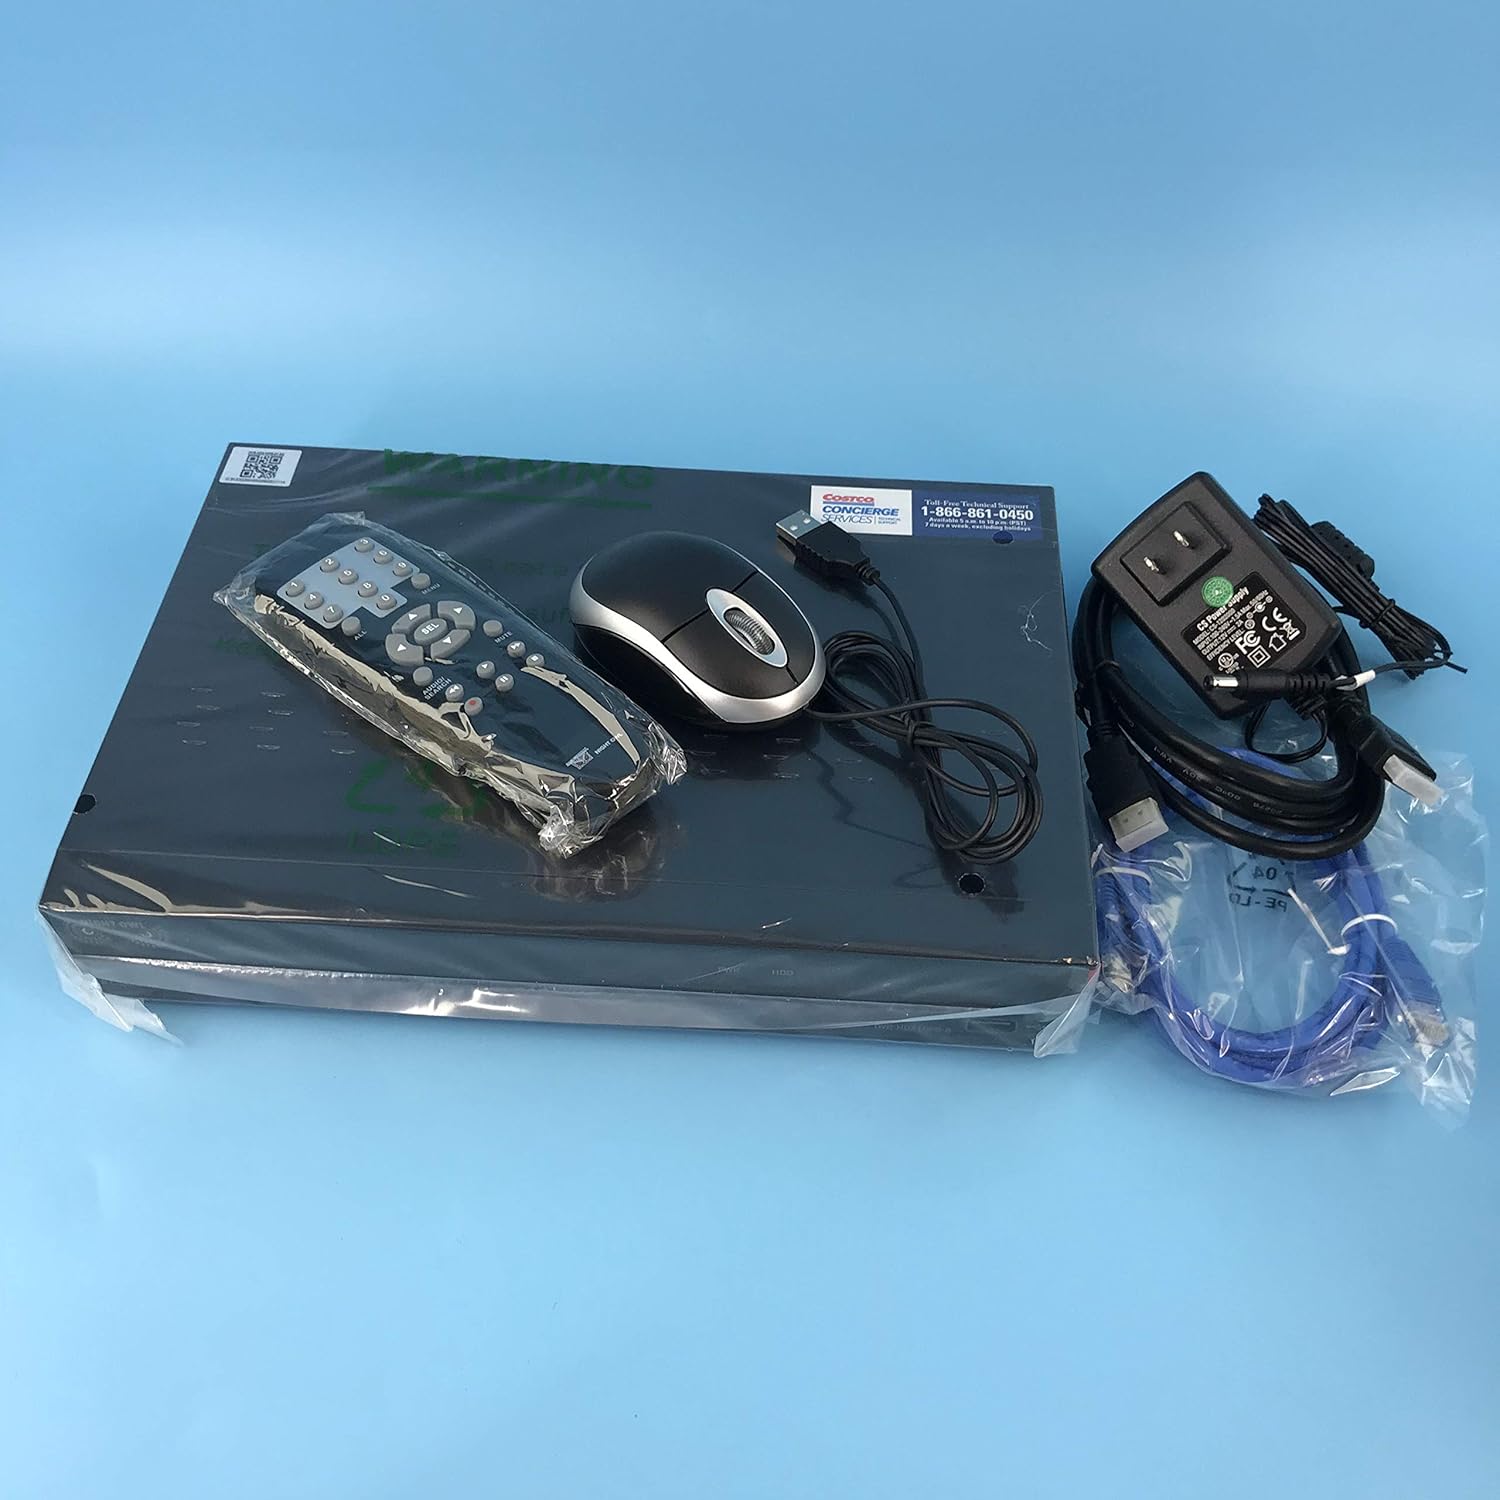
Image: The DVR unit, remote control, USB mouse, and power adapter, essential components for system operation.
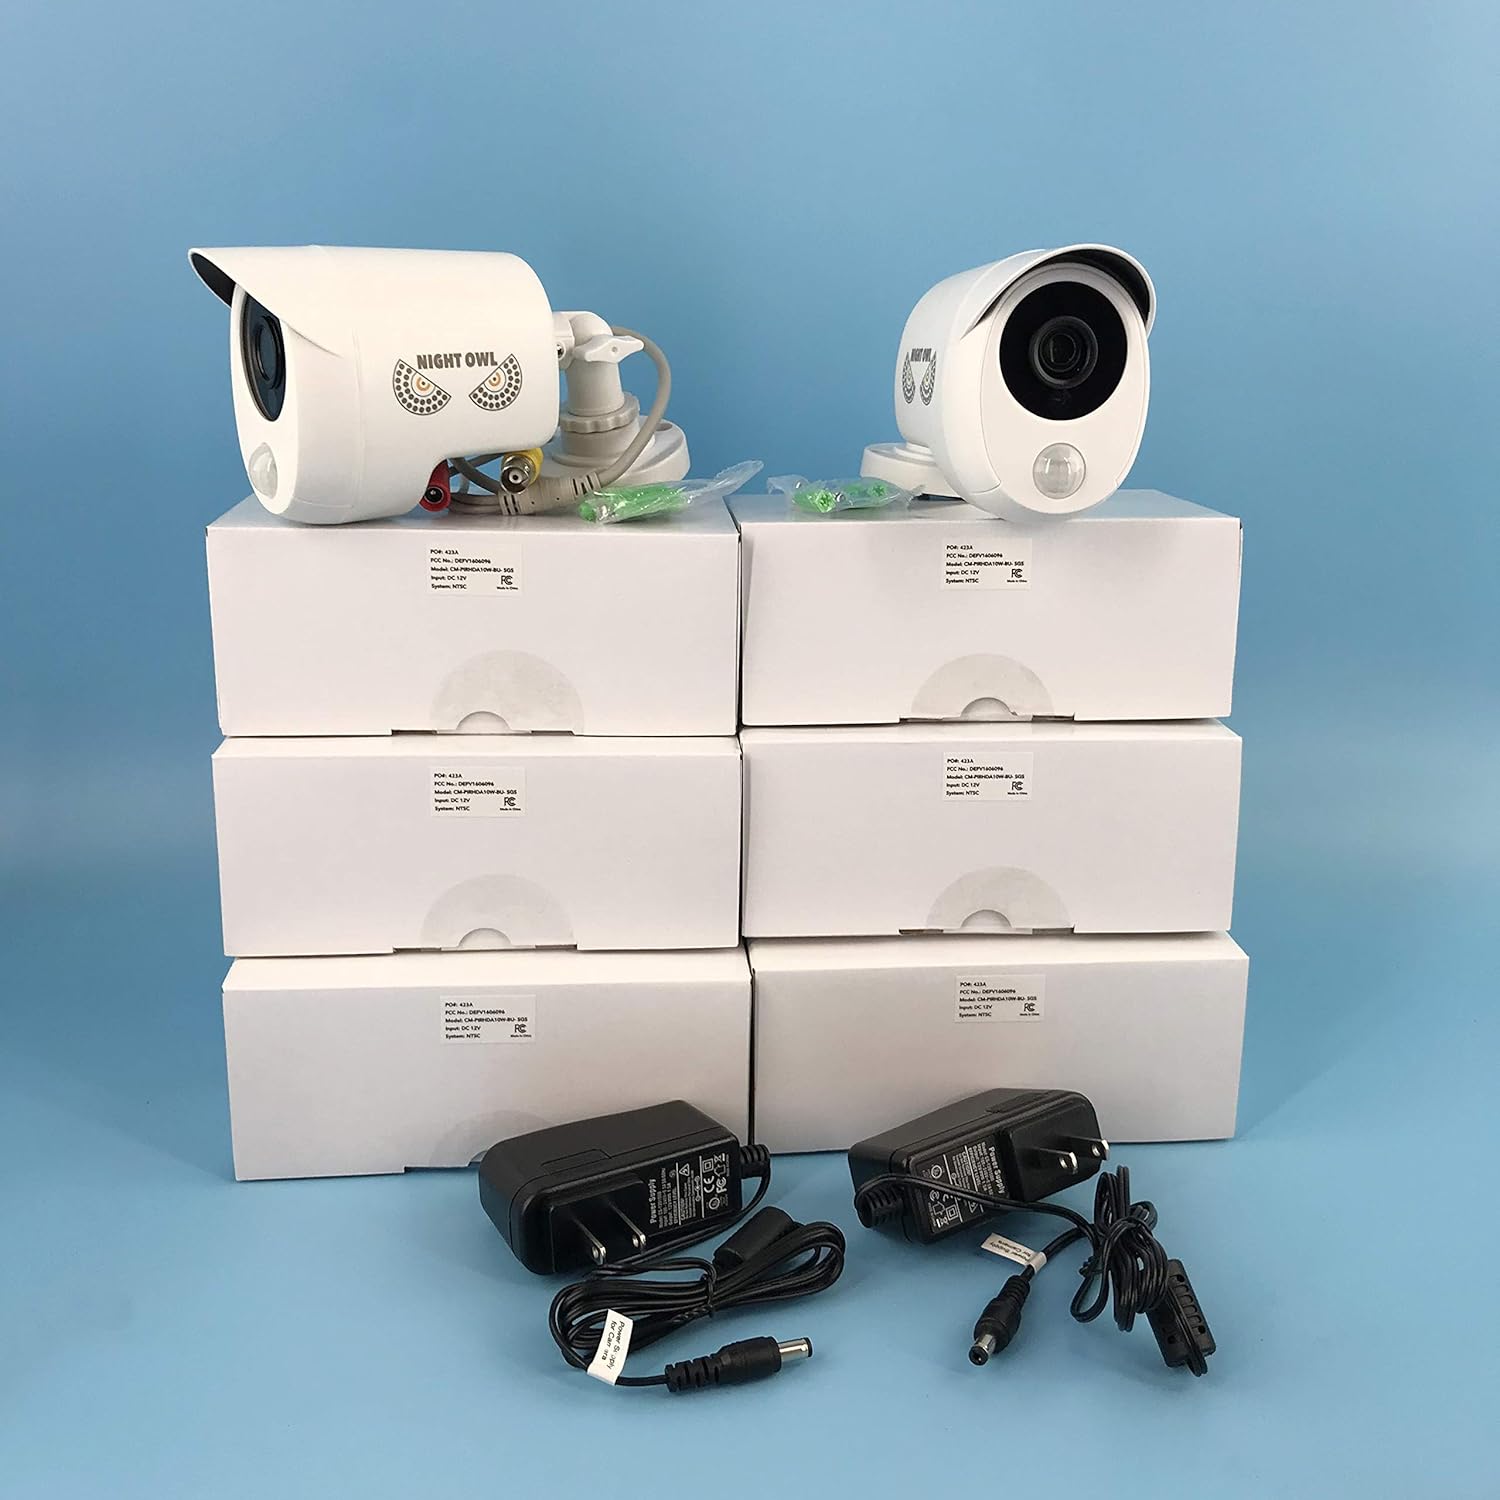
Image: Eight 1080p wired infrared cameras and their individual power adapters, ready for installation.

Image: Bundles of 60 ft camera cables with BNC and power connectors, used to connect cameras to the DVR.
Setup
1. Initial Unboxing and Component Identification
Carefully remove all items from the packaging. Refer to the "What's Included" section to ensure all parts are present. Identify the DVR, cameras, cables, and power adapters.
2. Connecting the DVR
- Connect the USB mouse to one of the USB ports on the DVR.
- Connect the HDMI cable from the DVR's HDMI output to your monitor or TV's HDMI input.
- For network access and remote viewing, connect the RJ-45 Ethernet cable from the DVR's LAN port to your router.
3. Connecting the Cameras
Each camera requires a video connection to the DVR and a power connection. The included 60 ft cables provide both.
- Determine the optimal placement for each camera. Ensure cameras are installed on a horizontal surface, such as under a roof overhang, for proper directional adjustment.
- Connect the BNC connector of a camera cable to a BNC input on the back of the DVR. Ensure a secure connection.
- Connect the power connector of the same camera cable to the camera's power input.
- Use the 4-way camera power splitters to connect multiple cameras to a single camera power adapter. Connect the camera power adapters to an electrical outlet.

Image: A close-up view of the label on a camera, showing model number CM-PIRHDA10W-BU-SGS and input voltage DC 12V.

Image: A close-up view of the label on the DVR, showing model number DVR-HDA10PB-81-RS and input voltage DC 12V.
4. Powering On the System
Once all connections are made, connect the DVR power adapter to the DVR and then to an electrical outlet. The system will power on automatically.
5. Network Connection and App Setup
For remote viewing, ensure the DVR is connected to your router. Download the free Night Owl app on your smart device. Follow the on-screen instructions in the app and on the DVR to configure network settings and enable remote viewing. You may need to adjust port forwarding settings on your router (e.g., ports 9000, 9001) for optimal performance.
Operating Instructions
1. Basic DVR Operation
Navigate the DVR menu using the included USB mouse or remote control. The main interface provides a live view of all connected cameras.
2. Recording Modes
The system supports various recording modes, including continuous recording and motion-activated recording. The Dual Sensor Technology utilizes both motion and heat detection to trigger recordings, significantly reducing false alerts from environmental factors like rain or insects.
- Dual Sensor Technology: This advanced feature requires both motion and heat (from humans, animals, or vehicles) to be detected simultaneously before an alert or recording is triggered. This conserves hard drive space and focuses on meaningful events.
3. Playback
Access recorded footage through the DVR's playback menu. You can search by date, time, and event type (e.g., motion detection). The 1TB hard drive provides ample storage for weeks of motion detection recordings.
4. Remote Viewing via Free App
The Night Owl app allows you to view live feeds, play back recordings, and receive push notifications directly on your smartphone or tablet. Ensure your DVR is connected to the internet and properly configured for remote access.
The web interface for PC (using Internet Explorer) and Mac (using Safari) is also available. Note that the plugin may not work with Chrome on either platform.
Maintenance
1. Hard Drive Management
The DVR's 1TB hard drive will automatically overwrite the oldest footage when full. Regularly back up important recordings to an external USB drive if needed.
2. Camera Cleaning
Periodically clean the camera lenses with a soft, damp cloth to ensure clear image quality. Avoid abrasive cleaners.
3. Software Updates
Check the Night Owl website or your DVR's system settings for available firmware updates. Keeping your system updated ensures optimal performance and security.
Troubleshooting
- No Video/Black Screen from Camera:
Ensure the camera is properly connected to both the DVR (BNC) and power. Check power adapters and cable integrity. Some users have reported issues with cameras being dead on arrival; contact support if troubleshooting steps do not resolve the issue.
- Blurry or Distorted Image:
Check camera lens for dirt or condensation. Ensure cable connections are secure. If using extension cables, ensure they are high-quality and designed for HD signals, as standard definition cables can degrade signal quality.
- Too Many False Alerts (Motion Detection):
Verify that Dual Sensor Technology is enabled and configured correctly. This feature significantly reduces false alerts by requiring both motion and heat detection. Adjust motion detection zones and sensitivity settings in the DVR menu.
- App Connectivity Issues:
Ensure your DVR is connected to the internet via the Ethernet cable. Check your router's settings, especially port forwarding (e.g., ports 9000, 9001). Some users report needing to re-save the product in the app to maintain connection. Ensure your app is updated to the latest version.
- Remote Control Not Responding:
Check batteries in the remote control. Ensure there are no obstructions between the remote and the DVR's IR receiver.
Specifications
| Feature | Detail |
|---|---|
| Brand | Night Owl |
| Model Number | LYSB01MA2G68C-ELECTRNCS |
| Connectivity Technology | Wired (Cameras), Wireless (App connectivity) |
| Video Capture Resolution | 1080p HD |
| Special Features | Motion Sensor, Night Vision, Dual Sensor Technology (Heat + Motion) |
| Number of Channels | 8 |
| Memory Storage Capacity | 1 TB HDD (pre-installed) |
| Color | Black (DVR), White (Cameras) |
| Power Source | Corded Electric |
| Signal Format | Analog |
| Recording Mode | Motion Detection, Continuous |
| Total USB Ports | 1 |
| Item Weight | 19.56 pounds |
| UPC | 810830024325 |
Warranty and Support
Night Owl products typically come with a manufacturer's warranty. For specific warranty details, including duration and coverage, please refer to the documentation included with your product or visit the official Night Owl website.
For technical support, troubleshooting assistance, or warranty claims, it is recommended to contact Night Owl customer service directly. Information regarding support channels (phone, email, online chat) can usually be found on the manufacturer's website or in the Quick Setup Guide provided with your system.
When contacting support, have your model number (LYSB01MA2G68C-ELECTRNCS) and serial number (e.g., 423A-04759, found on the DVR label) readily available, along with your proof of purchase.
You can visit the official Night Owl Store on Amazon for more information: Night Owl Store


