1. Introduction
Thank you for choosing the DANOPLUS Digital Non-Contact Laser Tachometer, Model PD_55. This device is designed for accurate measurement of rotational speed (RPM) without physical contact, utilizing a laser and reflective tape. It is suitable for various applications including fans, automobiles, motors, and paper production machinery. This manual provides detailed instructions for safe and effective use of your tachometer.
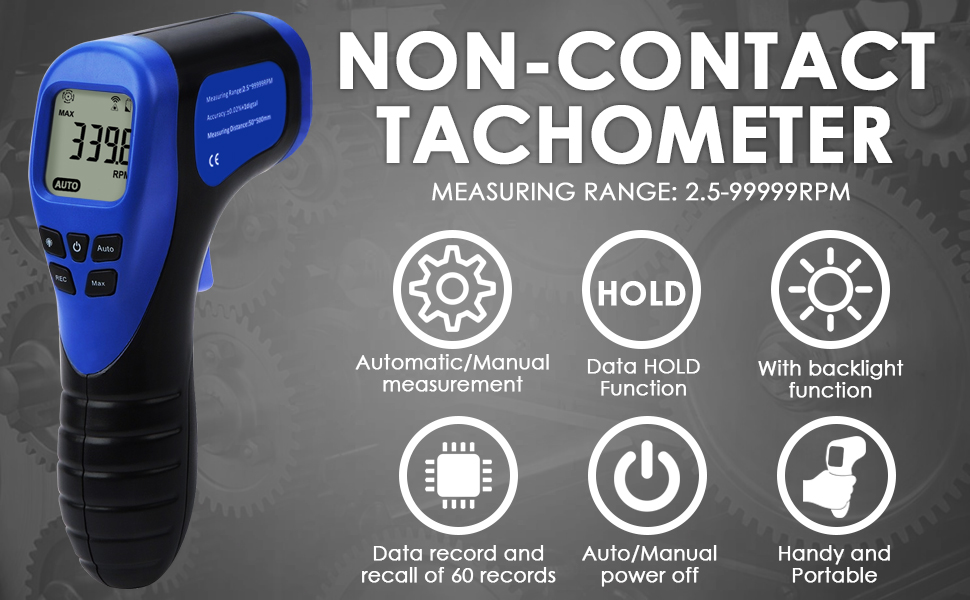
Figure 1: Key Features of the DANOPLUS Digital Non-Contact Tachometer
This image highlights the main features of the tachometer, including automatic/manual measurement, data hold, backlight function, data record and recall, auto/manual power off, and its handy and portable design.

Figure 2: Wide Application Examples
This image demonstrates the versatility of the tachometer, showing its application in measuring RPM for fans, automobiles, motors, and paper production machinery.

Figure 3: DANOPLUS Digital Non-Contact Laser Tachometer (Model PD_55)
This image displays the main unit of the DANOPLUS Digital Non-Contact Laser Tachometer, showcasing its ergonomic design and digital display.
2. Safety Information
Please read and understand all safety warnings and operating instructions before using this instrument. Failure to do so may result in injury or damage to the device.
- Laser Safety: This device uses a Class II laser. Do not stare directly into the laser beam or point it at others. Avoid direct eye exposure.
- Battery Safety: Ensure correct battery polarity when installing. Remove batteries if the device will not be used for an extended period to prevent leakage.
- Operating Environment: Do not operate the device in environments with high humidity, extreme temperatures, or explosive gases.
- Maintenance: Do not attempt to disassemble or modify the device. Refer all servicing to qualified personnel.
- Reflective Tape: Always apply reflective tape securely to the rotating object before measurement.
3. Product Overview
Familiarize yourself with the components and controls of your tachometer.

Figure 4: Labeled Diagram of Tachometer Components
This diagram illustrates the front and top views of the tachometer, labeling key components such as the display, laser output, backlight button, power on/off button, REC button, Max/Min/AVG button, Auto button, measuring button, and battery cover.
- Display: Shows RPM readings, MAX/MIN/AVG indicators, battery status, and other operational icons.
- Laser Output: Emits the laser beam for non-contact measurement.
- Backlight Button (💡): Toggles the display backlight.
- Power On/Off Button (⏻): Powers the device on or off.
- REC Button: Activates data recording mode.
- Max/Min/AVG Button: Cycles through maximum, minimum, and average recorded values.
- Auto Button: Toggles between automatic and manual measurement modes.
- Measuring Button (Trigger): Initiates the measurement when pressed.
- Battery Cover: Located at the bottom of the handle for battery access.
4. Setup
4.1. Battery Installation
- Locate the battery cover at the bottom of the tachometer handle.
- Slide the battery cover open.
- Insert one 9V battery, ensuring correct polarity (+/-).
- Close the battery cover securely.
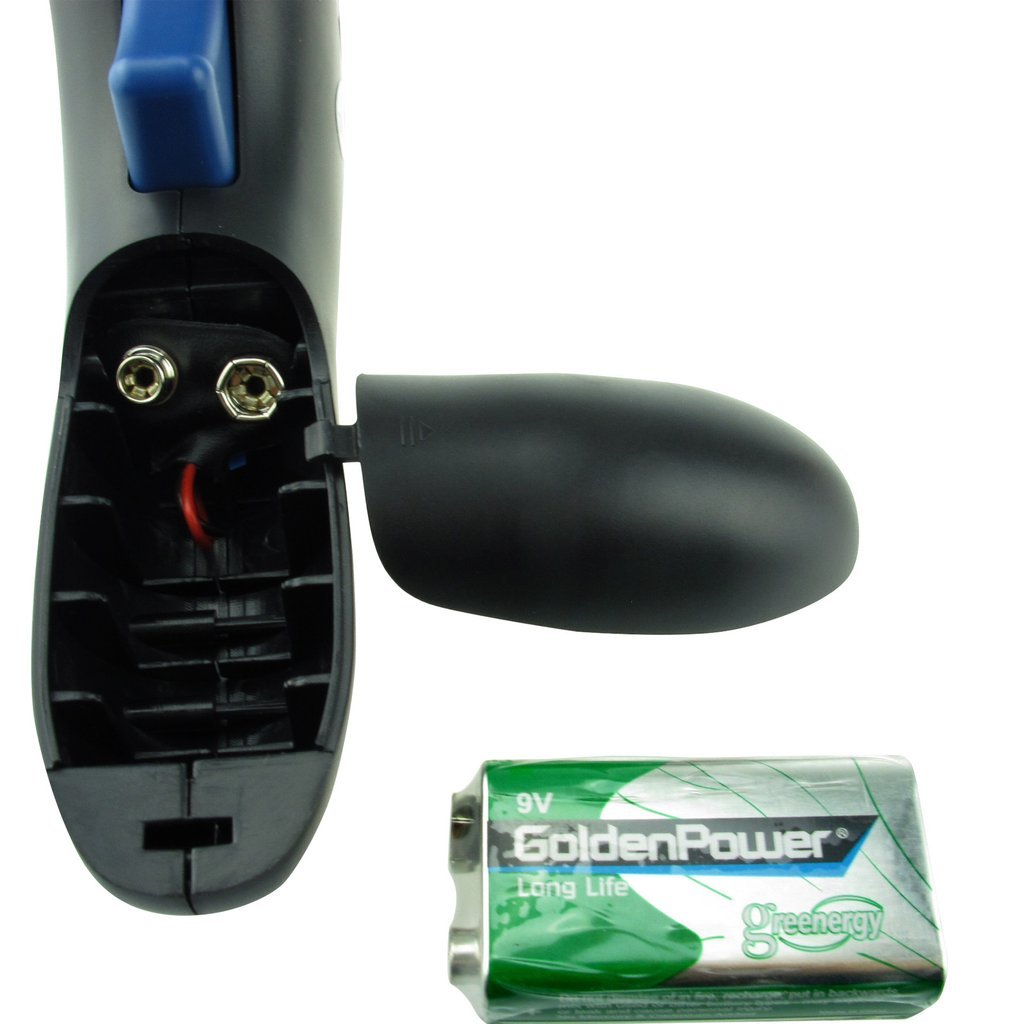
Figure 5: Battery Compartment and 9V Battery
This image shows the open battery compartment of the tachometer and a 9V battery, illustrating how to install the power source.
4.2. Applying Reflective Tape
For accurate measurements, reflective tape must be applied to the rotating object.
- Cut a small piece of the provided reflective tape.
- Attach the tape to the rotating shaft or surface of the object you wish to measure. Ensure the tape is flat and securely adhered.
- The laser will detect the reflection from this tape to calculate RPM.

Figure 6: Tachometer and Accessories
This image displays the tachometer, a carrying pouch, the user manual, and a roll of reflective tape, which is essential for operation.
5. Operating Instructions
5.1. Powering On/Off
- Press the Power On/Off button (⏻) to turn the tachometer on.
- Press and hold the Power On/Off button (⏻) for a few seconds to turn the tachometer off. The device also features an auto-power-off function to conserve battery.
5.2. Taking a Measurement
- Ensure reflective tape is applied to the rotating object.
- Point the laser output towards the reflective tape on the rotating object. Maintain a measuring distance of 2 to 20 inches (50-500mm).
- Press and hold the Measuring Button (trigger). The laser will activate, and the display will show the RPM reading.
- Release the Measuring Button to hold the last reading on the display.

Figure 7: Laser Beam Emitting from Tachometer
This image shows the tachometer in use, with its red laser beam actively projecting from the front, indicating it is ready for or in the process of taking a measurement.

Figure 8: Close-up of Tachometer Display
A detailed view of the tachometer's digital display, showing an RPM reading of "0.0" and the "AUTO" indicator, along with icons for signal strength and battery level.
5.3. Data Record Function (REC)
The tachometer can record up to 60 reading values.
- Press the REC button to enter recording mode. The "REC" icon will appear on the display.
- Take measurements as described in Section 5.2. Each measurement will be stored.
- To exit recording mode, press the REC button again.
- To view recorded data, press the Max/Min/AVG button. Each press will cycle through the maximum, minimum, and average values of the recorded data.
5.4. Automatic and Manual Measurement
- Press the Auto button to switch between automatic and manual measurement modes.
- In Automatic Mode (indicated by "AUTO" on display), the device continuously measures as long as the measuring button is held.
- In Manual Mode, the device takes a single measurement when the measuring button is pressed and held, then holds the reading when released.
6. Maintenance
- Cleaning: Wipe the device with a soft, dry cloth. Do not use abrasive cleaners or solvents.
- Storage: Store the tachometer in a cool, dry place. Remove batteries if storing for extended periods.
- Laser Lens: Keep the laser output lens clean and free from dust or debris to ensure accurate readings.
7. Troubleshooting
| Problem | Possible Cause | Solution |
|---|---|---|
| No display/Device won't turn on | Dead or incorrectly installed battery. | Replace battery or check polarity. |
| Inaccurate or erratic readings |
|
|
| Laser not visible | Device not powered on or measuring button not pressed. | Turn on the device and press the measuring button. |
8. Specifications
| Parameter | Value |
|---|---|
| Measuring Range | 2.5 - 99,999 RPM |
| Resolution | 0.1 RPM (2.5-999.9 RPM), 1 RPM (1000-99,999 RPM) |
| Accuracy | ±(0.02% + 1 digit) |
| Measuring Distance | 50 - 500 mm (2 - 20 inches) |
| Sampling Time | 0.5 seconds (above 120 RPM) |
| Operating Temperature | 0 - 50°C (32 - 122°F) |
| Operating Humidity | 10 - 90% RH |
| Storage Temperature | -10 - 60°C (14 - 140°F) |
| Storage Humidity | 10 - 75% RH |
| Dimensions | 5.5 x 3 x 1.5 inches |
| Weight | 115g (including battery) |
| Power Supply | 1 x 9V battery |

Figure 9: Visual Summary of Product Specifications
This image provides a graphical representation of the tachometer's key specifications, including measuring range, resolution, accuracy, and environmental conditions.
9. Warranty and Support
DANOPLUS products are manufactured to high-quality standards. For warranty information, technical support, or service inquiries, please refer to the contact information provided with your purchase or visit the official DANOPLUS website. Please retain your proof of purchase for warranty claims.

