1. Introduction
This manual provides essential information for the installation, operation, and maintenance of your Winflo 36" Wall Mount Stainless Steel Convertible Kitchen Range Hood, Model W103B36D. Please read these instructions thoroughly before installation and use to ensure proper function and safety. Keep this manual for future reference.
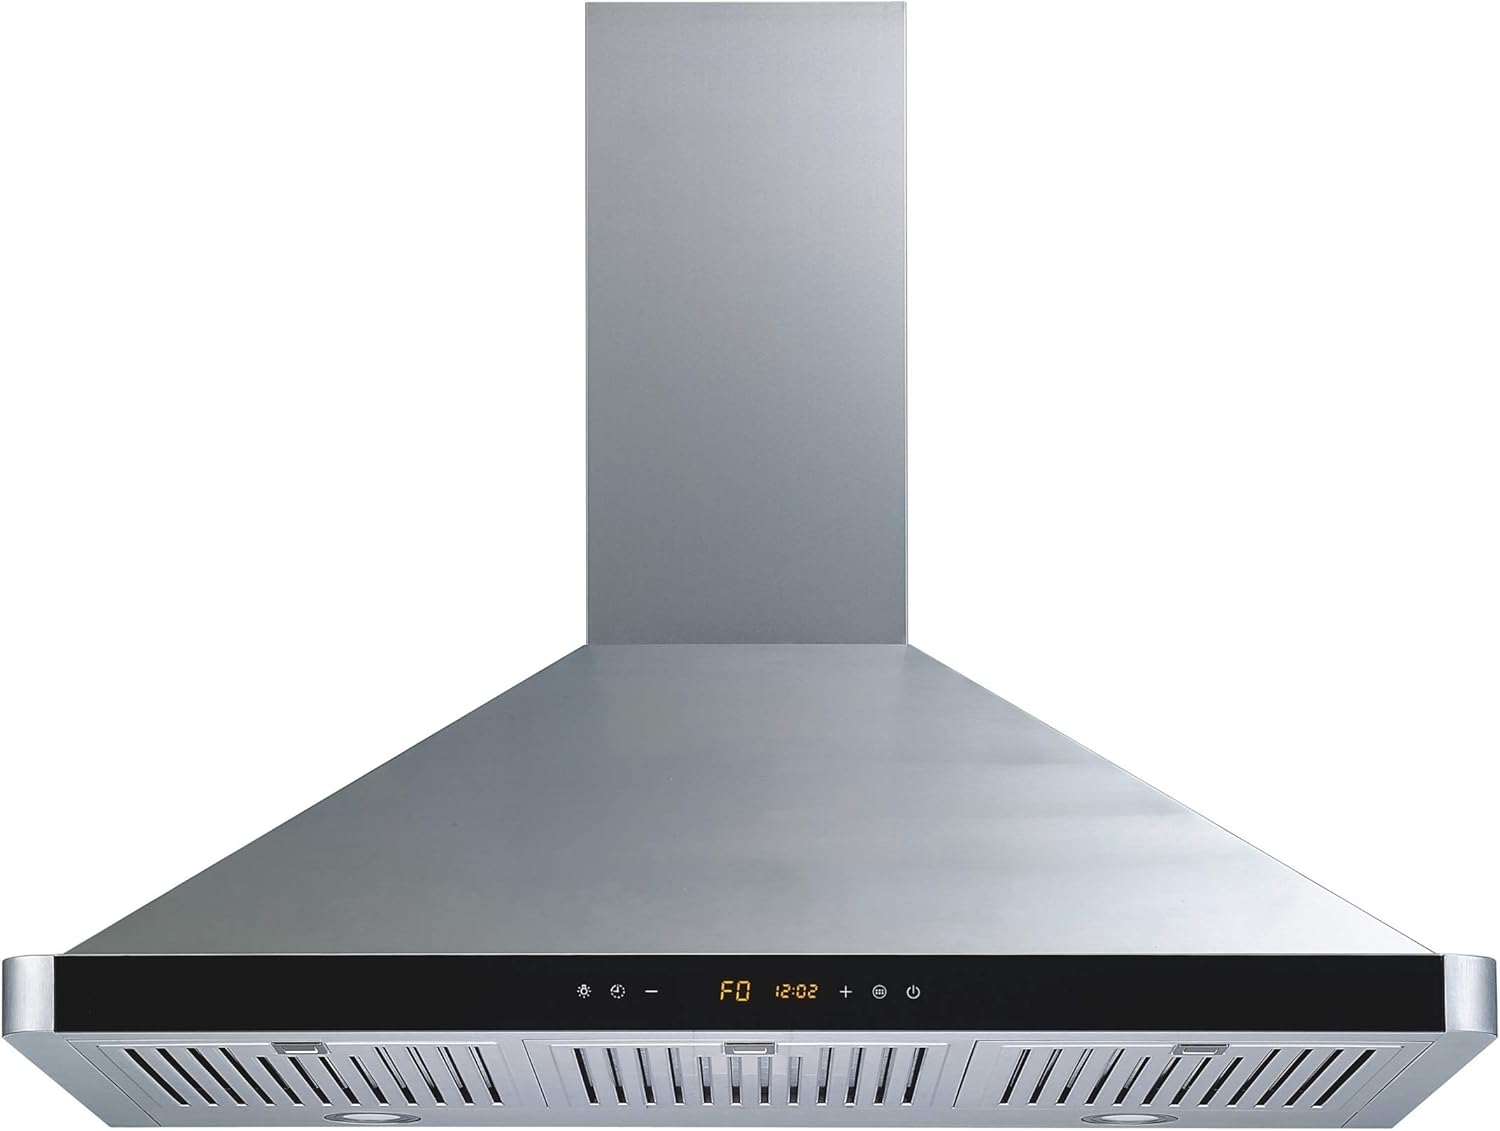
Figure 1: Front view of the Winflo 36-inch Wall Mount Range Hood.
2. Safety Information
WARNING: To reduce the risk of fire, electric shock, or injury, observe the following:
- Install this range hood in accordance with all specified instructions.
- Ensure the installation area has adequate ventilation.
- Always disconnect power to the unit before servicing or cleaning.
- Do not operate any fan with a damaged cord or plug. Discard fan or return to an authorized service facility for examination and/or repair.
- Do not use this unit with any external solid-state speed control device.
- This unit must be grounded.
- Clean grease filters frequently. Grease should not be allowed to accumulate on fan or filter.
- Never leave surface units unattended at high settings. Boil-overs cause smoking and greasy spillovers that may ignite.
- Use appropriate size cookware. Always use cookware appropriate for the size of the surface element.
3. Product Overview
The Winflo Model W103B36D is a 36-inch wall-mount range hood designed for efficient ventilation in your kitchen. It features a powerful centrifugal motor, touch controls, and LED lighting.
Key Features:
- Powerful Centrifugal Motor: Operates at 439 CFM (Cubic Feet Per Minute) for effective air extraction.
- 3-Speed Fan Levels: Adjustable fan speeds to suit various cooking needs.
- Touch Sensor Control Panel: Modern interface with LED display for easy operation.
- Quiet Operation: Noise level less than 65dB (5.5 sones) at high speed.
- LED Lights: Integrated LED lighting for illuminating the cooking surface.
- Stainless Steel Baffle Filters: Easy to remove and dishwasher safe for convenient cleaning.
- Convertible Design: Supports both ducted (vented) and ductless (recirculating) installations (charcoal filters required for ductless, sold separately).
Components:
- Range Hood Main Body
- Chimney Cover (Upper and Lower)
- Stainless Steel Baffle Filters
- Flexible Duct Work
- LED Lights (pre-installed)
- Damper
- Power Plug
- Installation Hardware

Figure 2: Underside view showing baffle filters and LED lights.

Figure 3: Detail of a stainless steel baffle filter.
4. Specifications
| Specification | Value |
|---|---|
| Model Number | W103B36D |
| Dimensions (D x W x H) | 18.9" x 35.2" x 40.6" |
| Material | Stainless Steel |
| Air Flow Capacity | 439 CFM |
| Noise Level | Less than 65dB (5.5 Sones) at high speed |
| Mounting Type | Wall Mount |
| Controls Type | Touch Sensor with LED Display |
| Number of Speeds | 3 |
| Lighting | LED |
| Filter Type | Baffle (Stainless Steel) |
| Voltage | 120 Volts |
| Wattage | 187.90 Watts |
| Item Weight | 27 Pounds |
| Ventilation Type | Ducted/Vented (Convertible to Ductless with optional charcoal filters) |
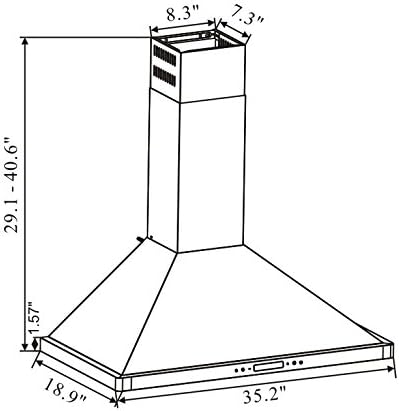
Figure 4: Dimensional diagram of the range hood.
5. Setup and Installation
IMPORTANT: Installation should be performed by a qualified installer or electrician. Ensure all local codes and ordinances are followed.
Pre-Installation Checklist:
- Verify all components are present (refer to "Components" section).
- Ensure the wall structure can support the weight of the range hood.
- Confirm electrical supply meets specifications (120V).
- Determine ventilation method (ducted or ductless). For ductless, ensure optional charcoal filters are acquired.
Installation Steps (Ducted Configuration):
- Mark Mounting Points: Use the provided mounting template (if included) or measure and mark the drilling points on the wall according to the hood's dimensions and desired height above the cooking surface.
- Drill Holes: Drill pilot holes for mounting screws and for the electrical wiring.
- Install Wall Anchors/Brackets: Secure any necessary wall anchors or mounting brackets.
- Mount the Hood Body: Carefully lift and secure the main hood body to the wall using the appropriate screws. Ensure it is level and firmly attached.
- Connect Ductwork: Attach the flexible duct work to the exhaust outlet of the hood and route it to the external vent. Ensure all connections are sealed to prevent air leaks.
- Electrical Connection: Connect the range hood to the electrical supply. This typically involves wiring to a junction box or plugging into a dedicated outlet. Ensure proper grounding.
- Install Chimney Covers: Slide the upper and lower chimney covers into place, securing them as per the design.
- Insert Baffle Filters: Install the stainless steel baffle filters into their designated slots.
For detailed diagrams and specific measurements, refer to the installation guide provided with your product packaging.

Figure 5: Example of the range hood installed in a kitchen setting.
6. Operating Instructions
Your Winflo range hood features a touch sensor control panel for easy operation.

Figure 6: Touch control panel with LED display.
Control Panel Functions:
- Power Button (Ⓘ): Press to turn the fan ON or OFF.
- Fan Speed Control (- / +): Use the minus (-) and plus (+) buttons to adjust the fan speed between 1 (low), 2 (medium), and 3 (high). The current speed will be shown on the LED display.
- Light Button (☀): Press to turn the LED lights ON or OFF.
- Timer Button (⏱): Activates the delay shut-off timer. Pressing this button will typically set the fan to run for a predetermined period (e.g., 5-15 minutes) before automatically turning off. Refer to the LED display for timer indication.
For optimal performance, turn on the range hood a few minutes before cooking and allow it to run for a few minutes after cooking to clear residual smoke and odors.
7. Maintenance
Regular maintenance ensures the longevity and efficiency of your range hood.
Cleaning Baffle Filters:
- Frequency: Clean baffle filters every 3-6 weeks, or more frequently depending on cooking habits.
- Removal: Locate the release latches or handles on the baffle filters. Push or pull to release and carefully remove them from the hood.
- Cleaning Method: The stainless steel baffle filters are dishwasher safe. Alternatively, wash them by hand in hot water with a mild detergent. Rinse thoroughly and allow to dry completely before reinstallation.
- Reinstallation: Insert the dry filters back into their slots, ensuring they are securely latched.
Cleaning Exterior Surfaces:
- Frequency: Wipe down exterior surfaces regularly to prevent grease buildup.
- Method: Use a soft cloth dampened with warm water and a mild, non-abrasive detergent. For stainless steel, wipe in the direction of the grain. Avoid abrasive cleaners, steel wool, or harsh chemicals, as these can damage the finish.
- Drying: Dry thoroughly with a clean, soft cloth to prevent water spots.
LED Light Replacement:
LED lights are designed for long life. If replacement is necessary, contact Winflo customer support for compatible replacement parts and instructions.
8. Troubleshooting
Before contacting customer support, review the following common issues and solutions:
| Problem | Possible Cause | Solution |
|---|---|---|
| Hood does not turn ON | No power supply; Circuit breaker tripped; Loose wiring. | Check power cord connection. Reset circuit breaker. Consult a qualified electrician to check wiring. |
| Poor suction performance | Clogged filters; Improper ductwork installation; Damper stuck; Fan motor issue. | Clean or replace filters. Check ductwork for obstructions or leaks. Ensure damper opens freely. Contact support if motor issue is suspected. |
| Excessive noise | Loose components; Obstruction in fan; Improper installation; Damaged motor. | Check for loose screws or parts. Remove any obstructions. Verify secure installation. Contact support if motor noise persists. |
| Lights not working | Loose connection; Faulty LED bulb/module. | Check light connections. Contact Winflo support for replacement LED modules. |
9. Warranty and Support
Manufacturer's Warranty:
This Winflo range hood (Model W103B36D) comes with a 3-year limited warranty on parts. Labor is not included. This warranty covers defects in materials and workmanship under normal use and service. Please retain your proof of purchase for warranty claims.
Customer Support:
For technical assistance, warranty claims, or to order replacement parts, please contact Winflo customer support. Refer to the contact information provided with your product packaging or visit the official Winflo website.
Online Resources: For additional information and support, you may visit the Winflo Store on Amazon.