Vanxse BX08
Vanxse CCTV HD 960H 8mm CS Lens Bullet Box Security Camera User Manual
Model: BX08
1. Introduction
This manual provides detailed instructions for the installation, operation, and maintenance of your Vanxse CCTV HD 960H 8mm CS Lens Bullet Box Security Camera. Please read this manual thoroughly before use to ensure proper functionality and longevity of the product.
2. Product Overview
2.1 Product Features
- 1/3 Color Super HAD CCD Effio-E processor with 1000TVL resolution.
- Equipped with an 8mm fixed CS lens for focused surveillance.
- 960H CCTV Bullet Box Camera design.
- Suitable for various environments including stores, homes, offices, and factories.
2.2 Camera Components
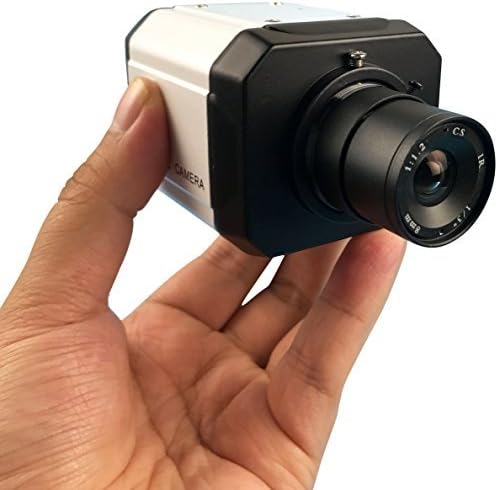
Figure 1: The Vanxse CCTV HD 960H Bullet Box Camera, held in a hand, highlighting its 8mm CS lens and robust casing.
3. Technical Specifications
| Feature | Specification |
|---|---|
| Image Sensor | 1/3 Color Super HAD CCD Effio-E processor |
| TV System | NTSC video System |
| Effective Pixels (NTSC) | 976(H)x494(V) |
| Lens | Built-in 8mm Fixed CS Lens |
| Horizontal Resolution | 1000TVL |
| Minimum Illumination | 1.0Lux F=1.2 (0Lux with IR on) |
| Video Output | 1.0Vp-p.75Ω. BNC Connector |
| AGC (Automatic Gain Control) | Auto |
| White Balance | Auto |
| Backlight Compensation | Auto |
| Exposure Mode | EE (Electronic Exposure) |
| Electronic Shutter | 1/60 - 1/100000 sec |
| Power Supply | DC12V2A |
| Sync. System | Internal Synchronization |
| Dimensions (L x W x H) | 30 x 19.99 x 10.01 cm |
| Weight | 340 g |
| Model Number | BX08 |
| Form Factor | Bullet |
| Voltage | 12 Volts |
| Wattage | 3 watts |
| Connectivity Protocol | Wi-Fi (for control, video via BNC) |
4. Setup and Installation
4.1 Unpacking and Inspection
- Carefully remove the camera from its packaging.
- Inspect the camera for any visible damage.
- Verify that the camera unit is present.
4.2 Mounting the Camera
- Select a suitable location for surveillance, ensuring a clear and unobstructed field of view.
- Securely mount the camera using appropriate hardware (not included). The bullet form factor is designed for versatile wall or ceiling mounting.
4.3 Power Connection
- Connect a DC12V2A power adapter (not included) to the camera's power input port.
- Ensure the power source is stable and matches the camera's voltage and current requirements.
4.4 Video Output Connection
- Connect the camera's BNC video output connector to your DVR (Digital Video Recorder) or monitor using a BNC cable (not included).
- Ensure the connection is secure to prevent signal loss.
4.5 Lens Adjustment
This model features a fixed 8mm CS lens, which does not require manual focus or zoom adjustment. The lens is pre-set for optimal performance at its specified focal length.

Figure 2: A side view of the Vanxse CCTV HD 960H Bullet Box Camera, illustrating the lens assembly and the robust housing.
5. Operating Instructions
5.1 Basic Operation
- Once properly connected and powered, the camera will automatically begin capturing video.
- The camera features automatic gain control (AGC), white balance, backlight compensation, and electronic exposure (EE) for optimal image quality under varying light conditions without user intervention.
- The video output is in standard NTSC format, compatible with most DVRs and monitors supporting this standard.
6. Routine Maintenance
6.1 Cleaning the Lens
- Periodically clean the camera lens with a soft, lint-free cloth to ensure clear image quality. Avoid using abrasive cleaners or harsh chemicals, which can damage the lens coating.
6.2 Power Supply Check
- Regularly inspect the power adapter and all cable connections to ensure they are secure and free from damage. A stable power supply is crucial for consistent operation.
6.3 Environmental Considerations
- Protect the camera from extreme temperatures, direct water exposure (unless specifically rated for outdoor use), and physical impact. Ensure proper ventilation if installed in an enclosed space.
7. Troubleshooting
7.1 No Image Display
- Check Power: Ensure the DC12V2A power adapter is correctly connected to the camera and a functional power outlet.
- Check Video Connection: Verify that the BNC cable is securely connected between the camera and your DVR/monitor. Try a different cable if available.
- Input Selection: Confirm your DVR or monitor is set to the correct video input channel for the camera.
7.2 Poor Image Quality
- Clean Lens: Dust, smudges, or condensation on the lens can significantly degrade image quality. Clean the lens as described in the Maintenance section.
- Lighting Conditions: While the camera has auto-adjustments, extremely low light conditions without adequate ambient or IR illumination can result in a grainy or dark image. Excessive backlight can also cause issues.
- Cable Quality: A damaged or low-quality BNC cable can introduce noise or interference into the video signal. Consider replacing the cable.
8. Warranty and Support
8.1 Warranty Information
Specific warranty details for your Vanxse CCTV HD 960H camera are typically provided at the point of purchase or included with the product packaging. Please retain your proof of purchase, such as a receipt or invoice, as it is required for any warranty claims.
8.2 Customer Support
For technical assistance, troubleshooting beyond this manual, or further inquiries regarding your product, please contact your retailer or the manufacturer's customer support channels. Refer to the product packaging or the manufacturer's official website for up-to-date contact information.