1. Introduction
This manual provides comprehensive instructions for the proper installation, operation, and maintenance of your SEETEC P173-9HSD 17.3-inch Full HD broadcast monitor. Please read this manual thoroughly before using the product to ensure optimal performance and safety. Keep this manual for future reference.
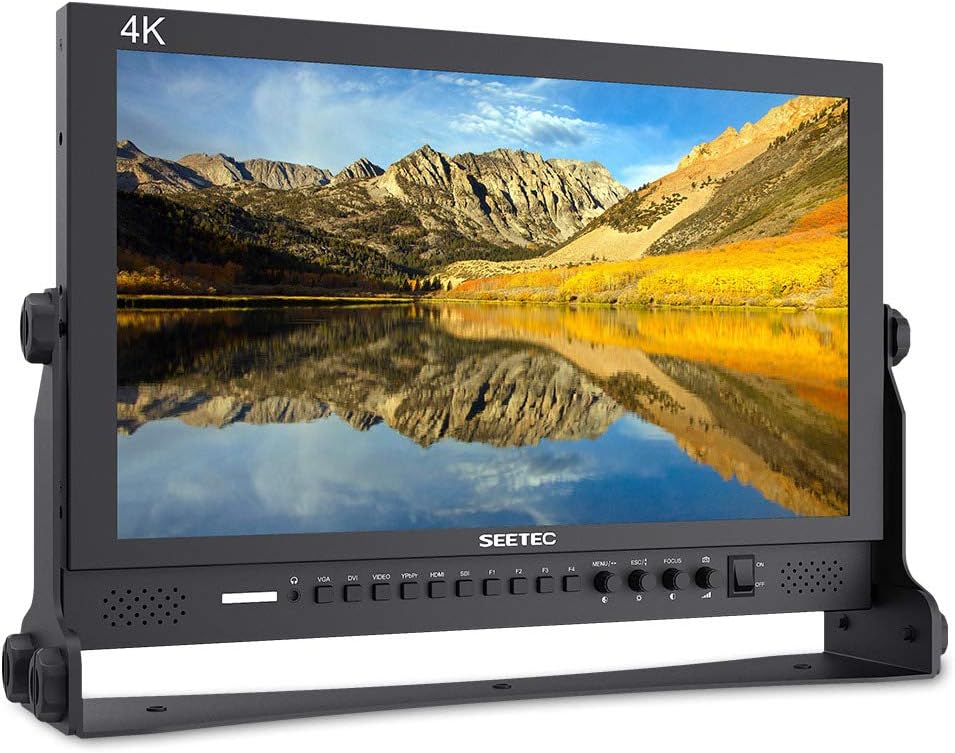
Image 1.1: Front view of the SEETEC P173-9HSD 17.3-inch Broadcast Monitor.
2. Safety Information
Observe the following safety precautions to prevent damage to the monitor and ensure user safety:
- Do not expose the monitor to rain or moisture to avoid fire or electric shock.
- Do not open the monitor casing. Refer all servicing to qualified personnel.
- Ensure proper ventilation. Do not block ventilation openings.
- Use only the power adapter supplied with the unit.
- Avoid placing the monitor on unstable surfaces.
- Clean the monitor with a soft, dry cloth. Do not use liquid cleaners or aerosol cleaners.
3. Package Contents
Verify that all items listed below are included in your package. If any items are missing or damaged, contact your dealer immediately.
- SEETEC P173-9HSD 17.3-inch Broadcast Monitor
- 3A DC Power Adapter
- V Battery Plate
- Mini HDMI Cable
- Tally Kit
- Sunshade
- U-bracket
- Operation Manual (this document)

Image 3.1: Standard accessories included with the monitor. Note: Batteries are not included.
4. Product Overview
The SEETEC P173-9HSD is a 17.3-inch Full HD broadcast monitor designed for professional video monitoring applications. It features a robust full metal cabinet for high impact resistance and anti-interference.
4.1 Key Features
- 17.3-inch Full HD (1920x1080) Resolution
- High Brightness: 400cd/m²
- High Contrast Ratio: 600:1
- Wide Viewing Angle: 80°/80° (L/R), 60°/80° (U/D)
- Fast Response Time: 40ms
- Integrated 3-color LED Tally Light (Red, Green, Yellow)
- Multiple Video Inputs: 3G-SDI, HDMI, YPbPr, Video, Audio (L/R), DVI-I
- Multiple Video Outputs: 3G-SDI, HDMI, YPbPr, Video
- Audio Output: 3.5mm stereo headphone jack, built-in speaker
4.2 Front Panel Controls

Image 4.1: Front panel controls and input/output ports.
The front panel features buttons and a knob for navigating the On-Screen Display (OSD) menu and accessing various functions. Four 'F' keys (F1-F4) are programmable for quick access to frequently used features.
4.3 Rear Panel Connections
The rear panel provides all necessary input and output connections for video, audio, and power.

Image 4.2: Rear panel connections and V-mount battery plate.
- DC 9~24V Input: Power connection.
- USB Upgrade: For firmware updates.
- VGA/DVI-I: Video input.
- YPbPr In/Out: Component video input/output.
- Video In/Out: Composite video input/output.
- Audio In/Out: Analog audio input/output.
- HDMI In/Out: HDMI video input/output. Supports 4K UHD 3840x2160p (30/29.97/25/24/23.98Hz) and 4096x2160p (24Hz).
- 3G-SDI In/Out: SDI video input/output.
- TALLY: DB-9 port for Tally light control.
5. Setup
5.1 Mounting the Monitor
The monitor can be mounted using the included U-bracket or other compatible third-party rigging equipment. There are three standard mounting points on the U-bracket, allowing for versatile placement on camera supports, rigs, or flat surfaces.

Image 5.1: Monitor mounted on the U-bracket.
5.2 Power Connection
- Connect the supplied 3A DC power adapter to the DC 9~24V input port on the rear panel.
- Plug the power adapter into a suitable power outlet.
- Alternatively, attach a compatible V-mount battery to the V battery plate on the rear of the monitor for portable operation.
5.3 Video Input Connection
Connect your video source (e.g., camera, video switcher) to the appropriate input port on the monitor (3G-SDI, HDMI, YPbPr, Video, or DVI-I) using the corresponding cable.

Image 5.2: Example of monitor integration in a mobile production setup.
5.4 Attaching the Sunshade
For outdoor use or bright environments, attach the included sunshade to the monitor to improve visibility and reduce glare.

Image 5.3: Monitor with sunshade attached.
6. Operating Instructions
6.1 Powering On/Off
Press the 'POWER' button on the front panel to turn the monitor on or off.
6.2 OSD Menu Navigation
Use the 'MENU' button to access the On-Screen Display (OSD) menu. The knob type coding switch allows for convenient navigation and selection within the menu. The 'ESC' button exits the current menu level.
6.3 Function Buttons (F1-F4)
The four 'F' keys (F1, F2, F3, F4) are user-programmable shortcut buttons. You can assign frequently used functions (e.g., Peaking, Check Field, Image Flip) to these buttons via the OSD menu for quick access.
6.4 Advanced Monitoring Features
The P173-9HSD includes several professional auxiliary shooting functions to assist with accurate exposure and focus:
- Peaking Focus Assist: Highlights in-focus areas with a red outline.
- Check Field: Displays the image in Red, Green, Blue, or Mono to aid in color calibration.
- Camera Mode: Adjusts display settings to match camera output.
- Pixel to Pixel: Displays the image at its native resolution without scaling.
- Center Marker: Displays a crosshair in the center of the screen.
- Safe Marker: Displays various aspect ratio markers (80%, 85%, 90%, 93%, 96%, 2.35:1) for framing.
- Image Flip: Flips the image horizontally, vertically, or both.
- Image Freeze: Pauses the current video frame.
- U/D & L/R Zoom: Zooms in on specific areas of the image.

Image 6.1: Visual representation of Peaking Focus Assist and icons for other advanced features.
6.5 Tally Light Operation
The monitor features front and rear Tally lights that display red, green, or yellow. These lights are controlled via the DB-9 port on the rear panel, typically connected to a video switcher or tally system.

Image 6.2: Tally light port and pinout diagram.
7. Maintenance
7.1 Cleaning
- Screen: Gently wipe the screen with a soft, lint-free cloth. For stubborn marks, slightly dampen the cloth with water or a mild, non-abrasive screen cleaner. Do not spray liquid directly onto the screen.
- Casing: Wipe the monitor casing with a soft, dry cloth. Avoid using harsh chemicals or solvents.
7.2 Storage
When not in use for extended periods, store the monitor in a cool, dry place, away from direct sunlight and extreme temperatures. Use the original packaging or a protective case to prevent dust accumulation and physical damage.
8. Troubleshooting
If you encounter issues with your monitor, refer to the following common problems and solutions:
| Problem | Possible Cause | Solution |
|---|---|---|
| No power | Power cable disconnected; faulty power adapter; V-mount battery not properly seated or discharged. | Check power cable connections. Ensure power adapter is functional. Verify V-mount battery connection and charge level. |
| No video signal | Incorrect input selected; video cable disconnected or faulty; video source not active. | Press the 'INPUT' button to cycle through inputs or select the correct input via OSD. Check video cable connections. Ensure video source is powered on and outputting a signal. |
| Image is distorted or incorrect colors | Incorrect display settings; faulty cable. | Reset display settings to default via OSD. Try a different video cable. |
| Tally light not working | Tally cable disconnected; external tally system not configured correctly. | Check DB-9 tally cable connection. Verify configuration of external tally system. |
If the problem persists after attempting these solutions, please contact SEETEC customer support.
9. Specifications
Detailed technical specifications for the SEETEC P173-9HSD monitor:

Image 9.1: Key display specifications.
| Feature | Specification |
|---|---|
| Screen Size | 17.3 Inches |
| Resolution | 1920 x 1080 (Full HD) |
| Aspect Ratio | 16:9 |
| Brightness | 400 cd/m² |
| Contrast Ratio | 600:1 |
| Response Time | 40ms |
| Viewing Angle | 80°/80° (L/R), 60°/80° (U/D) |
| Input Voltage | DC 9~24V |
| Power Consumption | ≤26W |
| Working Temperature | -10°C ~ 50°C |
| Storage Temperature | -20°C ~ 60°C |
| Unit Dimensions (W/O Bracket) | 426L × 285H × 35.1D mm (16.77 x 11.22 x 1.38 inches) |
| Unit Weight (W/O Bracket) | 2.75 kg (6.06 lbs) |
| Unit Weight (W/ Bracket) | 3.30 kg (7.28 lbs) |
| SDI Support Formats | 480i/576i, 720p (60/59.94/50/30/29/25/24/23.98), 1080i (60/59.94/50), 1080p (60/59.94/50/30/29.97/25/24/24sF/23.98/23.98sF) |
| HDMI Support Formats | 480i/576i/480p/576p, 1080i (60/59.94/50), 720p (60/59.94/50/30/29/25/24/23.98), 1080p (60/59.94/50/30/29.97/25/24/24sF/23.98/23.98sF), 4K UHD 3840×2160p (30/29.97/25/24/23.98Hz), 4096×2160p (24Hz) |
10. Warranty and Support
For warranty information and technical support, please refer to the warranty card included with your product or visit the official SEETEC website. If you require assistance with troubleshooting or have questions about your monitor, contact SEETEC customer service directly.