1. Introduction
This manual provides detailed instructions for the installation, operation, and maintenance of your FLOUREON 8-Channel 960H CCTV DVR Security System with four 1000TVL Waterproof Dome Cameras. Please read this manual thoroughly before using the product to ensure proper setup and functionality. Keep this manual for future reference.
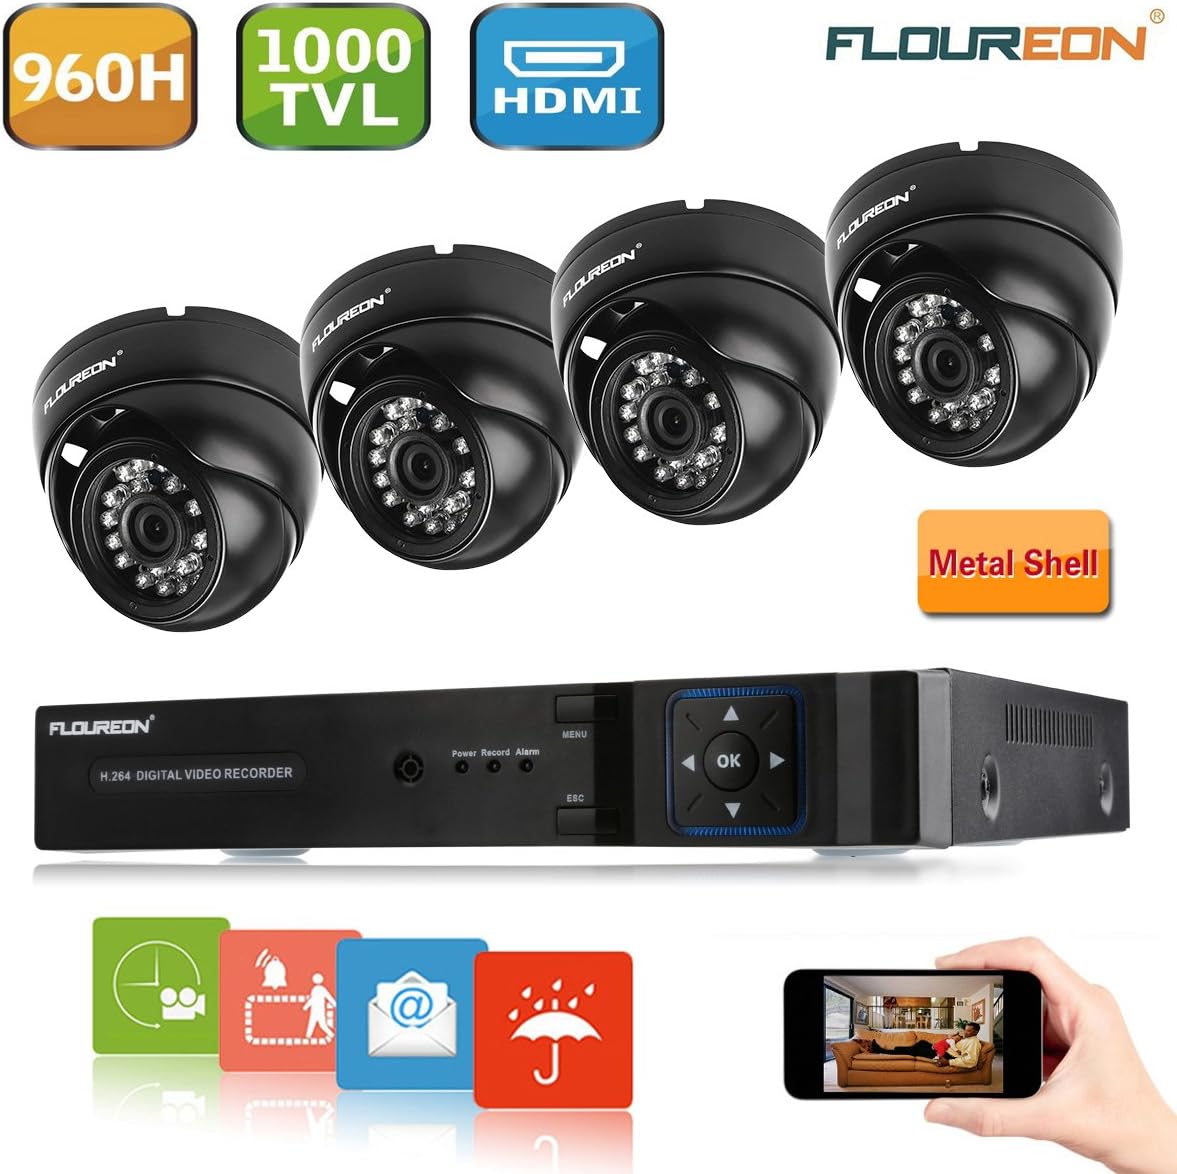
Figure 1.1: FLOUREON 8-Channel DVR and four 1000TVL dome security cameras kit. This image displays the complete FLOUREON security system, including the 8-channel Digital Video Recorder (DVR) unit and four dome-style 1000TVL waterproof cameras. It also highlights key features such as 960H resolution, 1000TVL camera resolution, and HDMI output.
2. Safety Information
Observe the following safety precautions to prevent damage to the product and ensure user safety:
- Use only the power adapter supplied with the device.
- Do not expose the DVR to rain or moisture.
- Ensure proper ventilation for the DVR to prevent overheating.
- Avoid placing the DVR in direct sunlight or near heat sources.
- Handle cameras and cables with care during installation.
3. Package Contents
Please check the package contents upon receipt. If any items are missing or damaged, contact your retailer.
- 1 x FLOUREON 8-Channel 960H DVR
- 4 x FLOUREON 1000TVL Dome Waterproof Cameras
- 4 x 60ft (approx. 18m) BNC Video Power Cables
- 1 x 12V DC Power Adapter for DVR
- 1 x 12V DC Power Adapter for Cameras (with 1-to-4 power splitter)
- 1 x USB Mouse
- 1 x User Manual (this document)
- Note: Hard Disk Drive (HDD) is NOT included and must be purchased separately for recording functionality.
4. Product Overview
4.1. Digital Video Recorder (DVR)
The DVR is the central unit of your security system, responsible for recording, storing, and managing video footage from the connected cameras.

Figure 4.1: FLOUREON H.264 Digital Video Recorder (DVR) front and rear panel view. This image shows both the front and rear panels of the FLOUREON H.264 DVR. The front panel features control buttons and status indicators, while the rear panel displays various input/output ports for video, audio, network, and power connections.
Front Panel Features:
- Power Indicator: Lights up when the DVR is powered on.
- Record Indicator: Flashes when recording is active.
- Alarm Indicator: Lights up when an alarm event (e.g., motion detection) is triggered.
- Menu Button: Accesses the main menu.
- Directional Buttons (Up/Down/Left/Right): Navigate through menu options.
- OK Button: Confirms selections.
- ESC Button: Exits current menu or cancels an operation.
Rear Panel Ports:
- Video In (BNC): Connects surveillance cameras (V1-V8).
- V-OUT (BNC): Analog video output.
- A-OUT (RCA): Audio output.
- VGA Output: Connects to a VGA monitor.
- HD-OUT (HDMI): Connects to an HDMI monitor or TV.
- Audio In (RCA): Connects external audio input devices (A1-A4).
- LAN Port (RJ45): Connects to your network router for remote access.
- USB Interface: Connects the USB mouse or for data backup.
- RS485: For PTZ camera control (if applicable).
- DC 12V: Power input for the DVR.
4.2. Dome Cameras
The included dome cameras are designed for both indoor and outdoor surveillance, featuring 1000TVL resolution and night vision capabilities.
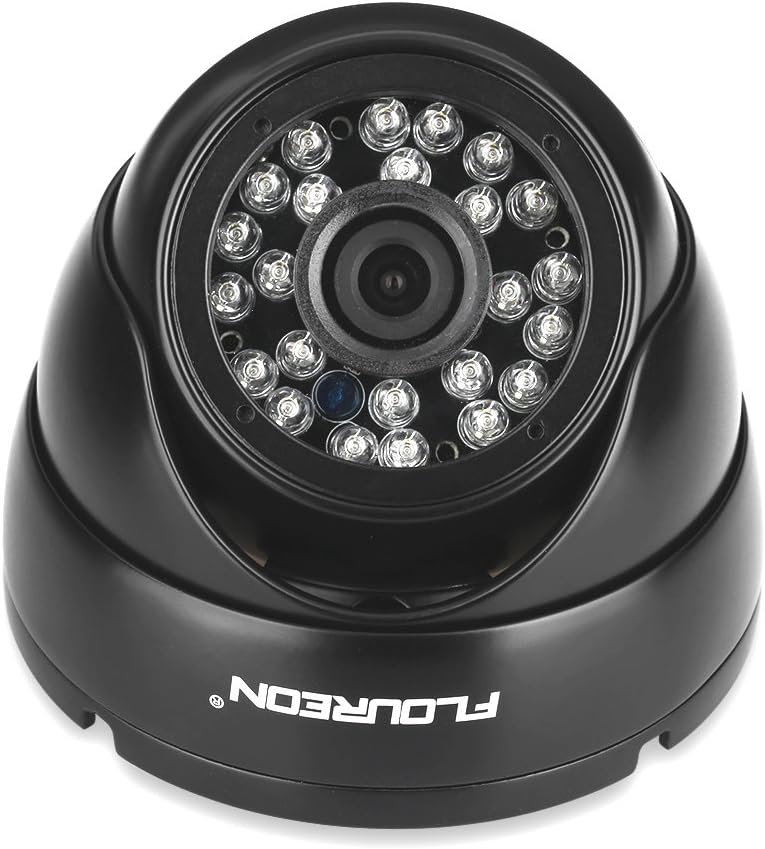
Figure 4.2: Close-up of a FLOUREON 1000TVL dome security camera with IR LEDs. A detailed view of one of the FLOUREON 1000TVL dome cameras, showcasing its robust design and integrated infrared (IR) LEDs for night vision capabilities.
Camera Features:
- 1000TVL Resolution: Provides clear video footage.
- Infrared (IR) LEDs: Enable night vision for surveillance in low-light or dark conditions.
- Waterproof (IP66 Rated): Suitable for outdoor installation, resistant to dust and water ingress.
- Dome Design: Discreet and vandal-resistant housing.
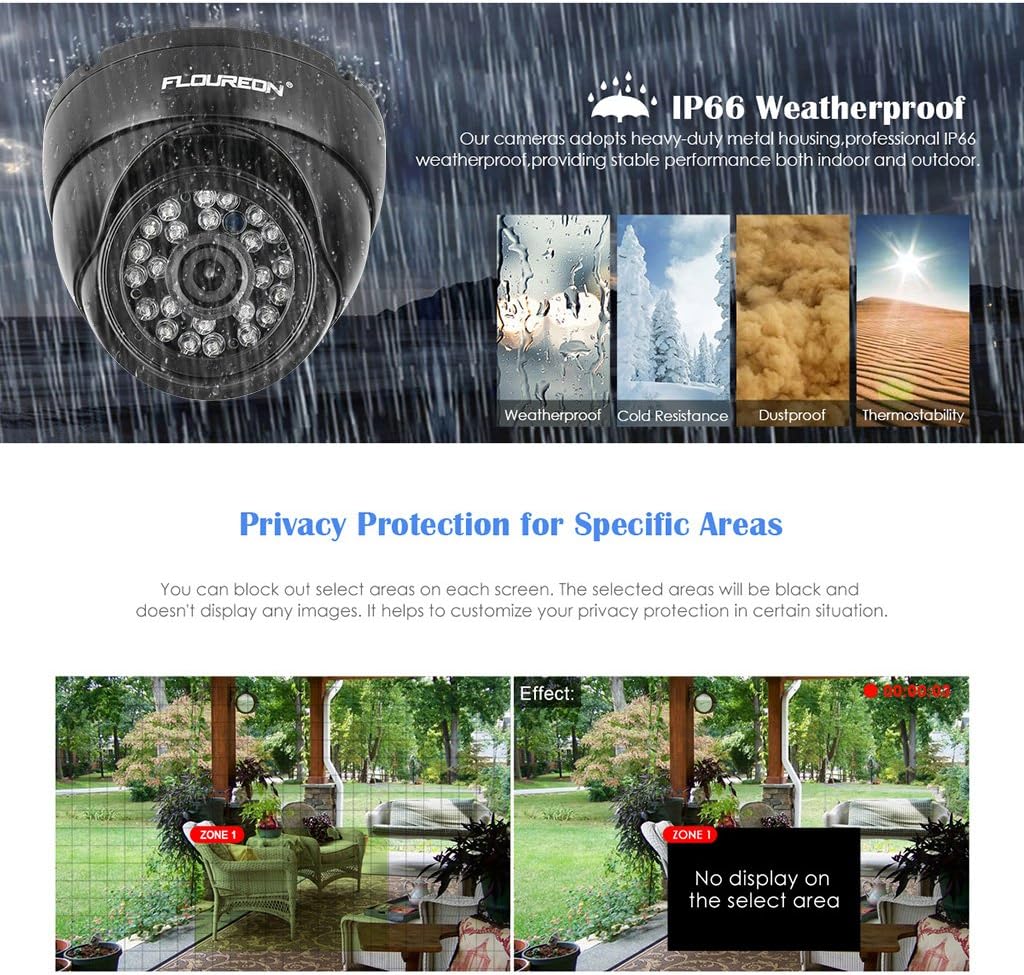
Figure 4.3: FLOUREON dome camera with IP66 weatherproof rating, showing resistance to rain, cold, dust, and heat. An illustration demonstrating the IP66 weatherproof rating of the FLOUREON dome cameras. This indicates their ability to withstand various environmental conditions, including rain, cold temperatures, dust, and heat, making them suitable for both indoor and outdoor use.
5. Setup and Installation
5.1. Hard Disk Drive (HDD) Installation (If Applicable)
This system does not include an HDD. For video recording, you must install a compatible 3.5-inch SATA HDD (up to 4TB recommended).
- Unscrew and remove the top cover of the DVR.
- Connect the SATA data cable and power cable from the DVR to the HDD.
- Secure the HDD to the DVR chassis using the provided screws.
- Replace the top cover and secure it with screws.
5.2. Connecting the DVR
Follow these steps to connect your DVR:
- Connect Cameras: Attach the BNC connectors of the camera cables to the 'VIDEO IN' ports (V1-V4) on the DVR's rear panel.
- Connect Power to Cameras: Use the 1-to-4 power splitter cable to connect all camera power inputs to the camera power adapter. Plug the camera power adapter into an electrical outlet.
- Connect Monitor: Connect a monitor or TV to the DVR using either the HDMI or VGA port.
- Connect USB Mouse: Plug the USB mouse into one of the USB ports on the DVR.
- Connect Network (Optional): For remote viewing, connect an Ethernet cable from the DVR's LAN port to your router.
- Power On DVR: Connect the DVR power adapter to the 'DC 12V' port on the DVR, then plug it into an electrical outlet. The DVR will power on automatically.

Figure 5.1: FLOUREON DVR connected to a monitor and HDTV via VGA and HDMI for live viewing. This diagram shows how the FLOUREON DVR can be connected to a TV or PC monitor using VGA and HDMI outputs for viewing live surveillance footage. It highlights the flexibility of display options.
5.3. Camera Installation
Choose appropriate locations for your cameras, considering coverage area, lighting, and cable length.
- Mounting: Use the provided screws and anchors to securely mount the cameras to a wall or ceiling.
- Adjust Angle: Loosen the adjustment screws on the camera base to set the desired viewing angle, then tighten them to secure the position.
- Cable Management: Route the camera cables neatly and protect them from environmental damage.
6. Operating Instructions
6.1. Initial Setup Wizard
Upon first power-on, the DVR will guide you through an initial setup wizard. Follow the on-screen prompts to configure basic settings such as language, date/time, network settings, and HDD formatting (if an HDD is installed).
6.2. Live View
After initial setup, the DVR will display the live view from all connected cameras. You can switch between single-camera view, multi-camera view, and sequence display using the mouse or front panel controls.
6.3. Recording Modes
The DVR supports various recording modes:
- Manual Recording: Start/stop recording manually.
- Scheduled Recording: Set specific times for continuous recording.
- Motion Detection Recording: Records only when motion is detected in the camera's view.
- Alarm Recording: Records when an external alarm input is triggered.
Configure recording settings via the DVR's main menu: Main Menu > Record > Record Schedule.
6.4. Playback
To review recorded footage:
- Go to Main Menu > Playback.
- Select the desired date and camera channel(s).
- Use the timeline to navigate through recordings.
6.5. Motion Detection
Configure motion detection to trigger recording and alerts when movement is detected.
- Go to Main Menu > Alarm > Motion Detect.
- Select the camera channel.
- Enable motion detection and draw the detection area on the screen.
- Set sensitivity levels and linkage actions (e.g., record, email alert).

Figure 6.1: Motion detection and instant email alerts feature of FLOUREON security system. This image demonstrates the motion detection functionality, where the system detects movement within designated zones. Upon detection, it can trigger recording and send instant email alerts to the user, enhancing security monitoring.
6.6. Privacy Masking
This feature allows you to block out specific areas in the camera's view to protect privacy.
- Go to Main Menu > Camera > Privacy Mask.
- Select the camera channel.
- Draw the areas you wish to mask. These areas will appear black in the live and recorded footage.
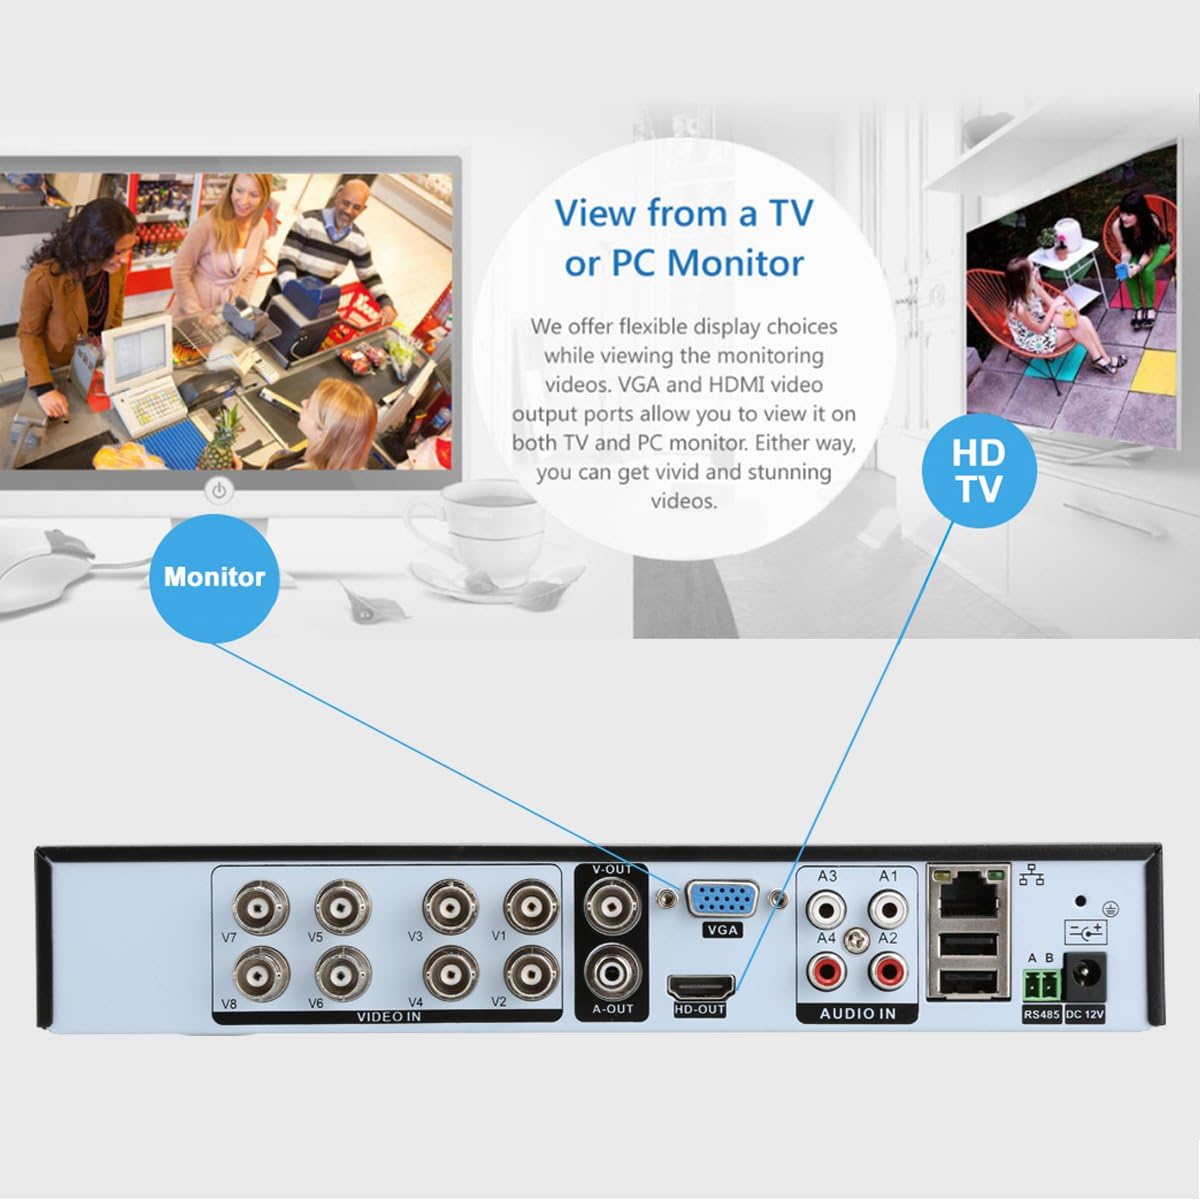
Figure 6.2: Privacy protection feature on FLOUREON security system, masking specific areas in the camera view. This image illustrates the privacy protection feature, allowing users to block out specific areas within the camera's field of view. The selected zones will appear black, ensuring privacy for sensitive areas.
6.7. Remote Access
Access your security system remotely via a mobile app or PC software.
- Network Configuration: Ensure the DVR is connected to your router. Configure network settings (DHCP or static IP) via Main Menu > System > Network.
- Mobile App: Download the recommended mobile application (refer to your DVR's on-screen information or manufacturer's website for the correct app). Scan the QR code or manually add the device using its serial number or IP address.
- PC Software: Install the client software on your computer (available from the manufacturer's website). Add the DVR using its IP address or serial number.
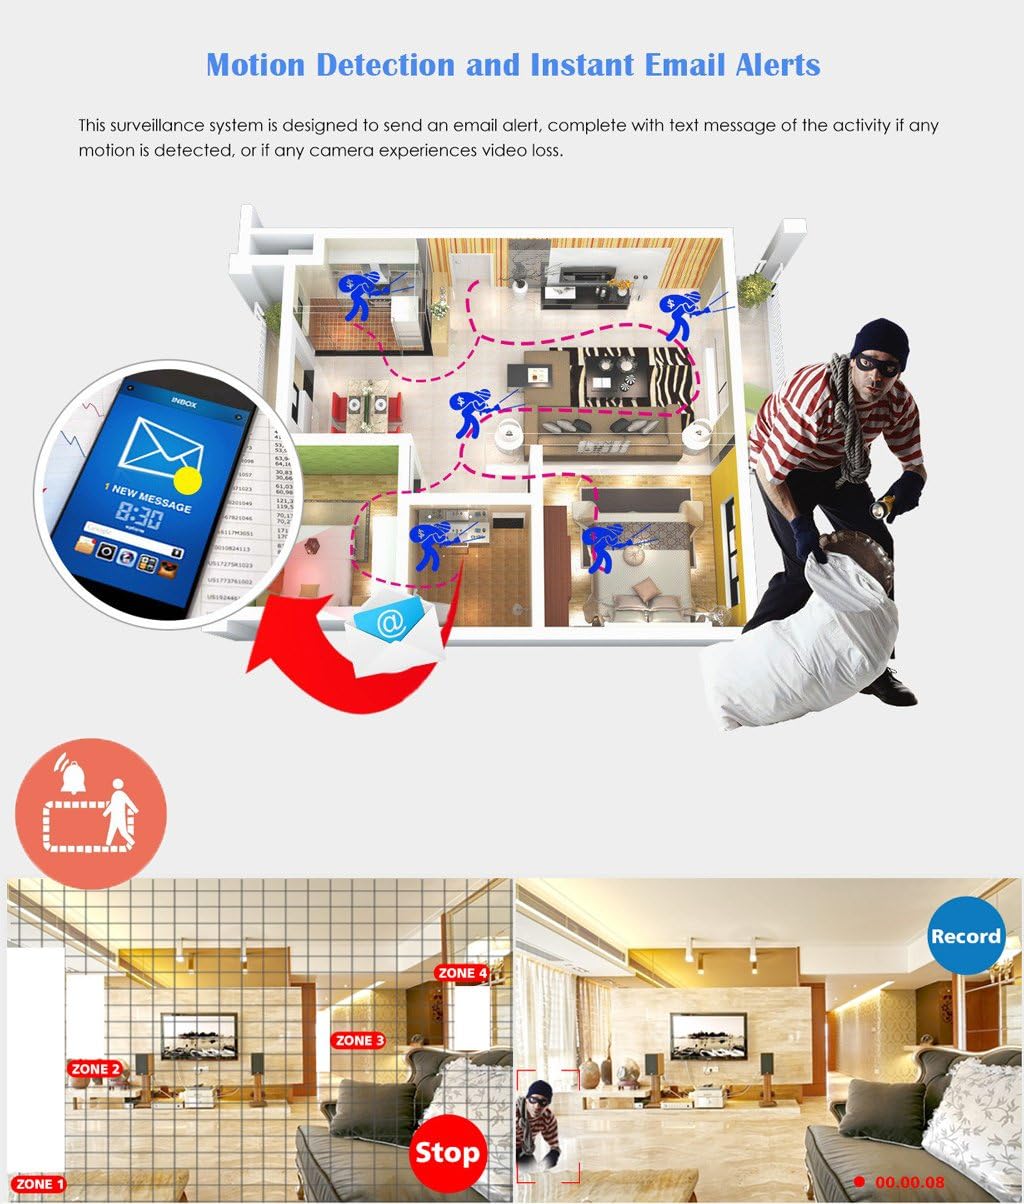
Figure 6.3: Remote access to FLOUREON security system via desktop computer, tablet, and smartphone. An illustration depicting the remote access capabilities of the FLOUREON security system. Users can view live and recorded footage from anywhere using a desktop computer, tablet, or smartphone application.
7. Maintenance
- Cleaning: Regularly clean the camera lenses with a soft, dry cloth to ensure clear image quality. Clean the DVR's exterior with a soft cloth. Do not use liquid or aerosol cleaners.
- Firmware Updates: Check the manufacturer's website periodically for firmware updates. Updating firmware can improve performance and add new features. Follow the update instructions carefully.
- HDD Health: If an HDD is installed, monitor its health through the DVR's system information. Back up important recordings regularly.
8. Troubleshooting
| Problem | Possible Cause | Solution |
|---|---|---|
| No video output on monitor | Loose cable connection, incorrect input source on monitor, DVR not powered on. | Check HDMI/VGA cable connections. Ensure monitor is set to correct input. Verify DVR power. |
| No image from a specific camera | Camera power issue, BNC cable issue, faulty camera. | Check camera power connection. Inspect BNC cable for damage. Test camera on a different channel or with a known working cable. |
| DVR not recording | No HDD installed, HDD not formatted, recording schedule not set, HDD full. | Install and format an HDD. Configure recording schedule. Check HDD capacity and enable overwrite if needed. |
| Remote access not working | Network cable disconnected, incorrect network settings, router firewall blocking connection, incorrect app settings. | Verify Ethernet cable connection. Check DVR network settings (DHCP recommended). Ensure router allows necessary ports (if manual port forwarding is used). Reconfigure app settings. |
| Poor night vision | IR LEDs obstructed, camera placed too far from subject, external light interference. | Clear any obstructions from IR LEDs. Reposition camera closer to the area of interest. Minimize external light sources that might cause glare. |
9. Specifications
| Component | Specification |
|---|---|
| DVR Model | 4332028145 |
| Video Compression | H.264 |
| Video Input | 8-Channel BNC |
| Video Output | 1 x HDMI, 1 x VGA, 1 x BNC |
| Audio Input | 4-Channel RCA |
| Audio Output | 1-Channel RCA |
| Display Resolution | Up to 1920x1080 (HDMI/VGA) |
| Recording Resolution | 960H (960x576/960x480) |
| HDD Support | 1 x SATA (up to 4TB, HDD not included) |
| Network Interface | RJ45 10M/100M Ethernet |
| USB Interface | 2 x USB 2.0 |
| Power Supply | DC 12V |
| Camera Resolution | 1000TVL |
| Camera Type | Dome, Waterproof (IP66) |
| Night Vision | Infrared (IR) LEDs |
| Operating Temperature | -10°C to 50°C (14°F to 122°F) |
10. Warranty and Support
For warranty information and technical support, please refer to the documentation provided with your purchase or visit the official FLOUREON website. Keep your purchase receipt as proof of purchase for warranty claims.