
1. Introduction
Welcome to your new Gemmy Holiday Projection Lightshow Display. This manual provides essential information for the safe and effective use of your projector. Please read these instructions carefully before installation and operation to ensure proper functionality and longevity of the product.
Product Features
- Includes eight different holiday slides for a customized Christmas message.
- Designs include snowman, Santa's sleigh, Happy Holidays, Merry Christmas, Seasons Greetings, Happy New Year, and more.
- One LED white colored light is included.
- Ground stake included for easy setup.
- Projects onto any wall or flat surface to create a festive holiday display.
2. Important Safety Information
To reduce the risk of fire, electric shock, or injury, always follow these basic safety precautions:
- Read all instructions before using this product.
- Do not look directly into the light source when the projector is operating.
- Ensure the power cord is not damaged, pinched, or placed under heavy objects.
- Use only with a properly grounded outdoor-rated extension cord if necessary.
- Do not immerse the projector unit in water or other liquids.
- Keep the projector away from children and pets.
- Unplug the unit from the power outlet when not in use or before cleaning.
- Operate the projector within specified temperature ranges to prevent overheating or malfunction.
3. Package Contents
Verify that all items listed below are included in your package:
- 1 x Gemmy Holiday Projection Lightshow Display Unit
- 1 x Ground Stake
- 8 x Interchangeable Holiday Slides
- 1 x Integrated Power Adapter
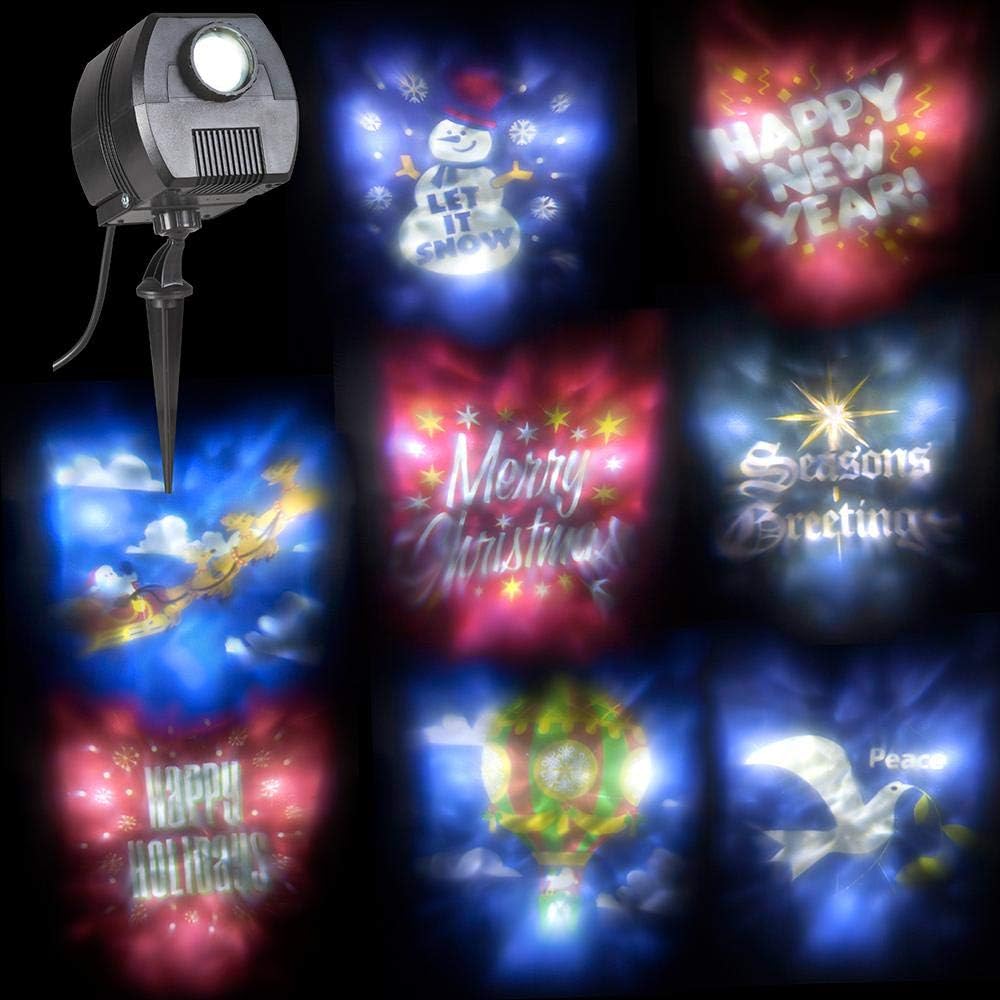
Image: The Gemmy Holiday Projection Lightshow Display unit and examples of the eight included projection slides.
4. Setup Instructions
Step 1: Unpacking
Carefully remove all components from the packaging. Inspect for any visible damage. If any parts are missing or damaged, do not proceed with setup and contact customer support.
Step 2: Attaching the Ground Stake
- Locate the ground stake and the mounting bracket on the projector unit.
- Align the ground stake with the opening on the mounting bracket.
- Securely attach the ground stake to the projector by twisting or using the provided knob/screw until it is firm and stable.

Image: The projector unit with the ground stake attached, ready for installation.
Step 3: Positioning the Projector
- For outdoor use, firmly insert the ground stake into soft ground. Ensure the projector is stable and upright to prevent it from falling.
- For indoor use, the projector can be placed on a flat, stable surface.
- Position the projector at a suitable distance from the projection surface (e.g., wall, garage door) to achieve the desired image size and clarity. Experiment with different distances for optimal results.
Step 4: Adjusting the Projection Angle
Loosen the adjustment knob on the side of the mounting bracket to tilt the projector up or down. Once the desired projection angle is achieved, tighten the knob firmly to secure the projector in place.

Image: Detail of the adjustable joint and securing knob on the projector.
Step 5: Power Connection
Plug the power cord into a standard electrical outlet. For outdoor use, ensure the outlet is weather-protected and rated for outdoor use to prevent electrical hazards.
5. Operating Instructions
Powering On/Off
The projector will power on automatically when plugged into an electrical outlet. To turn the unit off, simply unplug it from the power source.
Changing Projection Slides
- Gently pull out the current slide from the designated slot on the projector unit.
- Select a new holiday slide from the included set.
- Insert the new slide into the slot, ensuring it is fully and correctly seated.
Adjusting Focus
Rotate the lens housing at the front of the projector to adjust the focus of the projected image. Turn it clockwise or counter-clockwise until the image appears clear and sharp on your chosen projection surface.
6. Maintenance
Cleaning
- Always ensure the projector is unplugged from the power source before cleaning.
- Wipe the exterior of the projector with a soft, dry cloth.
- Gently clean the lens with a soft, lint-free cloth. Do not use abrasive cleaners, solvents, or harsh chemicals, as these can damage the lens or casing.
Storage
When not in use, store the projector in its original packaging or a protective container. Keep it in a cool, dry place, away from direct sunlight and extreme temperatures, to prolong its lifespan.
7. Troubleshooting
If you encounter any issues with your projector, refer to the table below for common problems and solutions:
| Problem | Possible Cause | Solution |
|---|---|---|
| Projector does not turn on | No power supply | Check power connection and electrical outlet. Ensure the power cord is not damaged. |
| Projected image is blurry | Out of focus | Rotate the lens housing at the front of the projector to adjust focus until the image is clear. |
| Image is dim or unclear | Projector too far from surface / High ambient light | Move the projector closer to the projection surface. Reduce ambient light in the projection area for better visibility. |
| Slide not projecting correctly | Slide incorrectly inserted | Ensure the slide is fully and correctly seated in the slide slot. |
If problems persist after attempting these solutions, please contact customer support for further assistance.
8. Specifications
Product specifications are subject to change without notice.
| Feature | Detail |
|---|---|
| Model | Holiday Projection Lightshow Display |
| ASIN | B01LZRPJFF |
| UPC | 086786882894 |
| Manufacturer | Gemmy |
| Light Source Type | LED |
| Number of Light Sources | 1 |
| Product Dimensions | 6.4 x 6.1 x 6 inches |
| Item Weight | 1.9 pounds |
| Power Source | Corded Electric |
| Batteries Required | No |
| Projected Colors | Blue, Red (as part of slide designs) |
| Style | Modern |
9. Warranty and Customer Support
For detailed warranty information or technical support, please refer to the documentation included with your original purchase or visit the official Gemmy website. You may also find additional product information and support resources by visiting the Gemmy Store on Amazon.