1. Introduction
This manual provides detailed instructions for the safe installation, operation, and maintenance of your Vento Clover N-00027 54-inch Indoor Ceiling Fan. Please read this manual thoroughly before attempting to assemble, install, operate, or maintain the product. Keep these instructions for future reference.
The Vento Clover N-00027 is a 54-inch indoor ceiling fan featuring 3 blades, a chrome finish, and remote control functionality, designed for use in bedrooms and living rooms.
2. Safety Instructions
WARNING: To reduce the risk of fire, electric shock, or personal injury, always follow these safety guidelines.
- Ensure the power is turned off at the circuit breaker before installation or servicing.
- All wiring must be in accordance with national and local electrical codes. Consult a qualified electrician if you are unsure.
- The mounting structure must be capable of supporting a minimum of 35 lbs (15.9 kg).
- Do not operate the fan with damaged blades or housing.
- Avoid placing objects in the path of the fan blades.
- This fan is for indoor use only. Do not expose to water or excessive humidity.
3. Package Contents
Verify that all components listed below are present and undamaged before beginning installation. If any parts are missing or damaged, do not proceed with installation and contact customer support.
- Ceiling Fan Motor Assembly
- Fan Blades (3)
- Mounting Bracket
- Downrod Assembly
- Remote Control with Wall Mount
- Hardware Pack (screws, washers, wire nuts)
- Instruction Manual
4. Setup and Installation
Professional installation is recommended. Ensure all power is disconnected at the circuit breaker before proceeding.
4.1 Mounting the Fan
- Attach the mounting bracket to the ceiling junction box. Ensure the junction box is securely fastened to the building structure and can support the fan's weight.
- Carefully lift the fan motor assembly and hang it from the mounting bracket using the provided hook or safety cable.
4.2 Wiring Connections
Connect the fan's electrical wires to the household wiring according to the wiring diagram provided in the hardware pack. Typically, this involves connecting:
- Black (Live) wire from fan to Black (Live) wire from ceiling.
- White (Neutral) wire from fan to White (Neutral) wire from ceiling.
- Green/Bare Copper (Ground) wire from fan to Green/Bare Copper (Ground) wire from ceiling.
Secure all connections with wire nuts and ensure no loose strands of wire are exposed.
4.3 Attaching the Blades
Attach the three fan blades to the motor housing using the screws and washers provided. Ensure all screws are tightened securely to prevent wobbling during operation.
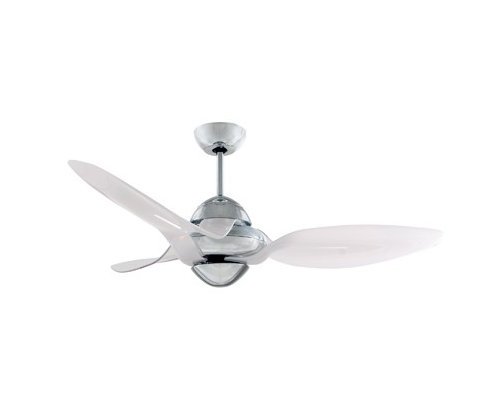
Figure 1: Vento Clover N-00027 54-inch Indoor Ceiling Fan. This image shows the assembled fan with its three white blades and chrome motor housing.
5. Operation
The Vento Clover N-00027 ceiling fan is operated using the included remote control.
5.1 Remote Control Functions
- ON/OFF Button: Press to turn the fan on or off.
- Speed Control Buttons: The fan has 3 speed settings. Press the speed buttons to cycle through Low, Medium, and High speeds.
- Fan Direction (Reverse) Button: (If applicable) This button changes the direction of the fan blades. In warm weather, the fan should rotate counter-clockwise to create a downdraft. In cool weather, it should rotate clockwise to create an updraft, circulating warm air without creating a direct breeze.
Ensure the remote control has fresh batteries installed for optimal performance.
6. Maintenance
Regular maintenance helps ensure the longevity and efficient operation of your ceiling fan.
- Cleaning: Dust the fan blades and motor housing periodically with a soft, damp cloth. Do not use abrasive cleaners or solvents, as these can damage the finish.
- Tightening Screws: Check all screws on the fan blades and mounting hardware annually. Tighten any loose screws to prevent wobbling and noise.
- Blade Balance: If the fan wobbles excessively, ensure all blades are securely attached and consider using a blade balancing kit (sold separately) if necessary.
CAUTION: Always turn off the power at the circuit breaker before cleaning or performing any maintenance on the fan.
7. Troubleshooting
| Problem | Possible Cause | Solution |
|---|---|---|
| Fan does not start. | No power to the fan; remote control battery low or dead; incorrect wiring. | Check circuit breaker; replace remote control batteries; verify wiring connections. |
| Fan wobbles. | Loose blade screws; unbalanced blades; loose mounting bracket. | Tighten all blade screws; use a blade balancing kit; ensure mounting bracket is secure. |
| Remote control not working. | Dead batteries; remote not paired (if applicable); obstruction. | Replace batteries; refer to remote pairing instructions (if provided separately); ensure clear line of sight to fan receiver. |
| Fan is noisy. | Loose screws; motor issues; blades hitting an obstruction. | Check and tighten all screws; ensure no obstructions; contact customer support if motor noise persists. |
8. Specifications
| Feature | Detail |
|---|---|
| Brand | Vento |
| Model Name | N-00027 |
| Size | 54 inches |
| Color | White (Blades), Chrome (Housing) |
| Number of Blades | 3 |
| Number of Speeds | 3 |
| Control Method | Remote Control |
| Mounting Type | Ceiling Mount |
| Indoor/Outdoor Usage | Indoor Only |
| Power Source | Corded Electric |
| Room Type | Bedroom, Living Room |
9. Warranty and Support
Vento products are manufactured to high-quality standards. For specific warranty information, please refer to the warranty card included with your product or visit the official Vento website. Keep your purchase receipt as proof of purchase.
For technical assistance, replacement parts, or general inquiries, please contact Vento customer support. Contact details can typically be found on the product packaging or the official Vento website.