Introduction
Welcome to the Suptek Single Monitor Desk Mount MD6421 user manual. This guide provides comprehensive instructions for the safe and efficient installation, operation, and maintenance of your new monitor desk mount. Please read this manual thoroughly before installation and retain it for future reference.

Important Safety Information
Please read all instructions carefully before installation. If you do not understand these instructions or have doubts about the safety of the installation, assembly, or use of this product, please contact customer support. Improper installation may cause damage or serious injury.
- Do not exceed the maximum weight capacity of 22 lbs (10 kg).
- Ensure the mounting surface (desk) can safely support the combined weight of the mount and the monitor.
- Use only the provided hardware. If any parts are missing or damaged, contact customer support.
- This product is intended for indoor use only.
- Keep children and pets away during installation.
Specifications
| Feature | Detail |
|---|---|
| Model Number | MD6421 / MD9421 |
| Brand | Suptek |
| Color | Black |
| Material | Alloy Steel |
| Screen Size Compatibility | 13" to 32" |
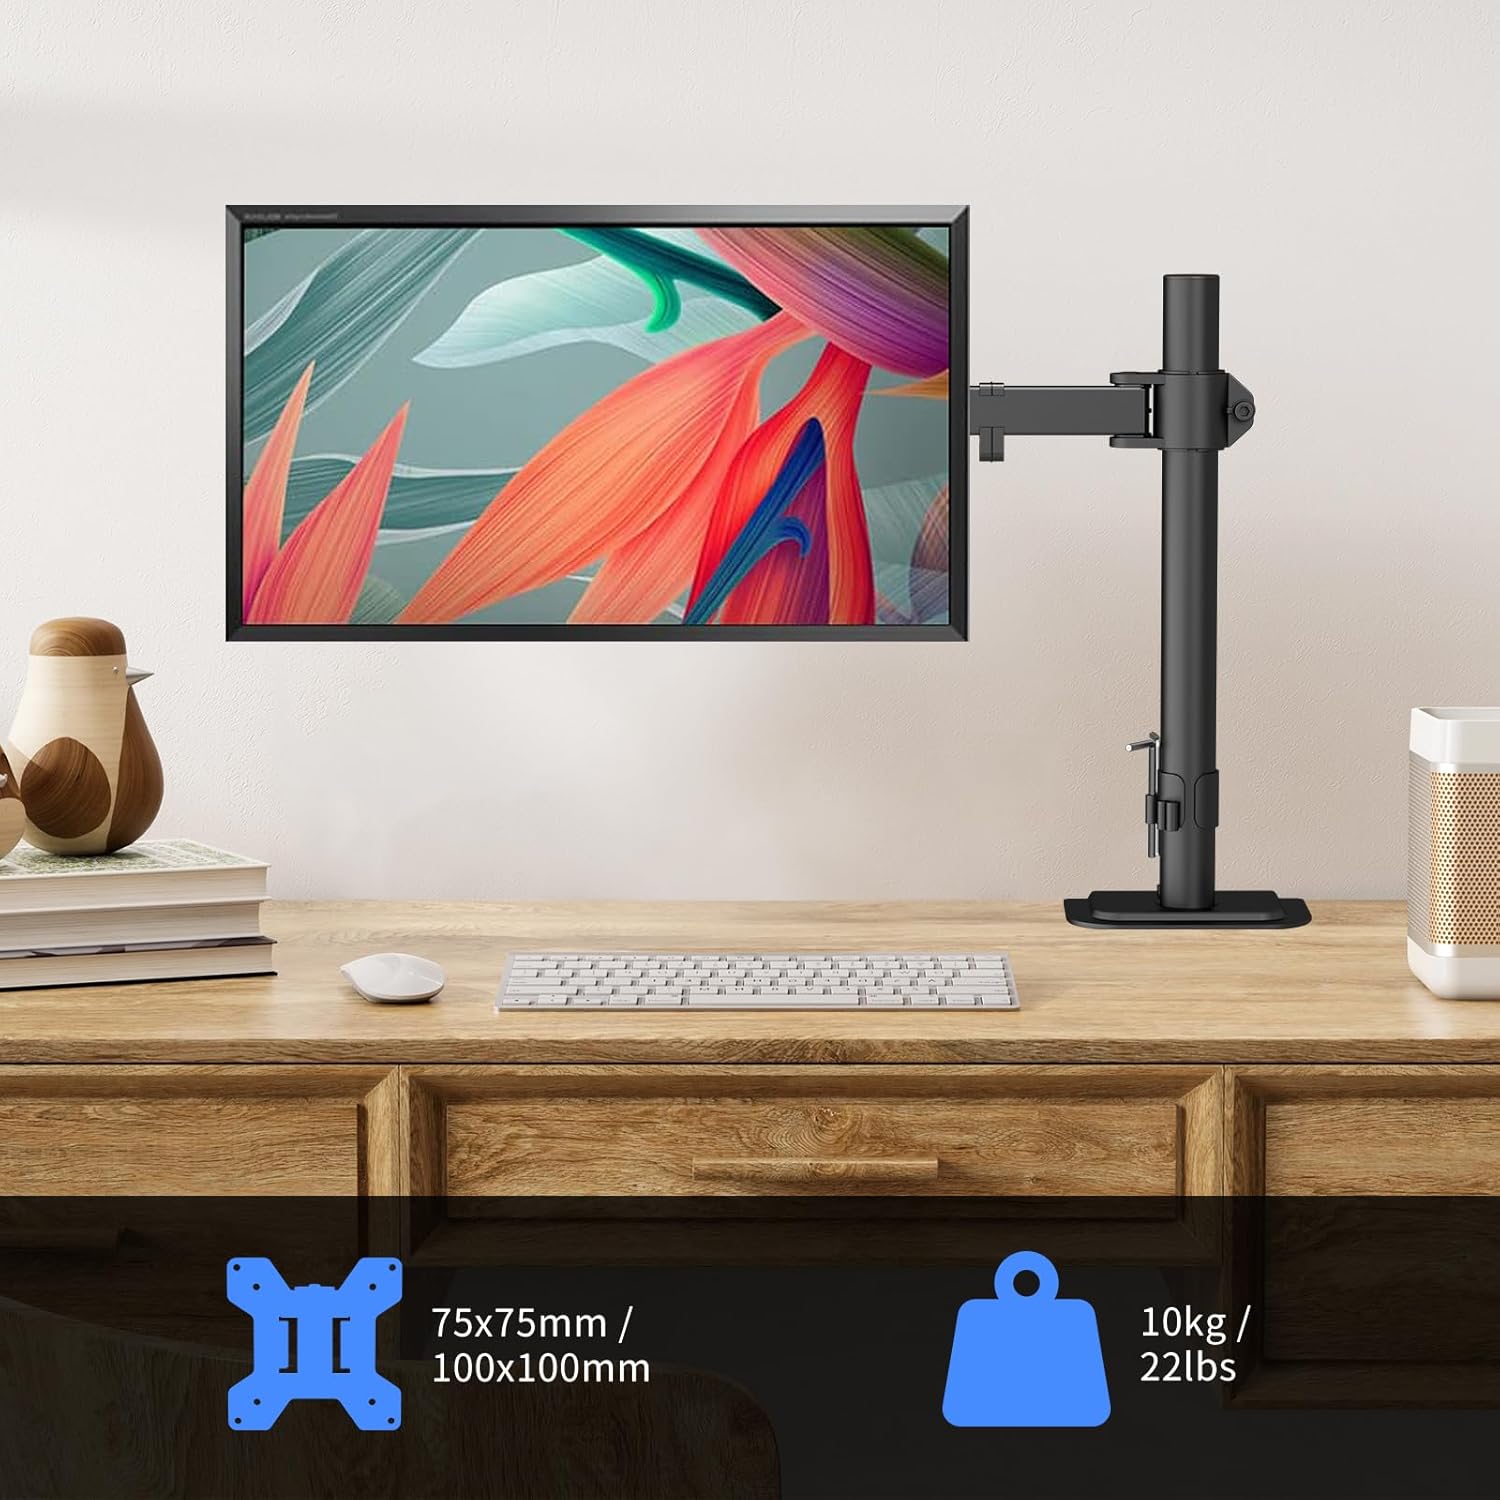
| Weight Capacity | Up to 22 lbs (10 kg) |
| VESA Compatibility | 75x75mm, 100x100mm |
| Mounting Type | Desk Mount (C-clamp or Grommet) |
| Desk Thickness (C-clamp) | 0.39" - 3.85" (10mm - 98mm) |
| Desk Thickness (Grommet) | 0.39" - 3.85" (10mm - 98mm) |
| Grommet Hole Diameter | ≥ 1.57" (40mm) |
| Adjustability | 360° Rotation, ±90° Tilt, ±90° Swivel, Height Adjustment |


Package Contents
Verify that all parts are present and undamaged before beginning installation. If any parts are missing or defective, please contact customer support.
The package typically includes:
- Monitor Arm Assembly
- Desk Clamp Base
- Grommet Mount Components
- VESA Plate
- Cable Management Clips
- Hardware Kit (screws, washers, spacers for various VESA patterns)
- Allen Wrenches for assembly and adjustments
Setup Instructions
Follow these steps carefully to install your Suptek Single Monitor Desk Mount.
Step 1: Assemble the Pole and Arm
- Attach the monitor arm to the main pole. Ensure the arm is oriented correctly (usually with the VESA plate attachment pointing upwards).
- Tighten the screws on the arm clamp using the provided Allen wrench to secure it to the pole.
Step 2: Choose and Install Desk Mounting Option
The mount offers two installation methods: C-clamp or Grommet base. Choose the method that best suits your desk.
Option A: C-Clamp Installation
- Place the C-clamp base on the edge of your desk.
- Ensure the desk thickness is between 0.39" and 3.85" (10mm - 98mm).
- Tighten the C-clamp screw until the mount is firmly secured to the desk. Do not overtighten.

Option B: Grommet Base Installation
- Ensure your desk has a grommet hole with a diameter of at least 1.57" (40mm).
- Insert the grommet base through the hole.
- Secure the base from underneath the desk using the provided plate and screw. Ensure the desk thickness is between 0.39" and 3.85" (10mm - 98mm).
- Tighten securely.
Step 3: Attach VESA Plate to Monitor
- Carefully place your monitor face down on a soft, clean surface to prevent scratches.
- Align the VESA plate with the mounting holes on the back of your monitor.
- Use the appropriate screws, washers, and spacers from the hardware kit to secure the VESA plate to the monitor. Do not overtighten.
Step 4: Mount Monitor to Arm
- With assistance, carefully lift the monitor with the attached VESA plate.
- Slide the VESA plate onto the monitor arm's mounting head until it clicks into place.
- Secure the monitor to the arm using the safety screw or locking mechanism, if applicable.
Operating and Adjustments
Your Suptek monitor mount offers full adjustability to achieve optimal ergonomic positioning.
Adjusting Monitor Position
- Height Adjustment: Loosen the clamp on the main pole to slide the monitor arm up or down. Retighten the clamp once the desired height is reached.
- Tilt: The monitor can be tilted ±90° (up/down). Adjust the tilt angle to reduce glare and improve viewing comfort.
- Swivel: The monitor arm can swivel ±90° (left/right) at the pole and at the monitor connection point.
- Rotation: Rotate the monitor 360° to switch between landscape and portrait orientations.


Cable Management
Utilize the integrated cable management clips along the arm and pole to keep your cables organized and your workspace tidy.
- Route your monitor's power and video cables through the clips.
- Ensure cables have enough slack to allow for full range of motion without tension.

Maintenance
Regular maintenance ensures the longevity and safe operation of your monitor desk mount.
- Cleaning: Wipe the mount with a soft, damp cloth. Avoid abrasive cleaners or solvents.
- Tightness Check: Periodically check all screws and connections to ensure they are secure. Retighten if necessary using the provided Allen wrenches.
- Movement Check: Ensure all moving parts operate smoothly. If any part feels stiff, apply a small amount of silicone-based lubricant (avoid oil-based lubricants).
Troubleshooting
If you encounter any issues with your monitor desk mount, refer to the following common problems and solutions.
- Monitor sags or does not hold position:
- Ensure all adjustment screws on the arm and VESA plate are sufficiently tightened.
- Verify that your monitor's weight does not exceed the 22 lbs (10 kg) capacity.
- Mount feels unstable on desk:
- Check that the C-clamp or grommet base is securely tightened to the desk.
- Ensure the desk thickness is within the specified range (0.39" - 3.85").
- Difficulty adjusting arm movement:
- Some joints may have tension adjustment screws. Loosen or tighten these slightly with an Allen wrench to achieve desired movement.
If the problem persists, please contact customer support.
Warranty and Support
Suptek products are designed for durability and performance. For warranty information, technical support, or to report missing/damaged parts, please visit the official Suptek website or contact their customer service directly.
You can find more information and contact details on the Suptek Store on Amazon.


