1. Introduction
Thank you for purchasing the SUNLUXY 7" TFT Color Video Door Phone Intercom System. This manual provides detailed instructions for the installation, operation, and maintenance of your new video intercom system. Please read this manual thoroughly before installation and use to ensure proper function and safety. Keep this manual for future reference.
2. Safety Information
- Electrical Safety: Ensure all power connections are made by a qualified electrician and comply with local electrical codes. Disconnect power before performing any installation or maintenance.
- Water Exposure: While the outdoor unit is waterproof, avoid direct high-pressure water jets. Ensure all connections are sealed properly.
- Temperature: Operate the system within the specified temperature range (-20°C to 50°C for the outdoor camera).
- Placement: Install the indoor monitor in a dry, well-ventilated area away from direct sunlight and heat sources.
- Cleaning: Use a soft, dry cloth for cleaning. Do not use abrasive cleaners or solvents.
3. Package Contents
Please check the package contents against the list below. If any items are missing or damaged, contact your retailer.

Image 3.1: Included components in the SUNLUXY Video Door Phone System package.
- Outdoor Camera Unit (x1)
- Indoor Monitor Unit (x1)
- Power Adapter (x1)
- 5-meter Connection Cable (x1)
- Mounting Bracket for Monitor (x1)
- Mounting Screws and Wall Plugs (x1 set)
- User Manual (x1)
4. Setup and Installation
4.1 Outdoor Camera Unit
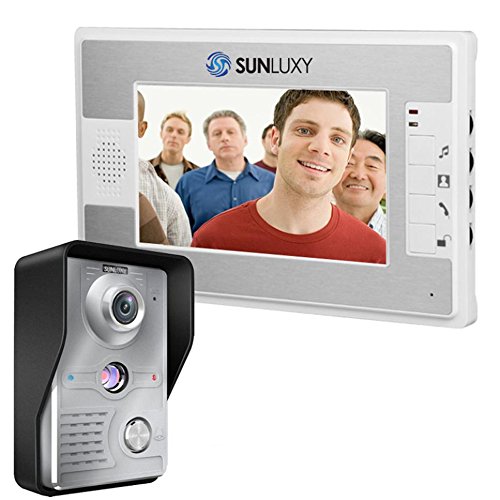
Image 4.1.1: SUNLUXY Outdoor Camera Unit.
The outdoor camera unit features a durable aluminum alloy panel and is designed to be waterproof and oxidation-proof for outdoor use.

Image 4.1.2: Outdoor Camera Unit Components.
- Logo: SUNLUXY brand identification.
- Mic: Microphone for two-way audio communication.
- Lens: 1/4" CMOS 700TVL camera lens for video capture.
- Light Sensor: Detects ambient light to activate IR LEDs for night vision.
- Power Light: Indicator light.
- 1.5W IR LED: Infrared LEDs for night vision illumination.
- Speaker: For audio output from the indoor monitor.
- Call Button: Initiates a call to the indoor monitor.
4.2 Indoor Monitor Unit

Image 4.2.1: SUNLUXY Indoor Monitor Unit.
The indoor monitor features a 7-inch TFT LCD screen for clear video display and intuitive controls.
Image 4.2.2: Indoor Monitor Unit Components.
- Loudspeaker: For audio output from the outdoor unit.
- Ringtone Selection: Button to cycle through 16 different melodies.
- Monitor Button: Activates the camera view without a call.
- Talk Button: Initiates two-way communication with the outdoor unit.
- Unlock Key: Activates an electronic lock (if connected).
- Mic: Microphone for two-way audio communication.
4.3 Wiring Diagram
The system uses a 4-wire connection for communication between the outdoor camera and indoor monitor. Additional wires are used for power and optional electronic lock connection.
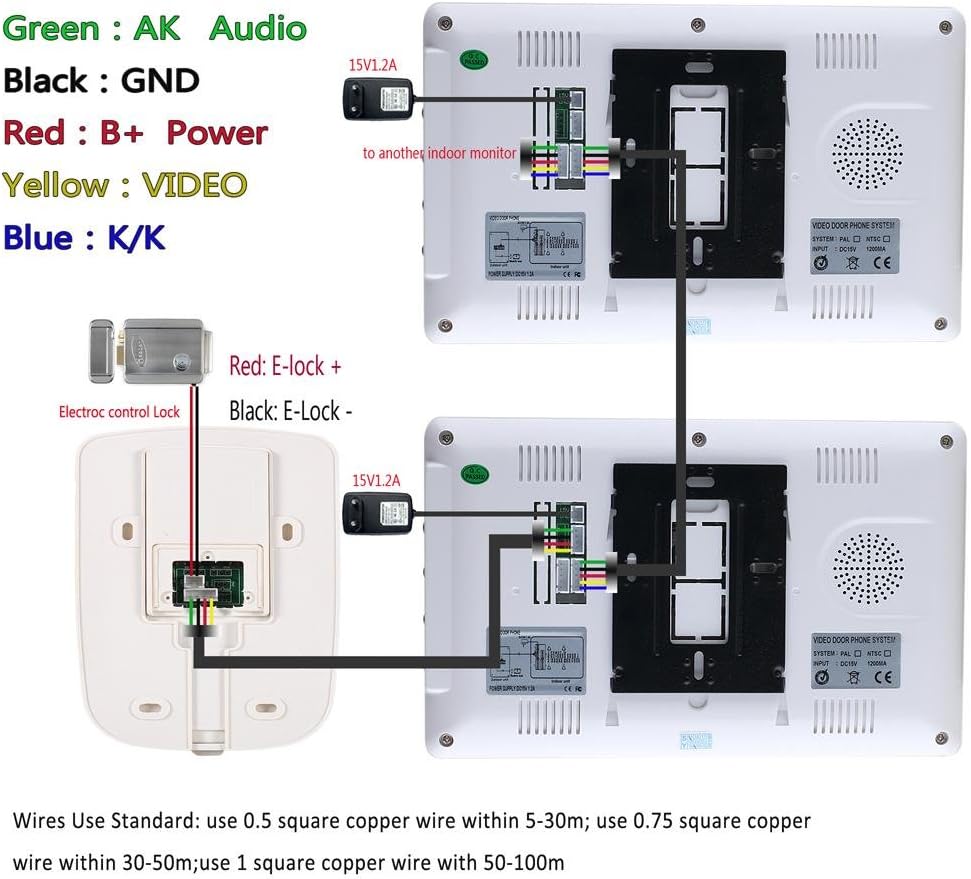
Image 4.3.1: System Wiring Diagram.
- Green (AK): Audio
- Black (GND): Ground
- Red (B+ Power): Power supply
- Yellow (VIDEO): Video signal
- Blue (K/K): Electronic lock control
Recommended Wire Gauge:
- 0.5 square copper wire for distances within 5-30 meters.
- 0.75 square copper wire for distances within 30-50 meters.
- 1 square copper wire for distances within 50-100 meters.
5. Operating Instructions
5.1 Receiving a Call
- When a visitor presses the call button on the outdoor unit, the indoor monitor will ring and display the visitor's image.
- Press the Talk button on the indoor monitor to establish two-way audio communication.
- To end the conversation, press the Talk button again or the call will automatically terminate after a set period.
5.2 Monitoring
Press the Monitor button on the indoor unit to view the outdoor camera feed at any time, even without a visitor pressing the call button.
5.3 Unlocking the Door
If an electronic lock is connected to the system, press the Unlock Key button on the indoor monitor to remotely open the door for your visitor.
5.4 Adjusting Settings
The indoor monitor allows for adjustment of various settings:
- Ringtone: Use the Ringtone Selection button to choose from 16 different melodies.
- Volume: Adjust the audio volume for the speaker.
- Brightness: Adjust the screen brightness of the 7-inch TFT display.
- Color: Adjust the color saturation of the video feed.
Specific controls for volume, brightness, and color are typically located on the side or back of the indoor monitor unit.
6. Maintenance
- Cleaning: Regularly wipe the outdoor camera lens and indoor monitor screen with a soft, lint-free cloth. Do not use harsh chemicals or abrasive materials.
- Power Supply: Ensure the power adapter is securely connected and not damaged.
- Cable Connections: Periodically check all wiring connections for tightness and signs of wear or corrosion.
- Environmental Protection: Protect the outdoor unit from extreme weather conditions if possible, even though it is designed to be waterproof.
7. Troubleshooting
If you encounter issues with your SUNLUXY Video Door Phone Intercom System, refer to the following common problems and solutions:
| Problem | Possible Cause | Solution |
|---|---|---|
| No image on indoor monitor | Loose video cable connection; Power issue; Camera malfunction. | Check all video cable connections. Ensure power adapter is plugged in. Verify camera is receiving power. |
| No sound or poor audio quality | Loose audio cable connection; Microphone/speaker obstruction; Volume too low. | Check audio cable connections. Ensure microphone and speaker are clear. Adjust volume settings on the monitor. |
| Outdoor unit call button unresponsive | Wiring issue; Button malfunction. | Check wiring to the call button. Ensure the outdoor unit is receiving power. |
| Door unlock function not working | Incorrect wiring to electronic lock; Lock power issue; Lock malfunction. | Verify electronic lock wiring (Blue K/K wires). Ensure the electronic lock has its own power supply if required. |
| Night vision not working | Light sensor obstructed; IR LEDs malfunction. | Ensure the light sensor on the outdoor unit is not obstructed. |
If the problem persists after trying these solutions, please contact customer support.
8. Specifications
8.1 Outdoor Camera Unit
- Camera: 1/4" CMOS, 700 TV Lines
- Minimum Illumination: 0.5 Lux
- Video Output: 1 Vp-p / 75Ω
- Power Adapter Input: 100-240V, 50/60Hz
- Power Adapter Output: DC15V / 1.2A
- Operating Temperature: -20°C to 50°C
- Installation: Wall-mounted
- Material: ABS Plastic and Aluminum Alloy
- Dimensions: 118 x 77 x 47 mm
8.2 Indoor Monitor Unit
- Screen: 7" TFT / LCD
- Power Supply: 100V-240V / 50-60Hz
- Effective Pixels: 480 * 234 * 30
- Power Consumption: ≤14W (operating), ≤2W (standby)
- Wiring: 4-wire system
- Dimensions: 245 x 150 x 27 mm
8.3 General Specifications
- Model: SY812MKW11
- Manufacturer: SUNLUXY
- Product Weight: 1.14 kg (approximate, total package)
9. Warranty and Support
This product comes with a standard manufacturer's warranty. Please refer to the warranty card included in your package or contact your retailer for specific warranty terms and conditions.
For technical support or service inquiries, please contact your point of purchase or visit the official SUNLUXY website for contact information.