Ecolight BO1063-WHG-12LF6-E
Ecolight 12-inch Battery-Operated LED Tap Bar Light Instruction Manual
Model: BO1063-WHG-12LF6-E
1. Introduction
This manual provides detailed instructions for the installation, operation, and maintenance of your Ecolight 12-inch Battery-Operated LED Tap Bar Light. This product is designed to provide convenient, wire-free illumination for various indoor applications such as under cabinets, workspaces, closets, and recreational areas. Please read this manual thoroughly before use and retain it for future reference.
2. Safety Information
- This product is intended for indoor use only. Do not expose to moisture or extreme temperatures.
- Do not mix old and new batteries, or different types of batteries (e.g., alkaline and rechargeable).
- Ensure batteries are inserted with correct polarity (+/-). Incorrect insertion can cause damage.
- Remove batteries if the light will not be used for an extended period to prevent leakage.
- Keep batteries out of reach of children.
- Do not attempt to disassemble or modify the light bar. This will void the warranty and may cause damage or injury.
- Use only the mounting hardware provided or suitable alternatives for secure installation.
3. What's Included
Verify that all components are present before beginning installation:
- 1 x Ecolight 12-inch LED Tap Bar Light
- 6 x AA Batteries
- 4 x Command™ Picture Hanging Strips
- 2 x Mounting Screws
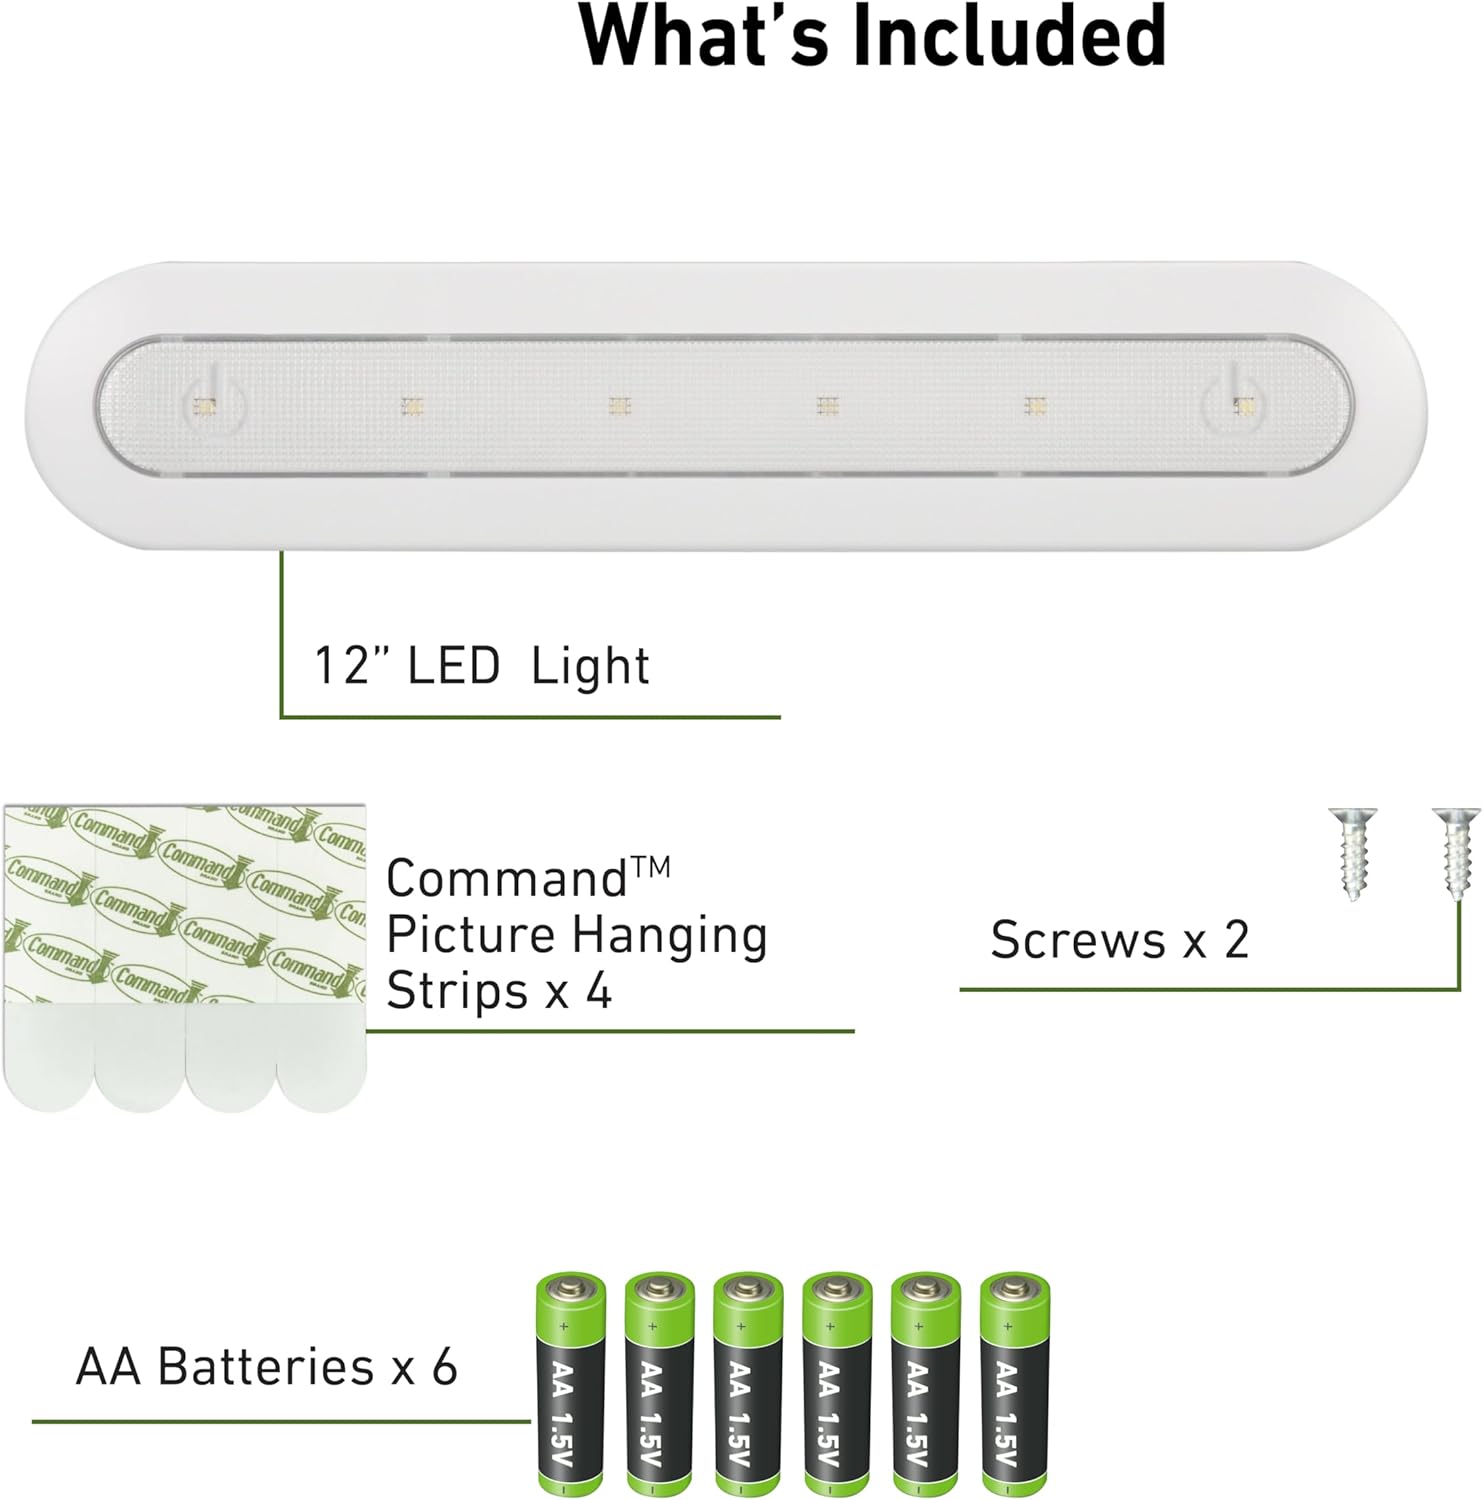
Image 3.1: Contents of the package, including the light bar, batteries, Command strips, and screws.
4. Installation
4.1 Battery Installation
- Locate the battery compartment cover on the back of the light bar.
- Slide or unclip the cover to open the compartment.
- Insert 6 AA batteries, ensuring correct polarity (+ and -) as indicated inside the compartment.
- Replace the battery compartment cover securely.
4.2 Mounting Options
The Ecolight LED Tap Bar Light offers two mounting methods:
- Temporary/Damage-Free Mounting: Using Command™ Picture Hanging Strips. Ideal for surfaces where you want to avoid holes.
- Permanent Mounting: Using the provided screws. Provides a more secure, long-term installation.
4.2.1 Mounting with Command™ Strips
- Clean the mounting surface with rubbing alcohol and let it dry completely. Do not use household cleaners.
- Separate the Command™ Strips. Press two strips together until they click. Repeat for the other two strips.
- Remove the red liner from one side of each pair of strips and press them firmly onto the back of the light bar.
- Remove the black liner from the other side of each pair of strips.
- Align the light bar with the desired mounting location and press firmly against the surface for 30 seconds.
- To ensure adhesive strength, remove the light bar by pulling it up and away from the strips. Press the strips firmly against the wall for another 30 seconds.
- Wait 1 hour before reattaching the light bar to the strips.
4.2.2 Mounting with Screws
- Identify the two keyhole slots on the back of the light bar.
- Hold the light bar in the desired mounting location and mark the positions for the two screws through the keyhole slots.
- Drill pilot holes at the marked locations if necessary.
- Insert the provided screws into the pilot holes, leaving a small portion of the screw head exposed.
- Align the keyhole slots on the back of the light bar with the exposed screw heads and slide the light bar down to secure it.
- Tighten the screws if the light bar feels loose, but do not overtighten.

Image 4.1: Product dimensions for planning installation space.

Image 4.2: Example of the light bar installed under a cabinet.
5. Operation
5.1 Turning On/Off
The Ecolight LED Tap Bar Light features a simple tap activation. To turn the light ON or OFF, gently tap the translucent lens on the front of the light bar.

Image 5.1: Tap On/Off activation method.
5.2 Timer Settings
The light bar includes a built-in auto-off timer to conserve battery life. The timer switch is located on the side of the unit. You can select from the following modes:
- ON: The light remains continuously on until manually turned off.
- 1 MIN: The light automatically turns off after 1 minute.
- 5 MIN: The light automatically turns off after 5 minutes.
- 15 MIN: The light automatically turns off after 15 minutes.
To manually turn off the light when a timer setting is active, tap the bar a second time.

Image 5.2: Timer setting switch on the light bar.
6. Maintenance
6.1 Cleaning
To clean the light bar, wipe it gently with a soft, dry cloth. Do not use abrasive cleaners, solvents, or sprays, as these may damage the finish or internal components.
6.2 Battery Replacement
When the light output diminishes, it is time to replace the batteries. Follow the battery installation steps (Section 4.1) to replace all 6 AA batteries with new ones. Always replace all batteries at the same time and use the same type of battery.
7. Troubleshooting
| Problem | Possible Cause | Solution |
|---|---|---|
| Light does not turn on. | Batteries are dead or incorrectly installed. | Replace batteries, ensuring correct polarity. |
| Light is dim. | Batteries are low. | Replace all batteries with new ones. |
| Light turns off too quickly. | Timer is set to a short duration. | Adjust the timer switch to a longer duration or 'ON' mode. |
| Light does not respond to tap. | Sensor obstruction or internal issue. | Ensure the lens is clean. If problem persists after battery replacement, contact customer support. |
8. Specifications
| Model Number | BO1063-WHG-12LF6-E |
| Dimensions (L x W x H) | 12" x 2.5" x 1.1" (30.5 cm x 6.35 cm x 2.8 cm) |
| Light Source | LED |
| Brightness | 80 Lumens |
| Color Temperature | 4000K (Cool White) |
| Power Source | 6 x AA Batteries (included) |
| Battery Life | Up to 44 hours (at full charge) |
| Lamp Life | 30,000 hours |
| Control Method | Tap On/Off, Timer Switch |
| Mounting Type | Surface Mount (Screws or Command™ Strips) |
| Material | Plastic |
| Indoor/Outdoor Usage | Indoor Only |
9. Warranty and Support
9.1 Warranty Information
This Ecolight product is covered by a 6-year limited warranty from the date of purchase. This warranty covers defects in materials and workmanship under normal use. It does not cover damage resulting from misuse, accident, modification, or unauthorized repair. Please retain your proof of purchase for warranty claims.
9.2 Customer Support
If you have any questions, require assistance, or encounter issues not covered in this manual, please contact Ecolight customer support. Refer to the product packaging or the official Ecolight website for current contact information.
no relevant documents
Ask a question about this manual
Ask about setup, troubleshooting, compatibility, parts, safety, or missing instructions. Manuals+ will review the question and use this page’s manual context to help answer it.