GE Appliances JB645RKSS
GE 30-inch Freestanding Electric Radiant Range User Manual
Model: JB645RKSS | Brand: GE Appliances
1. Introduction
Thank you for choosing a GE Appliances product. This user manual provides important information regarding the safe and efficient operation, maintenance, and troubleshooting of your new GE 30-inch Freestanding Electric Radiant Range (Model: JB645RKSS). Please read this manual thoroughly before using your appliance to ensure proper installation and to maximize its performance and longevity. Keep this manual for future reference.
2. Safety Information
Your safety and the safety of others are very important. We have provided many important safety messages in this manual and on your appliance. Always read and obey all safety messages.
- Electrical Safety: Ensure the range is properly grounded. Do not use an adapter plug or extension cord. Disconnect power before servicing.
- Anti-Tip Device: This range is equipped with an anti-tip bracket. Failure to install the anti-tip bracket could result in the range tipping over, causing serious injury or death.
- Hot Surfaces: Cooktop and oven surfaces can become hot during use. Use caution when touching these areas. Allow surfaces to cool before cleaning.
- Children Safety: Do not leave children unattended near the range. Do not allow children to climb on or play with the appliance.
- Proper Use: Use the appliance only for its intended purpose as described in this manual. Do not use the oven for storage.
- Flammable Materials: Keep flammable materials away from the range. Do not store or use gasoline or other flammable vapors and liquids in the vicinity of this or any other appliance.
3. Setup and Installation
Proper installation is crucial for the safe and efficient operation of your range. It is recommended that installation be performed by a qualified installer.
3.1 Unpacking
Carefully remove all packaging materials, tape, and protective film from the range. Retain packaging for potential future transport or service.
3.2 Location Requirements
Ensure the installation area meets local codes and ordinances. The range requires a proper electrical supply. Refer to the electrical requirements section in the full installation instructions for details.
3.3 Leveling the Range
The range must be level for optimal cooking performance. Adjust the leveling legs at the bottom of the range until the cooktop is level. Use a spirit level to verify.
3.4 Anti-Tip Bracket Installation
The anti-tip bracket must be securely installed to prevent the range from tipping. Follow the detailed instructions provided with the anti-tip bracket kit. This is a critical safety step.
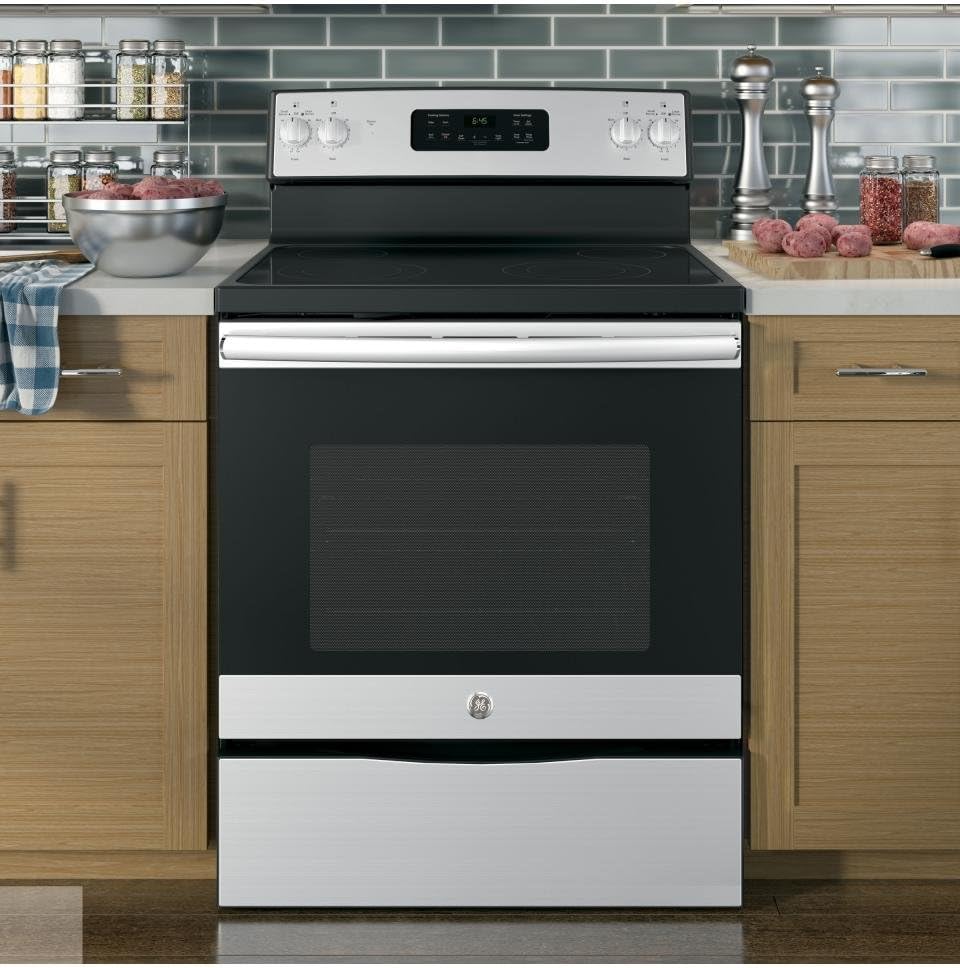
Figure 3.4.1: GE 30-inch Freestanding Electric Radiant Range (Model JB645RKSS) installed in a modern kitchen setting, showcasing its stainless steel finish and black glass cooktop.
4. Operating Instructions
Familiarize yourself with the controls and features of your GE Radiant Range.
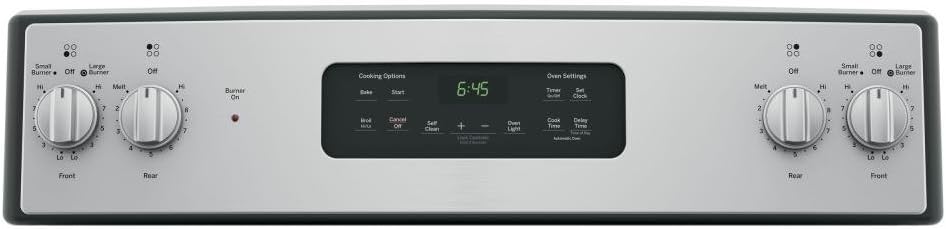
Figure 4.0.1: Close-up view of the control panel, featuring rotary knobs for cooktop burners and a digital display with touch controls for oven settings such as Bake, Start, Cancel Off, Self Clean, Timer, Set Clock, Broil, Cook Time, and Delay Time.
4.1 Cooktop Operation
The radiant cooktop features four heating elements. Use appropriate cookware for best results.
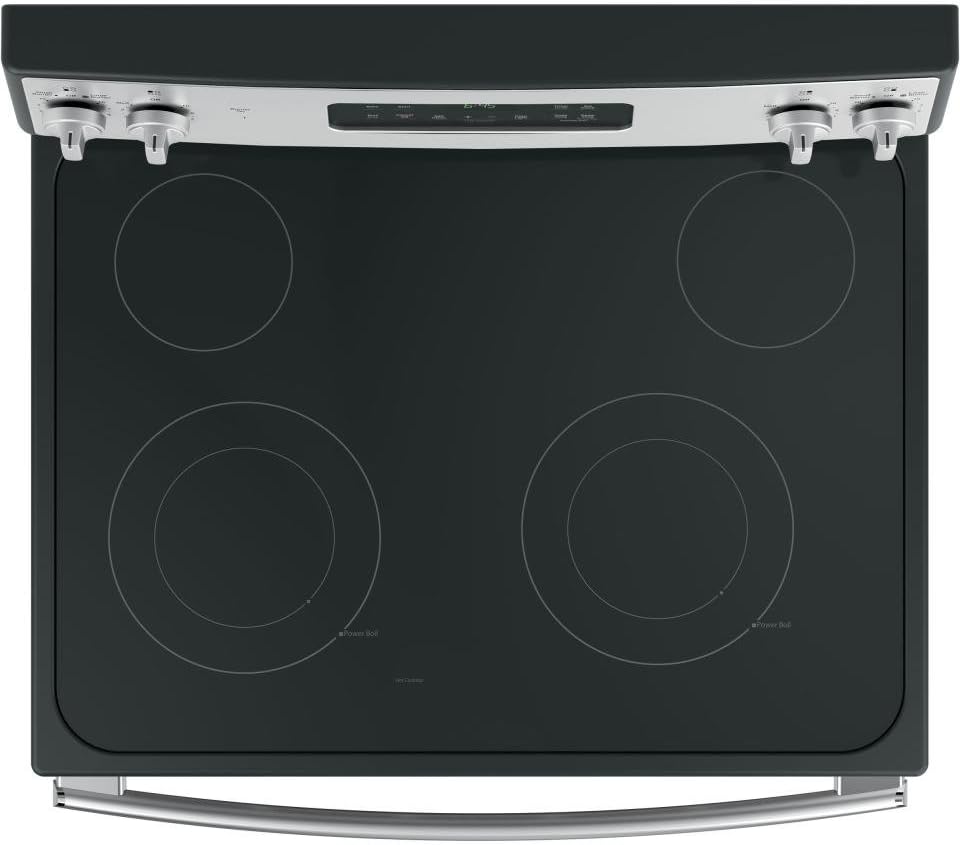
Figure 4.1.1: Overhead view of the black glass radiant cooktop, showing four circular heating elements. Two elements are dual-zone, indicated by inner and outer rings, labeled "Small Burner" and "Large Burner" on the control panel.
- Turning On Elements: Turn the corresponding control knob clockwise to the desired heat setting (Lo, 1-9, Hi, Melt). The "Burner On" indicator light will illuminate.
- Dual Elements: Some elements offer dual heating zones (Small Burner/Large Burner). Select the appropriate size using the knob.
- Melt Setting: Use the "Melt" setting for delicate tasks like melting butter or chocolate.
- Power Boil: The "Power Boil" element provides rapid heating for boiling water quickly.

Figure 4.1.2: Two stainless steel pots are shown on the black glass cooktop, with water boiling in both, demonstrating the active heating elements.
4.2 Oven Operation
The oven offers various cooking modes and features.
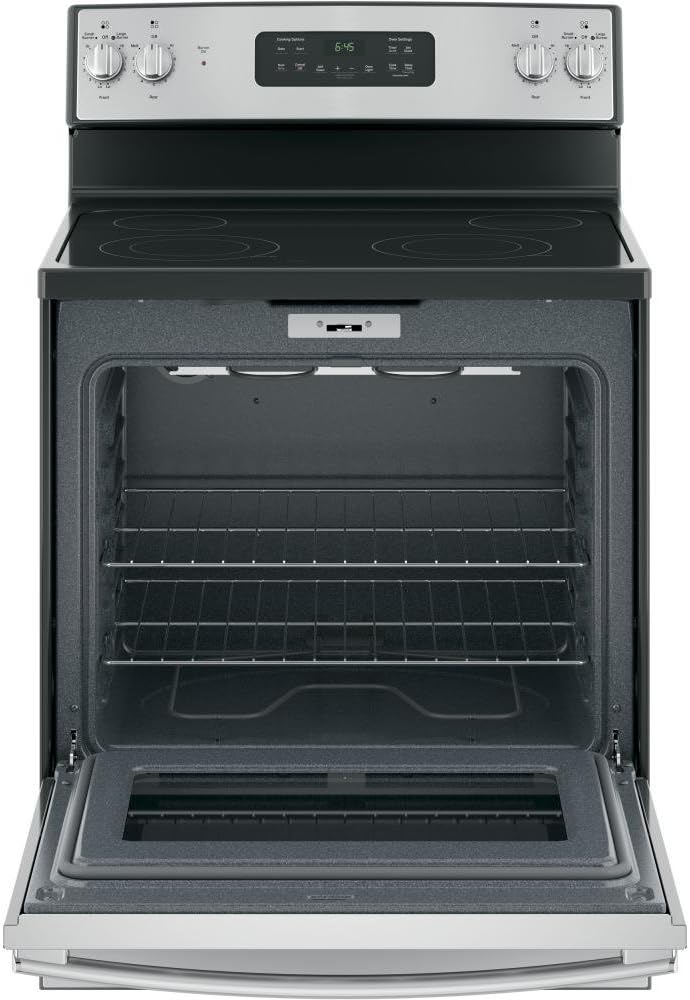
Figure 4.2.1: The oven door is open, revealing the spacious interior with multiple rack positions and two oven racks in place. The interior is dark gray, and an oven light is visible at the top.
- Bake: Press Bake, enter desired temperature using the + or - pads, then press Start.
- Broil: Press Broil Hi/Lo, select High or Low, then press Start.
- Timer: Press Timer On/Off, enter desired time, then press Start.
- Set Clock: Press Set Clock, enter current time, then press Start.
- Oven Light: Press Oven Light to turn the interior light on or off.
- Lock Controls: Press and hold Lock Controls for 3 seconds to lock/unlock the control panel.

Figure 4.2.2: The oven interior is shown with various dishes in baking pans on the racks, illustrating the oven's capacity for multiple items.
5. Maintenance and Cleaning
Regular cleaning and maintenance will help preserve the appearance and performance of your range.
5.1 Cooktop Cleaning
The smooth glass ceramic cooktop requires specific care to prevent scratching and damage.
- Daily Cleaning: For light soil, wipe with a damp cloth and mild dish soap. Rinse and dry thoroughly.
- Heavy Soil/Stains: Use a ceramic cooktop cleaner and a non-abrasive cleaning pad. Follow product instructions.
- Burned-on Residue: For stubborn spots, use a razor blade scraper held at a 45-degree angle.
- Avoid: Do not use abrasive cleaners, scouring pads, or harsh chemicals, as they can scratch the glass surface.

Figure 5.1.1: A close-up view of the black glass radiant cooktop surface, highlighting its smooth, reflective finish and the subtle markings of the heating elements.
5.2 Oven Cleaning
- Self Clean Cycle: The oven features a Self Clean function. Remove all oven racks and large food particles before starting. Follow the instructions on the control panel for selecting the self-clean duration. The oven will lock during this cycle.
- Manual Cleaning: For light cleaning, wipe the interior with a damp cloth and mild detergent. Do not use oven cleaners on the self-cleaning surfaces.
- Oven Racks: Oven racks are not self-cleaning. Clean them manually with warm, soapy water.
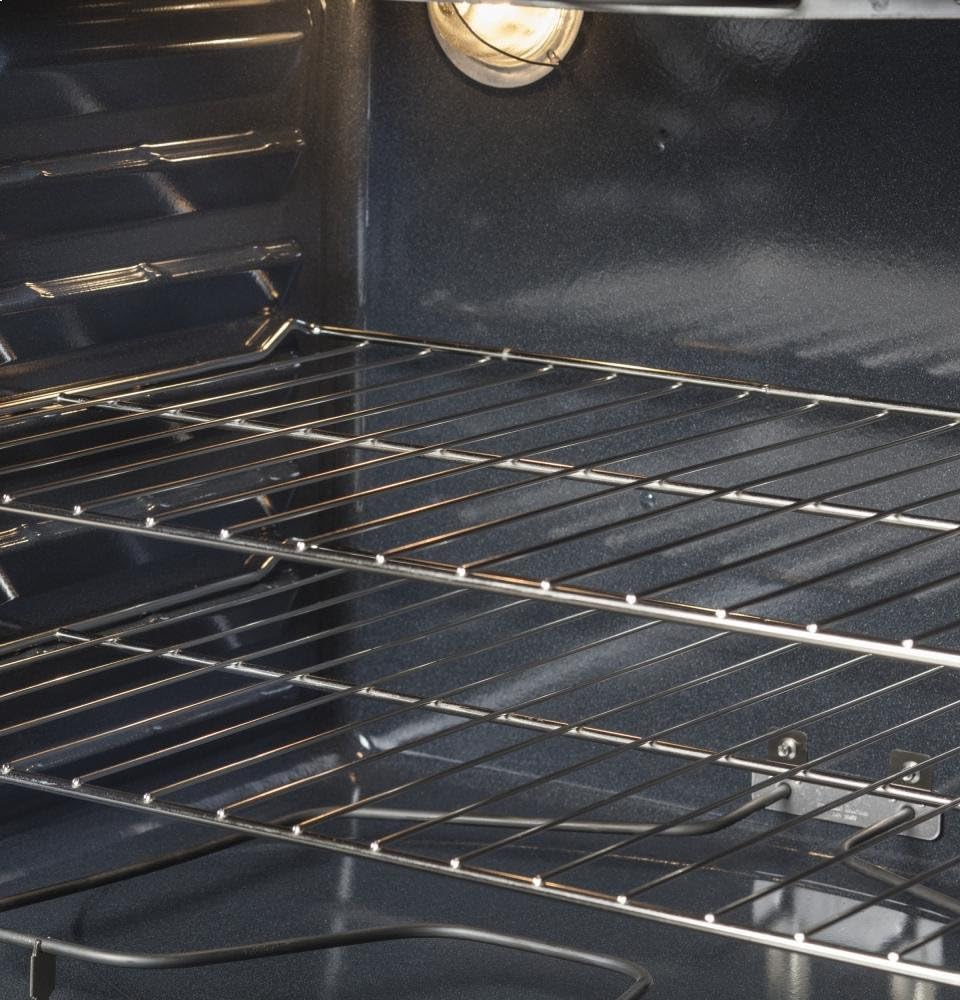
Figure 5.2.1: A detailed view of the interior of the oven, focusing on the sturdy metal racks and their support grooves, illustrating the ease of removal for cleaning.
5.3 Exterior Cleaning
Wipe stainless steel surfaces with a clean, damp cloth and a mild detergent. For best results, use a stainless steel cleaner and polish. Always wipe in the direction of the grain.
6. Troubleshooting
Before calling for service, review this section. It may save you time and expense. This section contains common problems that are not a result of defective workmanship or materials.
| Problem | Possible Cause | Solution |
|---|---|---|
| Range does not operate. | Power cord not connected; tripped circuit breaker/blown fuse. | Ensure range is plugged in. Check household circuit breaker or fuse box. |
| Cooktop element not heating. | Control knob not set correctly; element malfunction. | Ensure knob is turned to a heat setting. If problem persists, contact service. |
| Oven not heating. | Oven controls not set correctly; oven in Sabbath mode; element failure. | Verify correct mode and temperature. Check if Sabbath mode is active. Contact service if needed. |
| Oven light not working. | Light bulb loose or burned out. | Tighten or replace the oven light bulb. |
| Self-clean cycle not starting. | Oven door not fully closed and latched; controls not set correctly. | Ensure door is securely closed. Follow self-clean instructions precisely. |
7. Specifications
Key specifications for the GE 30-inch Freestanding Electric Radiant Range (Model: JB645RKSS).
- Model Name: JB645RKSS
- Brand: GE Appliances
- Product Dimensions (Approximate): 1 x 1 x 1 inches (Width x Depth x Height)
- Material: Stainless Steel (exterior), Glass (cooktop)
- Finish Type: Polished
- Drawer Type: Storage Drawer
- Cooktop Type: Radiant Electric Smoothtop
- Oven Type: Electric
- Manufacturer: GE Appliances
Note: For precise installation dimensions and electrical requirements, please refer to the detailed installation instructions provided with your appliance or consult the GE Appliances website.
8. Warranty and Support
GE Appliances stands behind its products. For detailed warranty information, including coverage periods and terms, please refer to the warranty card included with your appliance or visit the official GE Appliances website. Keep your proof of purchase for warranty claims.
For technical assistance, parts, or service, please contact GE Appliances Customer Support. Have your model number (JB645RKSS) and serial number ready when you call.
Online Support: Visit GE Appliances Support
Phone Support: Refer to your warranty documentation or the GE Appliances website for the most current contact numbers.
Ask a question about this manual
Ask about setup, troubleshooting, compatibility, parts, safety, or missing instructions. Manuals+ will review the question and use this page’s manual context to help answer it.