AWH YG-300
AWH YG-300 Mini LED Projector User Manual
Model: YG-300
1. Introduction
Thank you for purchasing the AWH YG-300 Mini LED Projector. This compact and portable projector is designed to provide an immersive home cinema experience with support for up to 1080P resolution. Please read this manual carefully before operating the device to ensure proper use and to maximize its lifespan. Keep this manual for future reference.
2. Safety Information
- Do not look directly into the projector lens when the lamp is on. The bright light can cause eye damage.
- Ensure proper ventilation around the projector. Do not block ventilation openings.
- Use only the power adapter supplied with the projector. Using an incorrect adapter may cause damage or fire.
- Keep the projector away from water, moisture, and extreme temperatures.
- Do not attempt to disassemble or repair the projector yourself. Refer all servicing to qualified personnel.
- Clean the projector only with a soft, dry cloth. Avoid liquid cleaners.
3. What's in the Box
Upon opening your package, please verify that all the following items are included:
- 1 x YG-300 Projector
- 1 x Power adapter
- 1 x User Manual (this document)
- 1 x AV Cable
- 1 x Remote Control

Image 3.1: Contents of the AWH YG-300 Projector package, including the projector, power adapter, AV cable, remote control, and user manual.
4. Product Overview
Familiarize yourself with the various parts and interfaces of your YG-300 projector.

Image 4.1: Front view of the YG-300 projector, highlighting its compact design and the main projection lens.
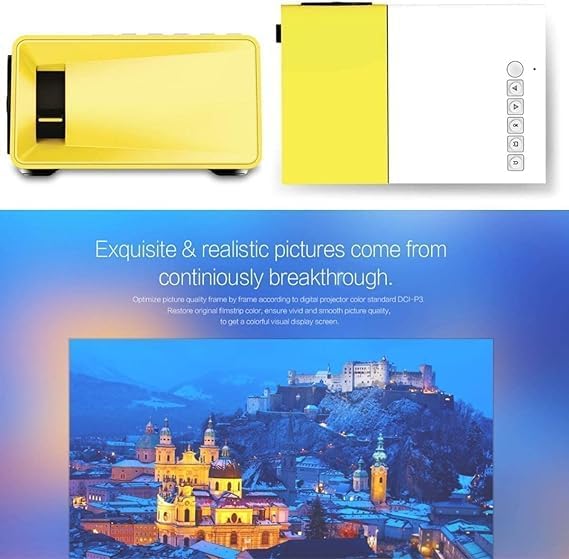
Image 4.2: Detailed view of the projector's input/output interfaces and control buttons. This includes the power input, TF card slot, AV input, 3.5mm headphone jack, HDMI port, and USB port.
4.1. Interfaces and Controls
- Power Input: Connects to the supplied power adapter.
- TF Card Slot: For inserting a Micro SD card with media files.
- AV Input: For connecting devices using the included AV cable (e.g., DVD players).
- 3.5mm Headphone Jack: For connecting external speakers or headphones.
- HDMI Port: For connecting devices like laptops, gaming consoles, or streaming sticks.
- USB Port: For connecting USB drives with media files.
- Focus Wheel: Adjusts the sharpness of the projected image.
- Control Panel: Buttons on the top of the projector for navigation and selection.
5. Setup
5.1. Power Connection
- Connect the power adapter to the projector's power input port.
- Plug the power adapter into a suitable electrical outlet.
5.2. Positioning the Projector
Place the projector on a stable, flat surface. The projection distance will determine the size of the image. For best results, project onto a smooth, white wall or a projector screen in a dark room.
- Projection Distance: 1 to 3.8 meters (approximately 3.3 to 12.5 feet).
- Projection Size: 24 to 60 inches diagonally.
6. Operating Instructions
6.1. Powering On/Off
- To power on, press the power button on the projector or the remote control.
- To power off, press the power button again.
6.2. Connecting Devices
The YG-300 supports multiple input sources:

Image 6.1: Connectivity diagram showing how various devices such as laptops, cameras, USB drives, game consoles, external speakers, camcorders, and smartphones can be connected to the YG-300 projector.
- HDMI: Connect a laptop, game console, or streaming device using an HDMI cable. Select HDMI as the input source from the projector's menu.
- USB: Insert a USB flash drive into the USB port. The projector will automatically detect the drive, allowing you to browse and play media files.
- SD Card: Insert an SD card into the TF card slot. Similar to USB, you can navigate and play media directly.
- AV: Use the included AV cable to connect older devices like DVD players. Select AV as the input source.
6.3. Adjusting Focus
Rotate the focus wheel located near the lens until the projected image appears sharp and clear.
6.4. Media Playback
The projector supports various media formats:
- Audio: MP3, WMA, AAC, and more. Features seven kinds of sound effects + SRS.
- Image: JPEG, BMP, PNG. Supports image scaling and 360-degree rotation.
- Video: MP4, RMVB, AVI, RM, MKV, and more.
- Text: TXT format with auto-flip support.
7. Maintenance
7.1. Cleaning the Lens
Use a soft, lint-free cloth specifically designed for optical lenses to gently wipe the projector lens. Do not use abrasive cleaners or excessive force.
7.2. Cleaning the Projector Body
Wipe the exterior of the projector with a soft, dry cloth. Avoid using chemical solvents that may damage the finish.
7.3. Storage
When not in use for extended periods, store the projector in a cool, dry place, away from dust and direct sunlight. It is recommended to use the original packaging for storage.
8. Troubleshooting
8.1. No Image Projected
- Ensure the projector is powered on and the power adapter is securely connected.
- Check the input source selection. Make sure it matches the connected device (e.g., HDMI, USB, AV).
- Verify that the connected device is powered on and outputting a signal.
- Adjust the focus wheel to ensure the image is not simply out of focus.
8.2. Image is Blurry
- Adjust the focus wheel until the image is clear.
- Ensure the projection surface is flat and smooth.
- Check if the projector lens is clean.
8.3. No Sound
- Check the volume settings on both the projector and the connected device.
- Ensure that external speakers or headphones are properly connected to the 3.5mm audio jack if used.
- Verify that the audio format of the media file is supported.
8.4. Remote Control Not Working
- Ensure there are no obstructions between the remote control and the projector's IR receiver.
- Check and replace the batteries in the remote control if necessary.
9. Specifications
| Feature | Specification |
|---|---|
| Product Model | YG-300 |
| Imaging Unit | LCD |
| Native Resolution | 320x240 pixels |
| Support Resolution | 1080P |
| Brightness | 400 Lumens |
| Color | 16770K |
| Contrast Ratio | 300:1 |
| Projection Size | 24-60 inches |
| Aspect Ratio | 4:3 or 16:9 |
| Projection Distance | 1-3.8 meters |
| Projection Ratio | 2.7:1 |
| Total Power | 24W (12V, 2A) |
| Product Dimensions | 126.4 x 85.8 x 47.7 mm (4.98 x 3.38 x 1.88 inches) |
| Bare Device Weight | 0.29 KG (0.64 lbs) |
| Operating Mode | Manual and remote control operated |
| Supported Languages | Chinese, English, etc. |
| Input Interface | AV, USB, SD card, HDMI |
| Output Interface | Loud speaker, Stereo headphone |
| Audio File Support | MP3, WMA, AAC, etc. (Seven sound effects + SRS) |
| Image File Support | JPEG, BMP, PNG (Supports scaling, 360 spin) |
| Video File Support | MP4, RMVB, AVI, RM, MKV, etc. |
| Text Reading Support | TXT format (Auto flip) |
| Internal Battery | None Integrated |
10. Warranty and Support
10.1. Warranty Information
Please refer to the warranty card included with your purchase for specific warranty terms and conditions. The warranty typically covers manufacturing defects for a specified period from the date of purchase.
10.2. Customer Support
For technical assistance, troubleshooting beyond this manual, or warranty claims, please contact AWH customer support through the retailer where you purchased the product or visit the official AWH website for contact information.
Ask a question about this manual
Ask about setup, troubleshooting, compatibility, parts, safety, or missing instructions. Manuals+ will review the question and use this page’s manual context to help answer it.