1. Introduction
Thank you for choosing the Hama Star 64 Tripod. This tripod is designed to provide stable support for your camera, enabling you to capture clear pictures and steady videos. Its features include a 3D tilt head for versatile positioning and a quick-release plate for efficient camera attachment and detachment. This manual provides essential information for the proper setup, operation, and maintenance of your tripod.
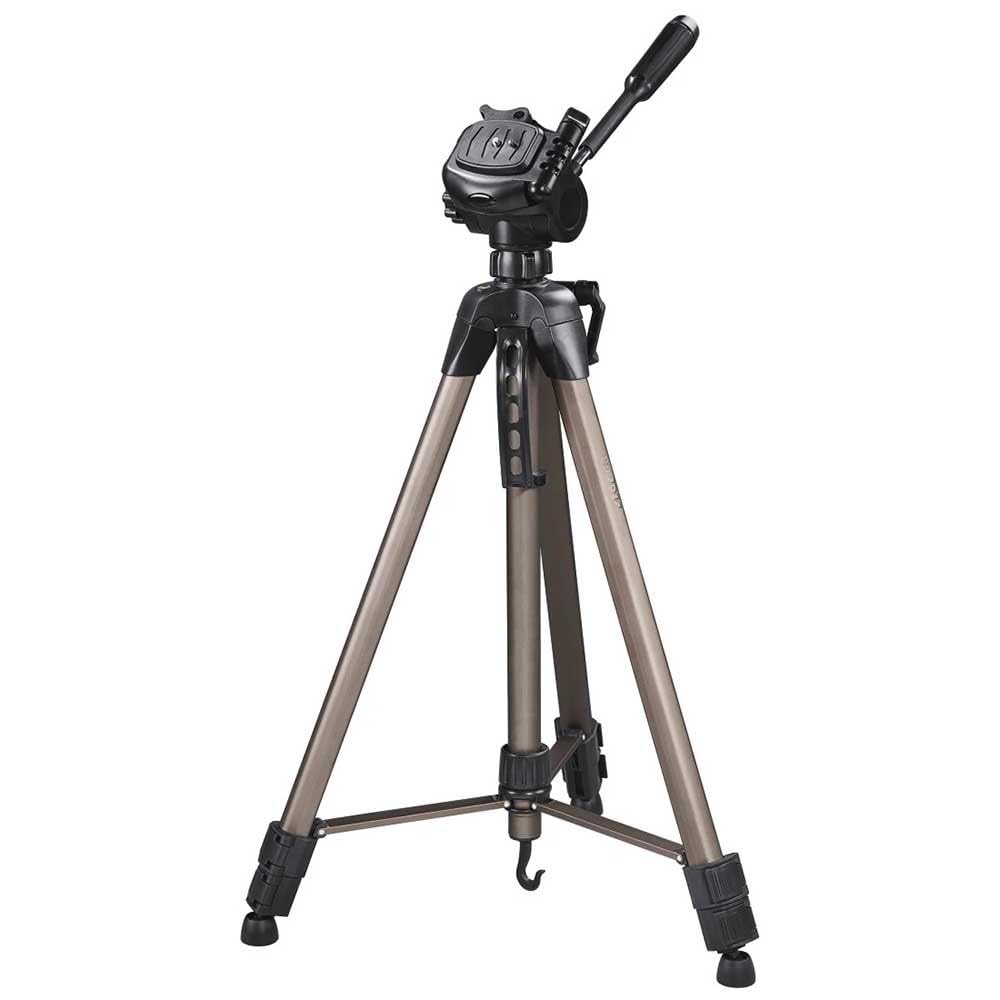
Image 1.1: The Hama Star 64 Tripod in its extended configuration, ready for use.
2. Product Overview and Components
Familiarize yourself with the main components of your Hama Star 64 Tripod before operation.
- 3D Tilt Head: Allows for precise camera positioning in both portrait and landscape orientations.
- Quick-Release Plate: Enables fast attachment and detachment of your camera.
- Center Column: Provides additional height adjustment.
- Crank Handle: Used to raise and lower the center column.
- Leg Sections: Extendable sections for height adjustment.
- Leg Locks: Secure the extended leg sections in place.
- Spirit Level: Integrated into the tripod head for accurate horizontal alignment.
- Level Indicator: Located at the base of the center column for overall tripod leveling.
- Hook: Located at the bottom of the center column, useful for attaching ballast for increased stability.

Image 2.1: Detailed view of the tripod head, showing the spirit level and crank handle for the center column.
3. Setup Instructions
- Unfold the Tripod Legs: Gently spread the tripod legs until they are fully extended and stable.
- Extend Leg Sections: Unlock the leg locks on each leg section. Extend the legs to the desired height, then securely fasten the leg locks. Ensure all leg locks are tightened to prevent collapse.
- Adjust Center Column (Optional): If additional height is required, turn the crank handle clockwise to raise the center column. Turn counter-clockwise to lower it. Do not over-extend the center column beyond its safety stop.
- Attach Quick-Release Plate to Camera:
- Locate the quick-release plate on the tripod head.
- Press the release lever to detach the quick-release plate from the tripod head.
- Screw the quick-release plate firmly onto the tripod mounting thread on the bottom of your camera. Ensure it is tight to prevent camera rotation.
- Mount Camera to Tripod:
- With the quick-release plate attached to your camera, align the plate with the receiver on the tripod head.
- Slide the camera and plate into the receiver until it clicks securely into place.
- Verify that the camera is firmly attached by gently attempting to lift it.
- Level the Tripod: Use the integrated spirit level on the tripod head and the level indicator at the base to ensure the tripod is perfectly horizontal. Adjust leg lengths as needed.

Image 3.1: A camera securely mounted on the Hama Star 64 Tripod, demonstrating proper attachment.
4. Operating Instructions
The Hama Star 64 Tripod features a 3D tilt head for flexible camera positioning.
- Adjusting Pan (Horizontal Movement): Loosen the pan lock knob located at the base of the tripod head. Rotate the camera horizontally to the desired position, then tighten the knob to secure.
- Adjusting Tilt (Vertical Movement): Loosen the tilt lock handle. Adjust the camera vertically to the desired angle, then tighten the handle to secure.
- Portrait/Landscape Orientation: The 3D tilt head allows you to quickly switch between portrait and landscape orientations. Loosen the tilt lock handle and carefully tilt the camera to the side until it is in the desired orientation, then re-tighten the handle.
- Using the Hook: For added stability in windy conditions or with heavier equipment, attach a weight (e.g., a camera bag) to the hook located at the bottom of the center column.
5. Maintenance
- Cleaning: Wipe the tripod with a soft, dry cloth after each use. If necessary, use a slightly damp cloth with mild soap, then dry thoroughly. Avoid harsh chemicals or abrasive cleaners.
- Storage: Store the tripod in its carry bag (if provided) in a cool, dry place away from direct sunlight and extreme temperatures.
- Inspection: Periodically check all screws, knobs, and leg locks for tightness. Do not overtighten.
- Lubrication: The tripod does not require regular lubrication. If any moving parts become stiff, consult a professional or contact customer support.

Image 5.1: The Hama Star 64 Tripod alongside its protective carry bag, essential for proper storage and transport.
6. Troubleshooting
| Problem | Possible Cause | Solution |
|---|---|---|
| Tripod is unstable. | Leg locks not fully tightened; uneven surface; center column over-extended; insufficient ballast. | Ensure all leg locks are secure. Adjust leg lengths for an even surface. Lower the center column if too high. Attach weight to the hook. |
| Camera wobbles on tripod head. | Quick-release plate not securely attached to camera; camera not fully seated in tripod head; pan/tilt locks loose. | Tighten the quick-release plate screw on the camera. Ensure the camera clicks into the tripod head. Tighten pan and tilt lock knobs/handles. |
| Center column does not move smoothly. | Dust or debris in the mechanism; crank handle mechanism needs inspection. | Clean the center column area. If the issue persists, contact customer support. Do not force movement. |
7. Specifications
- Model Name: Star 64
- Item Model Number: 00004464
- Maximum Height: 64 Inches
- Weight Limit: 4000 Grams (approximately 8.8 lbs)
- Item Weight: 3.74 pounds (approximately 1.7 kg)
- Material: Aluminum
- Tripod Head Type: Pan Heads (3D Tilt Head)
- Compatible Devices: Camera
- Special Feature: Lightweight
- Product Dimensions: 4.72 x 28.74 x 4.72 inches (folded)
8. Warranty and Support
For warranty information and customer support, please refer to the documentation included with your purchase or visit the official Hama website. Keep your proof of purchase for any warranty claims.


