Introduction
This manual provides essential information for the proper installation, function, and maintenance of the Cutex Juki DNU-1541S DNU-241HS Rotary Hook Assembly, part number B1830-241-SA0. This component is a genuine replacement part designed specifically for Juki DNU-1541S and DNU-241SH industrial sewing machines. Understanding its function and proper care will ensure optimal performance and longevity of your sewing equipment.
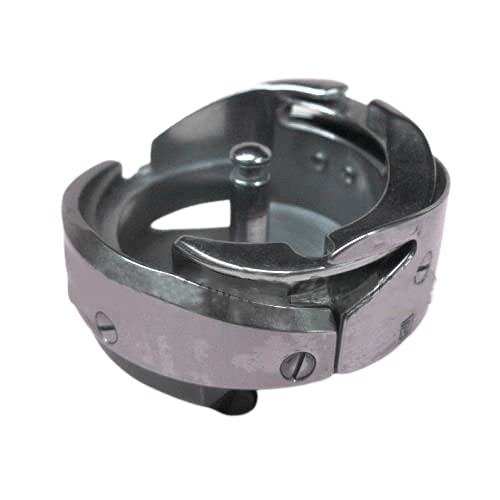
Figure 1: Cutex Juki DNU-1541S DNU-241HS Rotary Hook Assembly (Part # B1830-241-SA0)
Safety Precautions
- Always disconnect the sewing machine from the power supply before attempting any installation, maintenance, or repair.
- Wear appropriate personal protective equipment, such as safety glasses, to prevent injury.
- Handle the rotary hook assembly with care to avoid damage to precision components.
- If you are unsure about any step, consult a qualified sewing machine technician.
Setup and Installation
The rotary hook assembly is a critical component in the lower thread mechanism of your Juki industrial sewing machine. Proper installation is crucial for correct stitch formation.
- Preparation: Ensure the machine is powered off and unplugged. Remove the needle plate, feed dog, and bobbin case from the machine.
- Removal of Old Hook: Carefully unfasten the screws holding the existing rotary hook in place. Note the orientation and position of the old hook and its components for reference.
- Installation of New Hook: Position the new Cutex rotary hook assembly (B1830-241-SA0) into the machine's hook saddle. Ensure it sits correctly and aligns with the drive shaft.
- Secure the Hook: Fasten the retaining screws, tightening them securely but without over-tightening.
- Timing Adjustment: This is a critical step. The timing between the needle and the rotary hook must be precisely set. Refer to your specific Juki DNU-1541S or DNU-241SH service manual for detailed timing procedures. Incorrect timing will lead to skipped stitches or machine damage.
- Reassembly: Reinstall the bobbin case, feed dog, and needle plate.
- Test: Thread the machine and perform test stitches on scrap fabric to verify proper operation.
Note: If you are unfamiliar with sewing machine timing, it is highly recommended to seek assistance from a professional technician.
Operating Principles
The rotary hook is responsible for catching the needle thread loop and carrying it around the bobbin thread to form a lockstitch. This genuine Juki part ensures the precise timing and smooth operation required for consistent stitch quality in heavy-duty industrial sewing applications.
- Thread Path: The needle descends, carrying the upper thread through the fabric.
- Loop Formation: As the needle rises, a loop of upper thread is formed.
- Hook Engagement: The point of the rotary hook passes through this loop.
- Bobbin Thread Capture: The hook then rotates, carrying the upper thread loop around the bobbin case, enclosing the bobbin thread.
- Stitch Tightening: The take-up lever pulls the upper thread, tightening the stitch.
Proper lubrication and cleanliness of the rotary hook are essential for its smooth and efficient operation.
Maintenance
Regular maintenance of the rotary hook assembly is vital for extending its lifespan and maintaining stitch quality.
- Cleaning: Regularly remove lint, dust, and thread scraps from around the rotary hook and bobbin area. Use a brush or compressed air.
- Lubrication: Apply a few drops of high-quality sewing machine oil to the designated oiling points of the rotary hook, as indicated in your Juki machine's service manual. Frequency depends on usage, but typically daily for heavy industrial use.
- Inspection: Periodically inspect the hook point for burrs or damage. A damaged hook point can cause thread breakage or skipped stitches. If damage is found, the hook may need replacement.
- Bobbin Case: Ensure the bobbin case is clean and free of nicks or scratches, which can also affect thread flow.
Troubleshooting
If you encounter issues after installing or during the use of the rotary hook assembly, consider the following common problems and solutions:
- Skipped Stitches:
- Check needle installation (correct size, type, and orientation).
- Verify machine timing (needle-to-hook relationship).
- Ensure the rotary hook point is not damaged.
- Check for proper threading and tension.
- Thread Breakage (Upper or Lower):
- Inspect the rotary hook for burrs or sharp edges.
- Ensure the bobbin case is free of nicks.
- Check thread quality and proper tension settings.
- Verify correct needle size for the thread.
- Noisy Operation:
- Ensure the rotary hook is adequately lubricated.
- Check for loose components or foreign objects in the hook area.
- Poor Stitch Quality:
- Re-check machine timing.
- Ensure the rotary hook is clean and free of lint.
- Adjust thread tensions.
For persistent issues, consult your Juki DNU-1541S or DNU-241SH service manual or contact a professional technician.
Specifications
| Part Number: | B1830-241-SA0 |
| Compatibility: | Juki DNU-1541S, Juki DNU-241SH Industrial Sewing Machines |
| Type: | Rotary Hook Assembly |
| Brand: | Cutex (Genuine Juki Part) |
| ASIN: | B01J2M6CB2 |
| Batteries Required: | No |
Warranty Information
Specific warranty details for this product are not provided in the available information. Please refer to the original purchase documentation or contact the seller, Cutex Sewing Supplies, for warranty inquiries.
Support
For technical assistance, installation guidance, or troubleshooting beyond the scope of this manual, please contact the manufacturer (Juki) or the seller (Cutex Sewing Supplies) directly. Always provide your product model number (B1830-241-SA0) and the model of your Juki sewing machine when seeking support.