
1. Introduction
This manual provides detailed instructions for the installation, operation, and maintenance of your Lancher 4-Pack Non-Mortise Concealed 90 Degree Spring Hinges. These hinges are designed for easy installation in various cabinet and door applications, offering a concealed look and a self-closing mechanism. Please read this manual thoroughly before installation to ensure proper function and longevity of the product.
2. Product Overview
The Lancher Non-Mortise Concealed 90 Degree Spring Hinges are crafted from solid cold-rolled steel with a durable zinc-plated finish. They are designed for straightforward installation without the need for specialized tools or drilling, making them suitable for DIY projects. The hinges provide a 90-degree opening angle and feature a self-closing spring mechanism. Each hinge is built to support doors up to 20 lbs.

Image: Lancher 4-Pack Non-Mortise Concealed 90 Degree Spring Hinges.
3. Package Contents
Verify that all components are present in your package:
- 4 x Lancher Non-Mortise Concealed 90 Degree Spring Hinges
- 32 x Reinforced Stainless Steel Screws (M4*14mm)
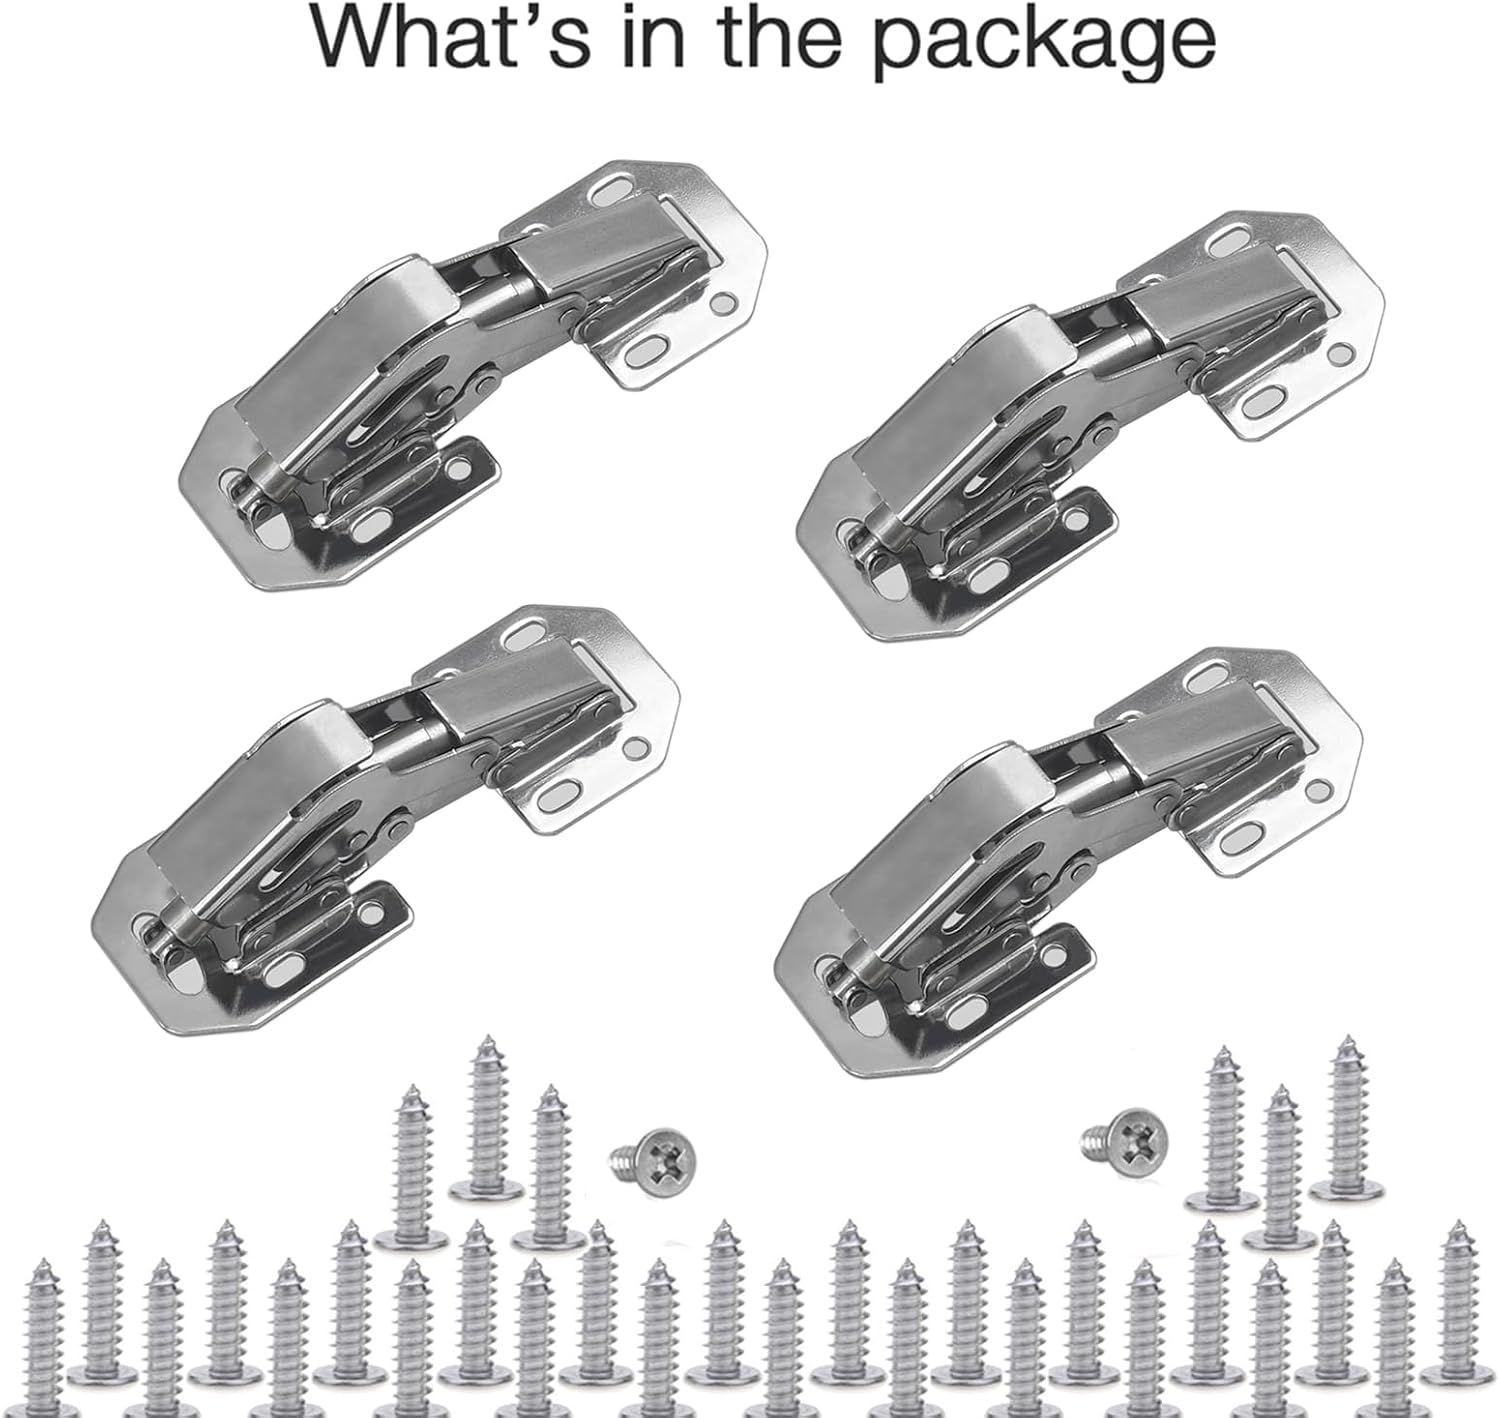
Image: Contents of the Lancher 4-Pack Hinge package, showing four hinges and accompanying screws.
4. Specifications
| Material | Solid Cold-Rolled Steel |
| Finish Type | Zinc Plated |
| Product Dimensions (L x W) | 4.4 inches x 1.7 inches (112mm x 43mm) |
| Hinge Type | Non-Mortise Concealed 90 Degree Spring Hinge |
| Mounting Type | Door Mount |
| Hole Count | 8 per hinge |
| Maximum Weight Capacity | 20 pounds per door (using multiple hinges) |
| Package Weight | 12 ounces (for 4 hinges) |

Image: Detailed dimensions of the Lancher hinge, indicating 4.4 inches (112mm) in length and 1.7 inches (43mm) in width.
5. Installation Guide
These hinges are designed for easy, non-mortise installation, requiring only a screwdriver. No drilling is necessary for standard applications.
5.1. Understanding Hinge Types and Board Thickness
Refer to the diagram below to determine the correct hinge application based on your cabinet door and side board configuration. The hinges are suitable for board thicknesses between 12-21mm.

Image: Installation guide illustrating different hinge applications: Full Overlay, Inset, and Half Overlay. It provides measurements and recommendations for board thickness.
- Full Overlay: For side board thickness of 19mm, the door overlay is 19mm. For side board thickness of 17mm, the door overlay should be 17mm.
- Inset: The width below the door should be 4mm.
- Half Overlay (Not Recommended): This type requires adding extra depth to the side board and using longer screws, which can be complex and is generally recommended for professionals only.
5.2. Installation Steps
- Position the Hinge: Place the hinge on the inside of the cabinet door and the side panel according to your desired overlay type (Full Overlay or Inset). Ensure the hinge is flush with the edges where the door meets the cabinet frame.
- Secure Initial Screws: Install screws into the 4 adjustable screw holes first. These holes allow for minor adjustments to align the door correctly.
- Adjust Door Alignment: Gently close the door to check its alignment. Make small adjustments by loosening and tightening the screws in the adjustable holes until the door sits perfectly square and closes smoothly.
- Install Remaining Screws: Once the door is properly aligned, install the remaining screws into the fixed holes to fully secure the hinge.

Image: A Lancher hinge installed on a cabinet door, demonstrating the non-mortise, no-drilling installation method.
5.3. Visual Installation Aid
Watch this video for a visual demonstration of the installation process:
Video: A demonstration of how to install the Lancher easy installation hinges on a cabinet door.
6. Operation
The Lancher Non-Mortise Concealed Hinges allow for a 90-degree opening of cabinet doors. They feature a spring-loaded self-closing mechanism, which means the door will automatically pull itself shut when pushed close. Please note that these hinges are not soft-close hinges; they will close with a distinct snap. If a soft-close feature is desired, external cabinet door dampers can be installed separately.

Image: A Lancher hinge installed inside a cabinet, demonstrating its concealed appearance when the door is closed.
7. Maintenance
To ensure the smooth operation and longevity of your Lancher hinges, follow these simple maintenance guidelines:
- Regular Cleaning: Wipe the hinges periodically with a soft, dry cloth to remove dust and debris. Avoid abrasive cleaners or harsh chemicals that could damage the zinc-plated finish.
- Lubrication: If the hinges begin to squeak or feel stiff, apply a small amount of silicone-based lubricant to the pivot points. Do not use oil-based lubricants as they can attract dust.
- Check Screws: Periodically inspect all mounting screws to ensure they are tight. Loose screws can lead to door misalignment or hinge failure.
- Avoid Overloading: Do not exceed the recommended weight capacity of 20 lbs per door. Excessive weight can strain the hinges and lead to premature wear.
8. Troubleshooting
If you encounter issues with your Lancher hinges, refer to the following common problems and solutions:
| Problem | Possible Cause | Solution |
|---|---|---|
| Door does not close completely or springs open slightly. | Misalignment; cabinet or door warped; insufficient spring tension for door weight. | Check door and cabinet for squareness. Loosen adjustable screws, reposition door, and retighten. Ensure door weight does not exceed 20 lbs. If the issue persists, consider adding a magnetic catch. |
| Door sags or is not level. | Loose screws; heavy door exceeding weight limit; improper hinge placement. | Tighten all screws. Verify door weight is within the 20 lbs limit. Ensure hinges are installed level and plumb. For very wide or heavy doors, additional hinges may be required. |
| Hinges squeak or operate roughly. | Lack of lubrication; dirt or debris. | Clean hinges and apply a silicone-based lubricant to pivot points. |
| Hinge appears loose or wobbly. | Loose screws; hinge mechanism wear. | Ensure all screws are securely tightened. If the hinge itself has excessive play, it may need replacement. |
9. Warranty and Support
Lancher provides a 5-year limited warranty on these hinges, covering manufacturing defects. If you experience any issues with your product or if any items are missing from your package, please contact Lancher customer support for assistance or free replacement parts.
For support, please refer to the contact information provided at the point of purchase or visit the official Lancher website.